Crochet Cupcake Pattern Anyone Can Stitch
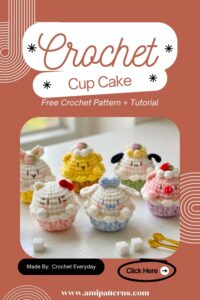
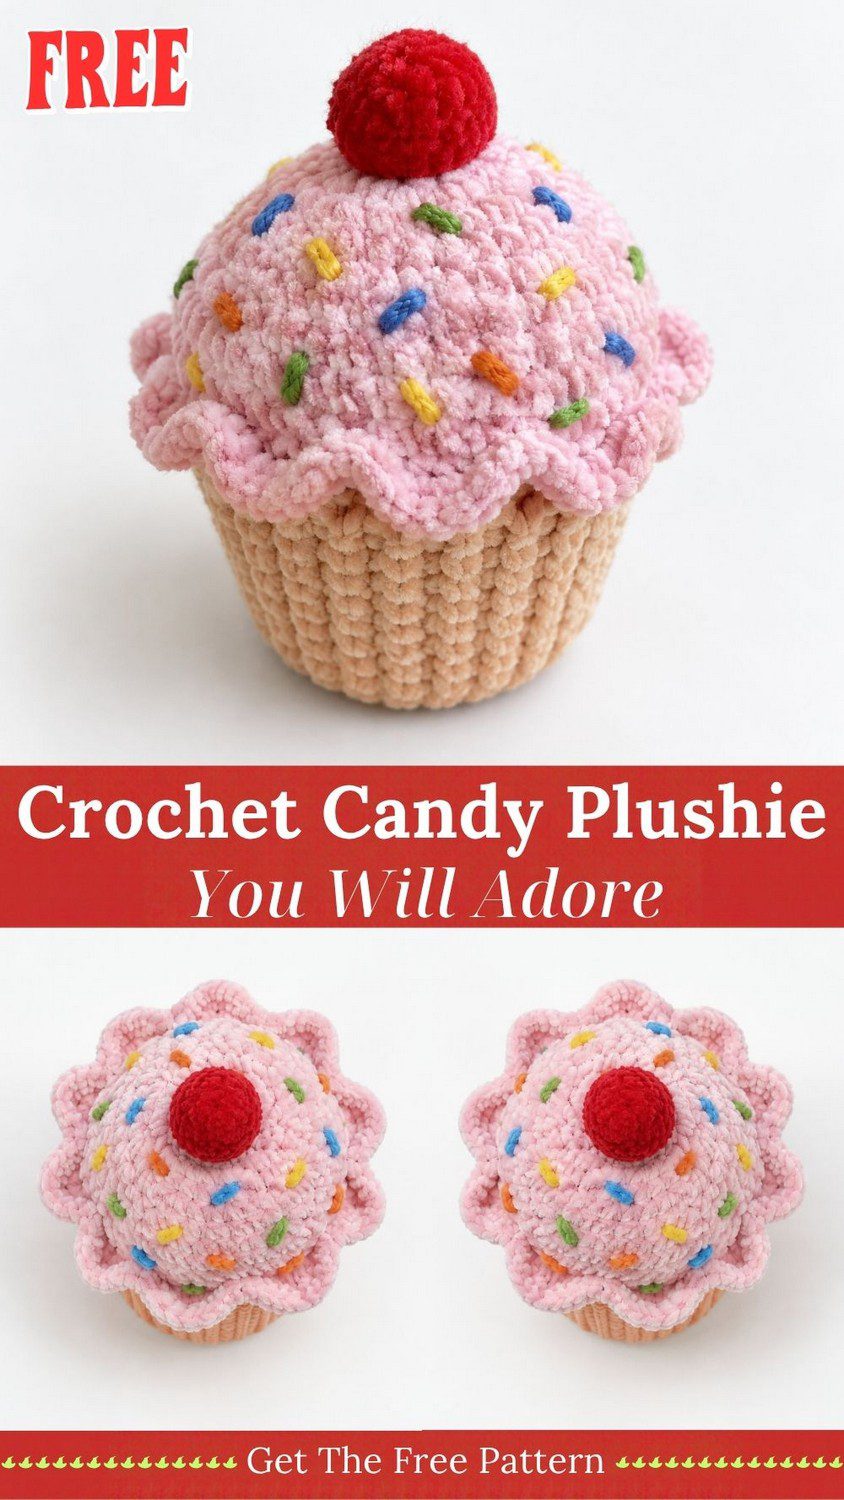
This crochet cupcake pattern gives you a fluffy pink swirl and a shiny red cherry with zero calories. First, stitch it with chunky yarn after breakfast. Then, add the frosting by lunch, and gift it as a Valentine’s Day or Galentine’s Day present.
Some cupcakes need an oven, but this one only needs a hook. Besides, the pattern below uses soft chenille yarn, simple rounds and a ruffled frosting edge that looks far fancier than it is. Moreover, every part is basic, so a first-timer can follow along without stress. Pick your favorite colors, and let’s bake something that never goes stale.
Crochet Cupcake Pattern Overview
This pattern is built from four easy parts. First, a peach liner forms the base. Next, a pink frosting dome sits on top and gets a ruffled edge. Finally, tiny sprinkle stitches and a red cherry add the finishing touches.
With super bulky chenille yarn and a 5 mm hook, the finished cupcake stands about 4.5 inches (11 cm) tall and about 4 inches (10 cm) wide. Likewise, a thinner yarn gives a smaller treat, while a thicker one gives a bigger one.
Gauge is not critical for a plush toy. However, tight stitches keep the stuffing hidden, so go down a hook size if you see gaps.
Also, this pattern uses US terms:
- MR: magic ring
- ch: chain
- sl st: slip stitch
- sc: single crochet
- dc: double crochet
- inc: two sc in one stitch
- dec: single crochet two stitches together
- BLO: back loop only
- FLO: front loop only
- R: round
Lastly, the numbers in brackets show the stitch count at the end of each round.
Materials for the Crochet Cupcake Pattern
- Super bulky chenille yarn in peach, about 35 g
- Super bulky chenille yarn in light pink, about 55 g
- Super bulky chenille yarn in red, about 8 g
- Small amounts of DK or worsted yarn in blue, yellow, orange and green for the sprinkles
- 5.0 mm crochet hook
- Polyfill stuffing
- Large blunt yarn needle, stitch markers and scissors
Time Box
- Prep: about 10 minutes to sort yarn and tools
- Stitching: about 1 hour 30 minutes for all parts
- Finishing: about 30 minutes for the sprinkles and sewing
All in all, plan on roughly 2 hours from the first ring to the last stitch.
Special Techniques for This Crochet Cupcake
Working in the Back Loop Only
First, insert the hook under the back loop of each stitch. As a result, the front loops stay behind as a neat ridge, so the liner gets a crisp base edge.
Making the Ruffled Edge
Work in the front loops of the last dome round. Then slip stitch in one stitch and make four double crochets in the next. Because the extra stitches crowd together, they curl into little scallops.
Sprinkle Stitches
Pull the needle through the dome and make a short straight stitch. However, do not pull too tight, because chenille puffs up easily.
Common Mistakes to Avoid
The most common mistake is loose stitching. Since chenille has no grip, wide stitches let the stuffing peek through. Therefore, drop down a hook size to fix it.
Another problem is a flat dome. A hat-shaped top looks sad, so stuff it firmly and shape it with your palms.
It also helps to count the ruffle carefully. Fifteen scallops fit around 30 stitches, but a miscount leaves a bald gap. For that reason, mark the first stitch before you start.
Finally, don’t pull the sprinkle yarn tight. Instead, keep the stitches gentle so they sit on the surface like real sprinkles.
Uses and Benefits of a Crochet Cupcake
A crochet cupcake works as a soft toy, a desk decoration or a cheerful gift. Plus, it brightens up a nursery shelf, a bakery display or a birthday table. In addition, crocheters often make several in different flavors, because each one uses just a little yarn. Best of all, the cupcake never melts, spoils or needs a fork.
Beginner Tips
First, keep a stitch marker in the first stitch of every round. That way, you never lose count.
Next, practice one ruffle scallop on scrap yarn. After two or three, the rhythm feels natural.
Also, leave long tails on the dome and cherry. Consequently, sewing becomes much easier.
Crochet Cupcake Pattern Instructions
Work all parts in continuous rounds. However, only the ruffle needs a turn into a different loop.
Step 1: Cupcake Liner (peach)
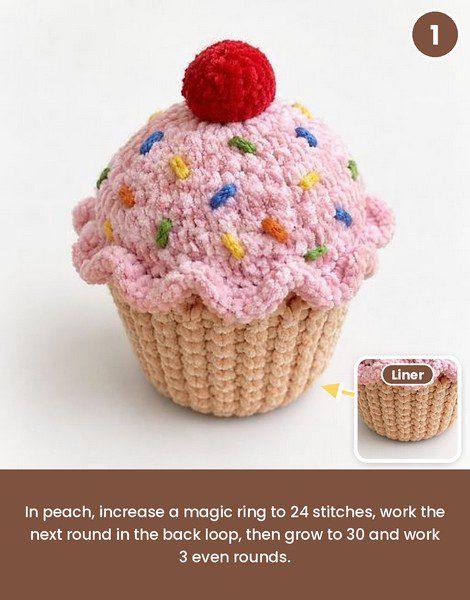
- R1: MR, 6 sc (6)
- R2: inc x6 (12)
- R3: (sc, inc) x6 (18)
- R4: (2 sc, inc) x6 (24)
- R5: sc in BLO around (24)
- R6: (3 sc, inc) x6 (30)
- R7-R9: sc around (30)
After that, sl st, fasten off and weave in the end. Then stuff the liner firmly.
Pro Tip: Working R5 in the back loop makes a sharp edge, so the liner sits flat on a table.
Step 2: Frosting Dome (light pink)
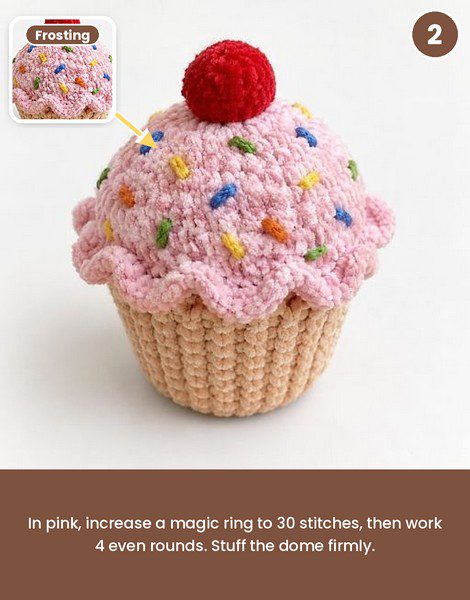
- R1: MR, 6 sc (6)
- R2: inc x6 (12)
- R3: (sc, inc) x6 (18)
- R4: (2 sc, inc) x6 (24)
- R5: (3 sc, inc) x6 (30)
- R6-R9: sc around (30)
Do not fasten off yet. Instead, stuff the dome firmly and shape it round.
Step 3: Ruffle Edge for the Cupcake Frosting
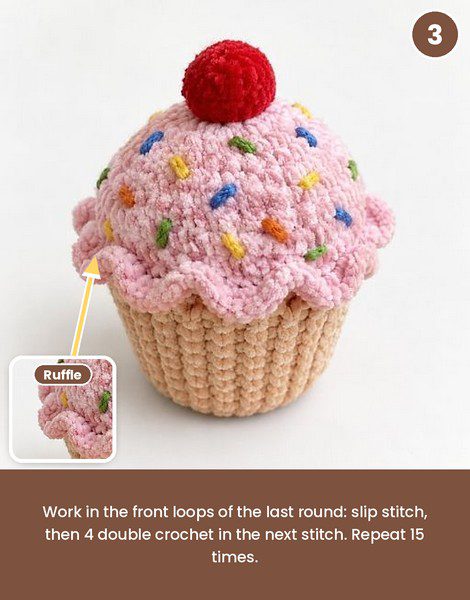
Keep going on the last round of the dome, working in the front loops only. Next, work (sl st in the next stitch, 4 dc in the following stitch) x15. Finally, sl st to join, fasten off and leave a long tail.
Pro Tip: Press the scallops outward with your fingers, and the ruffle will fan out like real frosting.
Step 4: Sprinkles (blue, yellow, orange, green)
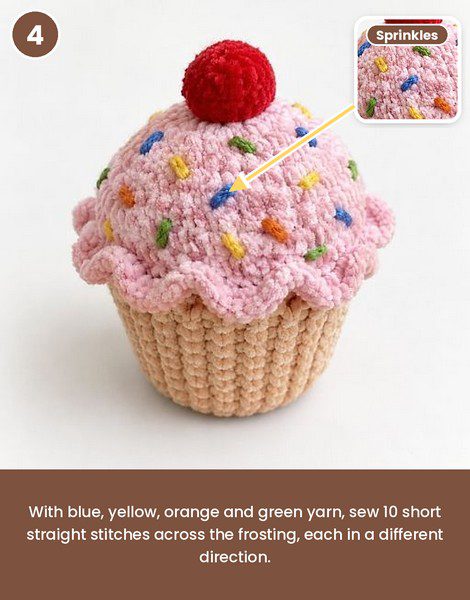
With the needle, sew 10 short straight stitches over the dome. Then slant each one a different way, and mix the four colors evenly.
Step 5: Cherry (red)
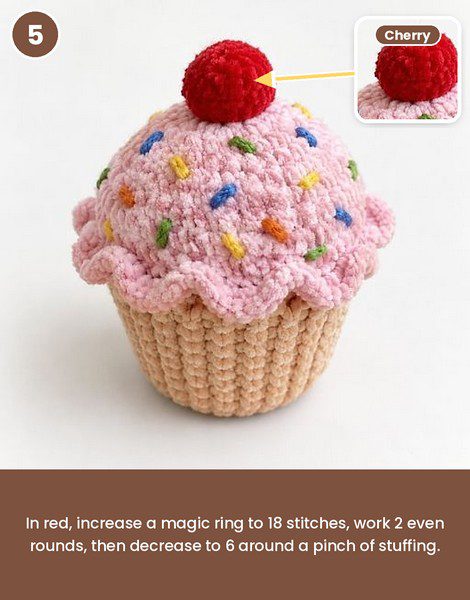
- R1: MR, 6 sc (6)
- R2: inc x6 (12)
- R3: (sc, inc) x6 (18)
- R4-R5: sc around (18)
- R6: (sc, dec) x6 (12)
Stuff firmly, then:
- R7: dec x6 (6)
Lastly, fasten off, close the hole and leave a tail.
Assembly
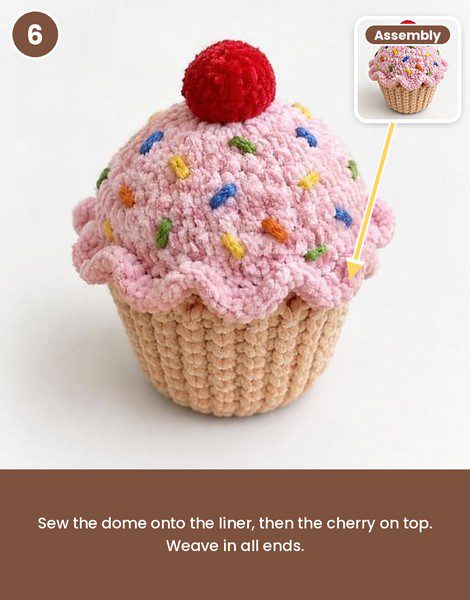
Step 6: Putting the Crochet Cupcake Together
- Place the stuffed dome on top of the liner.
- Pin the dome edge, then sew the unworked back loops of the dome to the liner all the way around.
- Sew the cherry to the center top of the dome.
- Weave in all the remaining ends.
Personalization Ideas
Flavor Colors
For a different flavor each time, try mint frosting, chocolate brown or soft lilac.
Frosting Style
Skip the sprinkles for a plain vanilla look. Alternatively, add a thin strip of white for a drizzle.
Topper Swap
Instead of the cherry, sew on a small star or a tiny strawberry.
Mini Version
For a mini cupcake of about 3 inches, simply use DK yarn and a 3.5 mm hook.
Bakery Display: Turn One Cupcake Into a Whole Set
One cupcake is cute, but a tray is irresistible. So make three or four in different frosting colors, then line them up on a small cake stand or inside a wooden box. Additionally, you can add a crochet cherry pie slice or a donut for variety. Kids love it as a pretend-play bakery, and shops love it as a window display. For baby gifts, however, skip anything tiny and keep all parts firmly sewn on.
FAQs
What yarn is best for a crochet cupcake pattern?
Super bulky chenille gives the soft plush look. However, worsted cotton also works with a smaller hook.
How tall is the finished cupcake?
It stands about 4.5 inches with the cherry, and it is roughly 4 inches wide.
Can beginners make this cupcake?
Yes. All stitches are basic, and the ruffle is just a repeat.
Is this cupcake safe for babies?
It has no small parts, but the sprinkles are sewn stitches. Therefore, check them often and sew everything tightly.
Frosting on Top of Every Day
Now your cupcake sits there with ruffles curled and cherry shining. Few projects feel this happy for so little time. So make a second one in a new flavor, and give it to someone who needs a sweet moment.