Crochet Candy Plushie You Will Adore
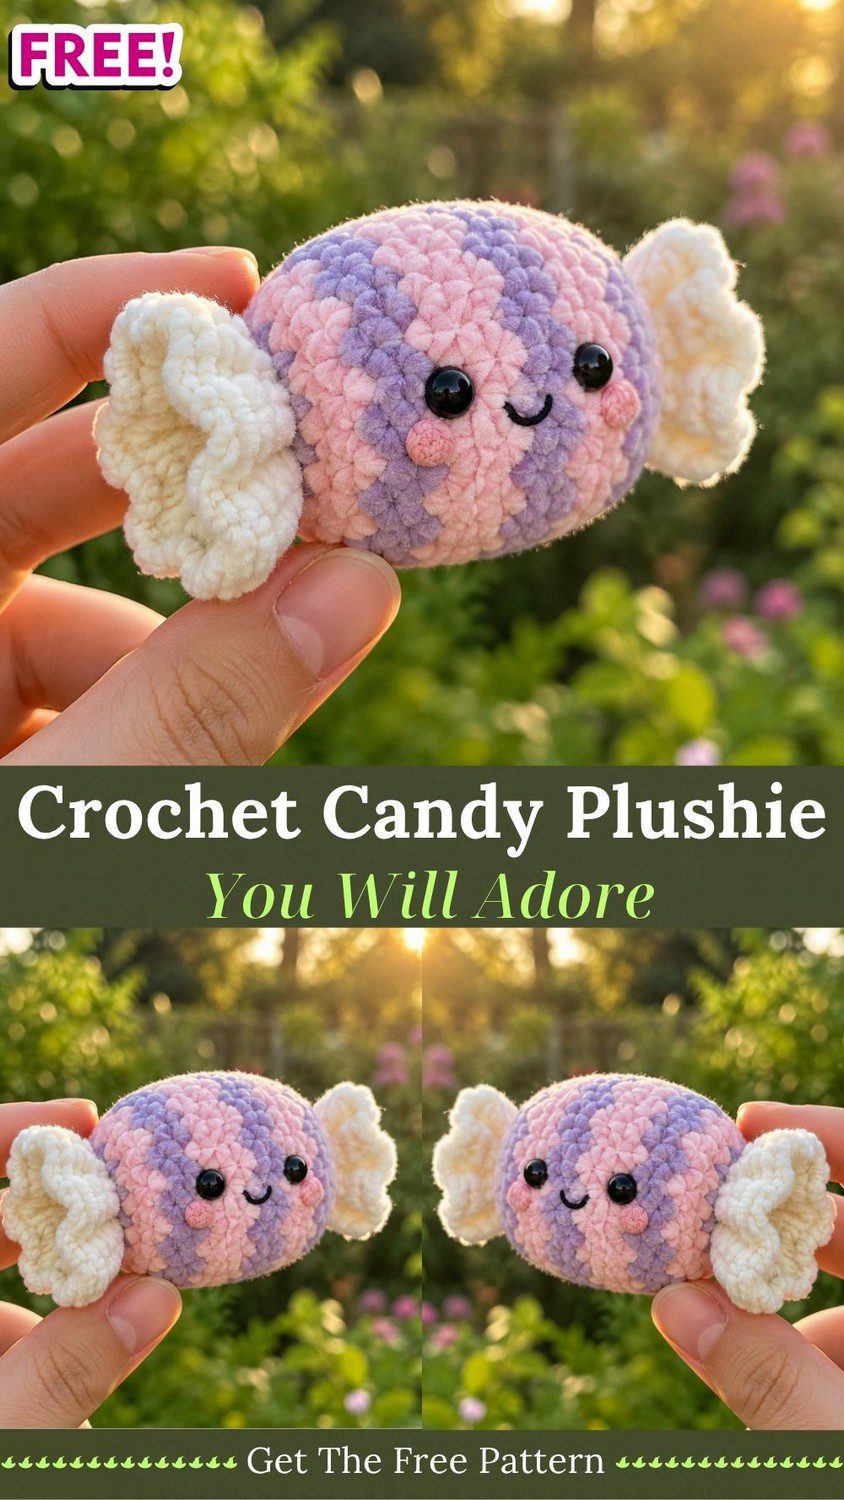
A pink and lilac swirl, a tiny smile, and ruffled cream wrappers make this crochet candy plushie look sweet enough to eat. Stitch it in one afternoon with chunky yarn, and you get a soft amigurumi candy that works as a Valentine’s Day crochet gift.
Some sweets are made for eating, but this one is made for hugging. The crochet candy plushie grows from a simple oval body and two frilly wrapper ends, so even a beginner can finish it with a smile. Besides that, it looks lovely on a desk, a bag, or a gift tag. So grab some soft yarn and a small hook, and let’s make something sweet together.
Crochet Candy Plushie Pattern Overview
This crochet candy plushie pattern builds one happy candy from four easy parts. First, you work the oval body in pink and lilac stripes. Next, you add the face. Then you make two cream wrappers with soft scalloped edges. Finally, you sew everything together.
With DK or light worsted cotton and a 3.5 mm hook, the body measures about 2.5 inches (6 cm) long. Including both wrappers, the finished candy is roughly 4.5 inches (11 cm) wide. However, thicker yarn will make a bigger candy, so choose the size you like best.
Gauge is not critical here. Even so, keep your stitches snug so the stuffing stays hidden.
This pattern uses US terms:
- MR: magic ring
- ch: chain
- sl st: slip stitch
- sc: single crochet
- hdc: half double crochet
- dc: double crochet
- inc: two sc in one stitch
- dec: single crochet two stitches together
- R: round
Also, the number in brackets shows the stitch count at the end of each round.
Materials and Supplies
- DK or light worsted cotton yarn in baby pink, about 20 g
- DK or light worsted cotton yarn in lilac, about 15 g
- DK or light worsted cotton yarn in cream, about 10 g
- Small amount of black yarn for the smile
- 3.5 mm crochet hook
- Two 8 mm black safety eyes
- Two small pink felt circles and fabric glue
- Polyfill stuffing
- Yarn needle, stitch marker, and scissors
Time Needed
- Prep: about 10 minutes to gather yarn and tools
- Stitching: about 1 hour 15 minutes for all parts
- Finishing: about 30 minutes for the face and sewing
In total, plan on about 2 hours from the first ring to the last stitch.
Special Techniques
Changing colors neatly. First, finish the last stitch of a round with the new color, then carry on. Because the stripes sit side by side, a quick tug keeps the joins tidy. Afterwards, cut the old yarn and weave the tail in later.
Making scalloped wrapper edges. Each scallop is a small group of stitches that grows taller from sc to hdc to dc and then back down. As a result, the edge ruffles like real candy paper.
Setting safety eyes. Push the post through the fabric before you stuff. Then snap the washer on tightly from the inside.
Common Mistakes When Making a Crochet Candy Plushie
Skipping the stitch marker causes the most trouble. Round pieces have no obvious start, so one lost round can ruin the stripes.
Another problem is under-stuffing. A soft, floppy candy loses its smooth oval shape. Therefore, stuff firmly, and add the last bit through the final opening.
Also, watch out for uneven stripes. Always change color at the same marked stitch, otherwise the bands drift sideways.
Finally, don’t glue the cheeks on too early. Wait until the face is placed, and then judge the spacing by eye.
Uses and Benefits of a Crochet Candy Plushie
A candy plushie is small, quick, and wonderfully giftable. For example, you can clip it on a bag, hang it on a Christmas tree, or tuck it into a goodie box. Besides, it makes a sweet birthday treat that never melts. Crocheters also love it as a scrap yarn project because it uses so little yarn.
Beginner Tips for Your Crochet Candy Plushie
First, work the body on a firm surface and count every round. A quick count catches mistakes early.
Next, practice one scallop on scrap yarn. Once you feel the rhythm, the second wrapper is easy.
Also, leave a long tail on each wrapper. That way, sewing goes smoothly without any re-threading.
Crochet Candy Plushie Instructions
Work the body in continuous rounds. Meanwhile, the wrappers are worked in rounds and finished with a scalloped edge.
Step 1: Crochet the Candy Plushie Body (Pink and Lilac)
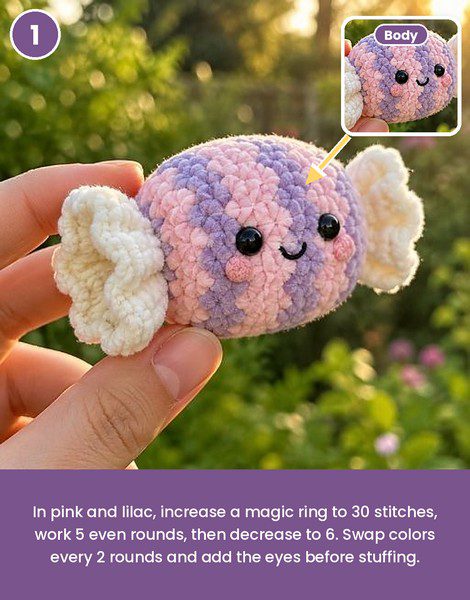
Change color every 2 rounds, as shown in the photo.
- R1: First, make MR with 6 sc in pink. (6)
- R2: Next, inc x6. (12)
- R3: Then work (sc, inc) x6. (18)
- R4: After that, switch to lilac and work (2 sc, inc) x6. (24)
- R5: Next, work (3 sc, inc) x6. (30)
- R6-R7: Then change to pink and sc around. (30)
- R8-R9: After that, change to lilac and sc around. (30)
- R10: Next, change to pink and sc around. (30)
- R11: Then work (3 sc, dec) x6. (24)
Now insert the 8 mm eyes between R7 and R8, about 5 stitches apart. Once they are secure, start stuffing.
- R12: Next, switch to lilac and work (2 sc, dec) x6. (18)
- R13: Then work (sc, dec) x6. (12)
- R14: Finally, change to pink and dec x6. (6)
After that, stuff firmly, close the hole with a yarn needle, and weave in the end.
Pro Tip: Keep the stuffing slightly oval, not round. That way, the candy looks long and plump, just like the real thing.
Step 2: Add the Face
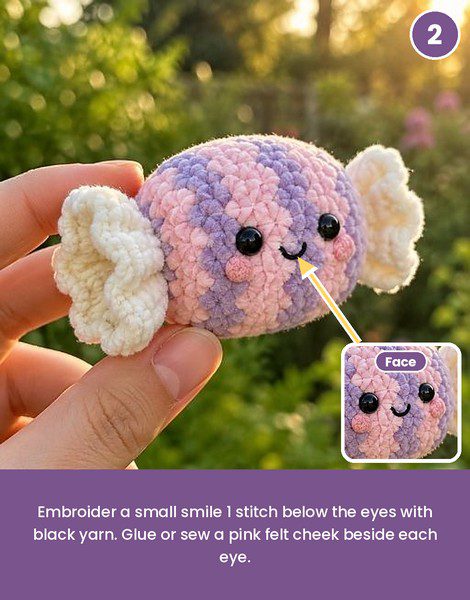
First, use black yarn to embroider a small smile one stitch below the eyes, about three stitches wide. Next, glue a pink felt cheek just outside each eye, one round lower.
Step 3: Make the Wrapper Ends (Make 2 in Cream)
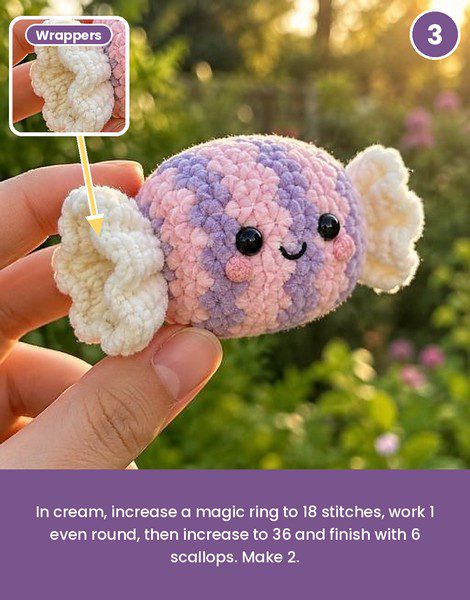
- R1: First, make MR with 6 sc. (6)
- R2: Next, inc x6. (12)
- R3: Then work (sc, inc) x6. (18)
- R4: After that, sc around. (18)
- R5: Next, inc x18. (36)
- R6: Finally, work (sc, hdc, 2 dc, hdc, sc) x6. (36)
Then sl st, fasten off, and leave a long tail for sewing.
Pro Tip: Gently press each wrapper flat with your fingers, so the scallops fan out nicely.
Assembly: Finish Your Crochet Candy Plushie
Step 4: Putting It Together
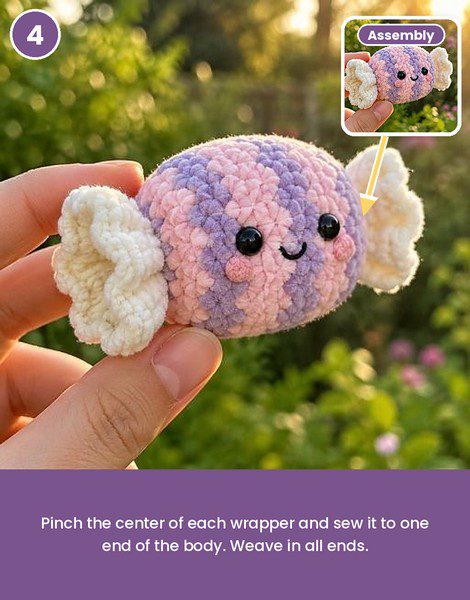
- First, pinch the center of one wrapper so it looks like a bow.
- Next, sew the pinched center to one end of the body, over the closed hole.
- Then repeat with the second wrapper on the opposite end.
- After that, fluff the scallops with your fingers.
- Finally, weave in all remaining ends.
Ways to Personalize Your Crochet Candy Plushie
Color combos. Mint and white, sky blue and yellow, or red and cream all give a classic candy look.
Wrapper style. Use a pretty shimmer yarn for the wrappers. Alternatively, stay with cream for a soft, vintage feel.
Add a loop. Chain 20 and sew a ring on one wrapper, and the plushie becomes a keychain.
Sleepy face. Use two curved stitches for closed eyes instead of safety eyes. As a bonus, this version also suits small children.
Turn Your Crochet Candy Plushie Into a Gift
Make three candies in different colors and drop them into a clear jar, and you have a gift that looks like a sweet shop. Then tie a ribbon around the lid and add a handwritten tag. For a festive twist, sew a ribbon loop to a wrapper and hang the candy on the tree. However, skip the safety eyes and embroider the eyes if the gift is for a baby.
FAQs
What yarn works best for a crochet candy plushie?
Soft cotton or acrylic in DK weight is ideal. However, any yarn works if you match the hook size to it.
How big is the finished candy?
It is about 4.5 inches wide with both wrappers. Chunkier yarn makes it larger.
Can I skip sewing the wrappers?
Yes. Work the wrappers onto the body ends directly, and the sewing disappears. However, it takes a little practice.
Is this pattern beginner friendly?
Yes. Every stitch is basic, so the pattern stays short and quick.
One Sweet Little Stitch Away
Now your candy is smiling at you, wrappers fluffed and cheeks glowing. Few projects feel this cheerful for so little yarn. So make a few more in new colors, share them with friends, and watch the smiles spread.