Blissful Crochet Shark Amigurumi Pattern for Handmade Magic
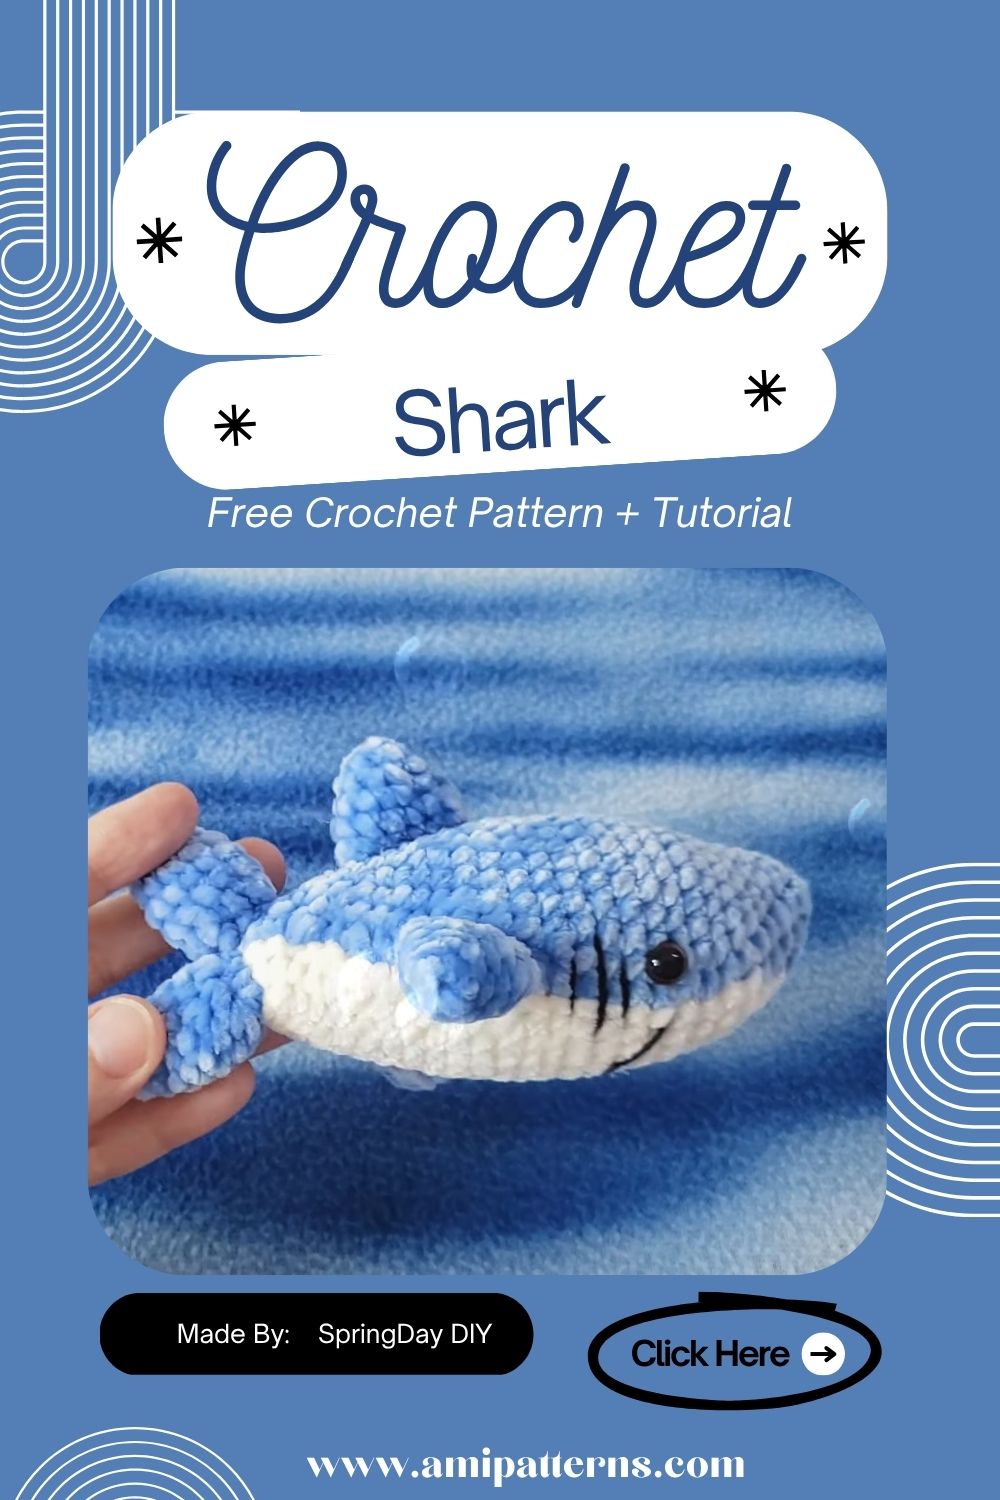
It is oddly relaxing to make one of the strongest animals of the sea a little smiling crochet friend. Crochet Shark may not be the most obvious option when it comes to a home-made project but this is exactly what makes it so special. This amigurumi with its round body, a small number of fins, and a smiling face will turn a terrible creature of the sea into a cute ornament that will always be near you.
You can use this shark as a fun project to do on a relaxing weekend, or as an opportunity to create a meaningful handmade present. It is made with the help of only a few stitches, it needs only a few colors of yarn, and there is a lot of space to add your own artistic elements. This cute shark crochet pattern can be put anywhere, whether in beach-themed nurseries or in comfortable craft rooms.
You will be glad to go through all the steps of this project in case you have already perfected the basics of amigurumi. And should you still be developing your confidence, don’t be alarmed. The forming process is simple, the components are simple to put together and the final piece seems much more impressive than the methods needed to make it.
Why You’ll Enjoy Making This Shark
Each crocheter possesses those patterns, to which they revert. This mini shark possesses every feature of a re-do project. It can be completed within a few evenings, it is elaborate enough to make it interesting and yet flexible enough so that no two sharks will ever need to be identical.
You can either stick to the traditional gray-and-white color scheme or play with navy, teal, pastel blue or even bright rainbow hues in a fun twist. And then you can add the scarf, or a sailor hat, or embroidered bubbles, and your shark has a personality of its own. It is also a practical (as well as a creative) project since this simple shark amigurumi pattern can be made with leftover yarn.
Difficulty Level
The skill level is beginner to intermediate. Before beginning, it is good to familiarize oneself with these basic techniques of crochet:
- Magic ring
- Single crochet
- Increasing and decreasing
- Continuous rounds
- Basic sewing and construction.
The body is formed in a single flowing form and then the fins and the tail are formed separately and attached.
Materials You’ll Need
Prepare your materials ahead of time.
- Grey yarn for the body
- Belly belly white yarn.
- Black embroidery thread
- Embroidery thread or black safety eyes to sew.
- Polyester fiberfill
- Matched hook of your yarn.
- Stitch marker
- Yarn needle
- Sharp scissors
- Optional pink yarn to cheeks.
- Decorative details are optional and can be decorated with blue embroidery thread.
Cotton yarn produces a very sharp definition of stitches and acrylic yarn creates a softer and squishier touch on the finished shark.
What Makes This Pattern Special?
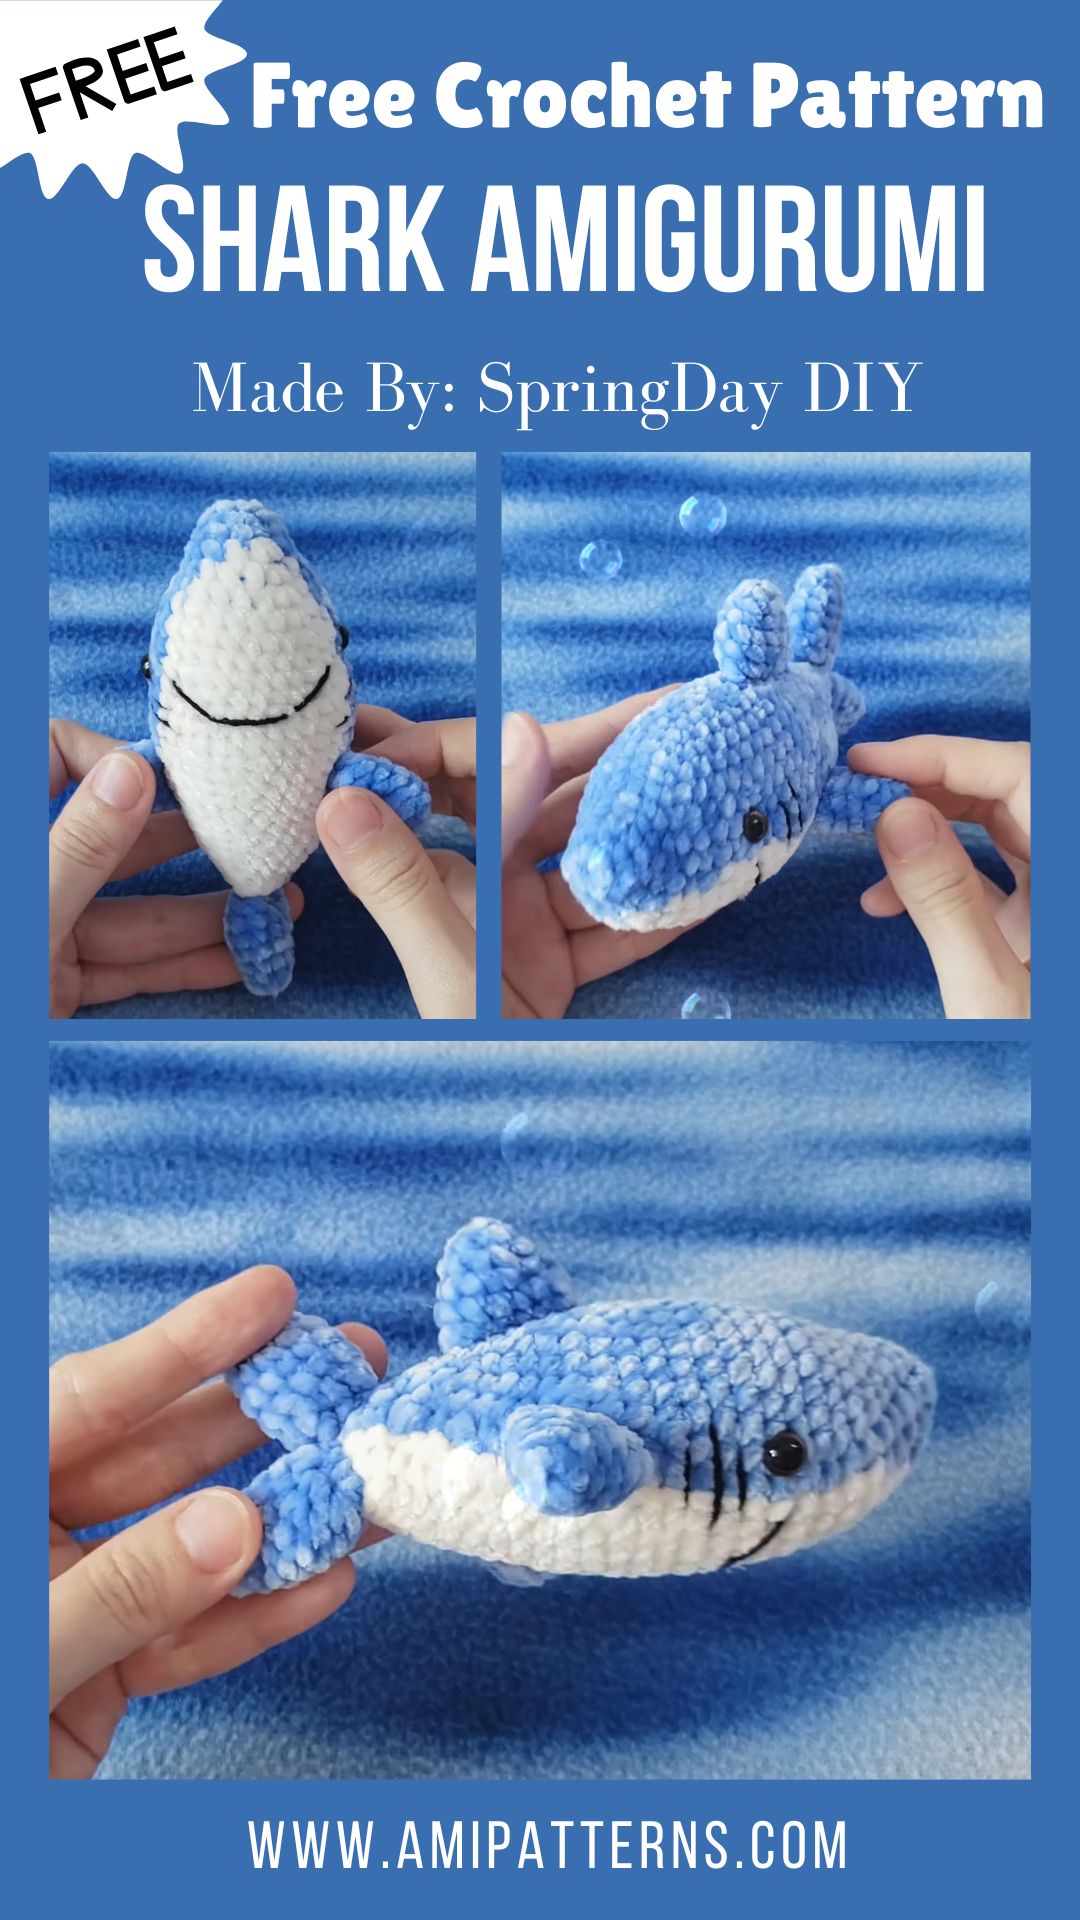
This shark can be easily crocheted, yet it has a lot of details and makes it special. The body is rounded and smoothly shaped.
- Contrasting white belly
- Large dorsal fin
- Two side fin-curves.
- Wide tail fin
- Friendly embroidered smile
- Compact display size
- Beginner-friendly construction
- Easy color customization
- Soft cuddly finish
The finished shark also doubles up as a wonderful mini ocean amigurumi for nursery toy or a beautiful addition to the beach-themed bedrooms or the play areas of children.
Simple Step-by-Step Shark Amigurumi Pattern
Step 1. Crochet Main Body
Start with a magic ring and crochet a few single stitches into the center. Gradually build up to the next rounds until you have a rounded bottom. Keep on working in continuous rounds and slowly form the body into a soft oval.
The shark does not have a perfectly round form but it should be a little longer and tapered at the tail as the shape of a perfect ball is quite delicate. Stuff it as you crochet. Gradual filling of the body is also useful in preventing lumps and maintains the shark in a well-rounded shape.
Step 2. Add the White Belly
One of the characteristics of a shark is the white belly. Crochet an oval panel with white yarn flat and oval. Check the fit by sewing Hold it against the underside of the body. Attach the panel in its time. Even stitches around the edge give a neat transition between the grey and white yarn. Such a minor detail instantly transforms the shark into the one that is well known.
Step 3. Create the Face
Insert the safety eyes prior to closing the head. Also maintain a distance between them so as to form a friendly expression. Embroider a little curved smile under the eyes with black embroidery thread. You can add small blush circles using pink yarn or embroidery thread, should you wish an even more adorable appearance. A plain face can sometimes be a lot more personality to the finished shark than intricate embroidery.
Step 4. Make Dorsal Fin
The first thing that everyone will notice is the dorsal fin. Crochet a small triangular shape of fin, with slightly rounded edges using grey yarn. Lightly stuffed, or not stuffed at all, so that it will set on the shark naturally. Stick it on the middle of the back and then stitch it firmly in between. The alignment can be checked on both sides and at the front of the shark so that it appears to be balanced.
Step 5. Make the Side Fins
Crochet two side fins of the same size with simple curved shapes. Instead of filling them full to the brim, ensure they are soft in order to form a smooth flowing effect. On each side of the body below the broadest part, put a fin. The slightest manipulation of their angle can give the impression that the shark is swimming.
Step 6. Crochet the Tail
The tail completes the silhouette of your shark. Make two tail parts that match each other and then connect them. Lightly padding- only the bottom of the tail- and keeping the ends soft and pliable. Stitch it firmly at the back of the body, and bend it to one side so as to be more natural.
Step 7. Enter the Final Details
Now it’s time to make your shark unique. Consider adding:
- Tiny embroidered bubbles
- Small sailor scarf
- Mini anchor charm
- Decorative wave stitching
- Felt seashell accents
- Little starfish appliqués
- Ocean-blue stripes
- Tiny bow tie
- Personalized name tag
These final details make a basic amigurumi into a homemade gift that can be described as a reflection of your creativity.
The completed shark is also used to create a cute plush sea animal crochet project as a gift, nursery and home decoration piece with a coastal theme.
Bring Your Shark to Life with Color
Although the traditional grey-and-white shark is always a classic, don’t be afraid to step outside the usual color palette. The very good thing about amigurumi is that there are no rules. Your shark may be as real as you please or as playful.
The gentle nursery decoration is achieved by using soft pastel colors whereas the project is given a fun and modern appeal by using bright turquoise, aqua, coral, or even rainbow stripes. In case you are making several sharks, you can vary the style of the eyes or even add some tiny accessories so that each shark has his own character.
You might even design a whole ocean-themed set of matching whales, turtles, octopuses and dolphins. They are all put on display to narrate a joyful homemade tale that will be enjoyed both by children and adults.
Creative Ways to Display Your Finished Shark
You may well want to keep your shark somewhere the whole family can see it once it is finished. The following display concepts are a few that are a great fit:
- Put it on a nursery shelf with other animals of the sea.
- Decorate a beach-themed bedroom or playroom.
- Place it in a bookshelf where shells and driftwood are.
- Hang it in your art studio as a reminder.
- Include it in a homemade baby shower gift basket.
- Prepare a coastal centerpiece consisting of a number of sharks of various sizes.
- Place it in your office as a desktop companion.
- Arrange on a level tray and decorate it with nautical motifs.
- Take photos of it with your crochet work either in social media or your portfolio.
- Send it to a person who is fond of sea creatures or crafts.
The reason behind its smiling face and small size is that it is equally applicable in normal decorations as it is during special events. The completed shark is also an art handmade marine life plush so it can be used as a playful handmade touch whatever the display location.
Why You’ll Want to Crochet More Than One
There are those projects that become complete with the initial project. This isn’t one of them. Since the making is straightforward, and the yarn needs are few, it is not complicated to test a new color, accessories, and facial expressions. Each completed shark forms his or her little personality.
It also makes a great stash busting project. The remaining balls of blue, grey, or white, or teal yarn which have been lying in your craft-basket are made useful again. A popular project among crocheters is to make a shark family: large, medium, and small, and have it on display to get a striking effect, as well as have fun and surprisingly relaxing to crochet.
Video Pattern Here:
Pro Tip
Pin the fins in place and look at the shark in every position before sewing the fins permanently. Even a minor modification can help the completed work to appear more balanced and natural.
Caring for Your Crochet Shark
With a bit of attention, your homemade shark will stay fresh over the years. Lightly dust it with a soft brush or lint roller every now and then. When it requires cleaning, then put it under cool water in a hand-wash using a light detergent.
Do not wring or twist the toy, this may overstretch the stitches. Rather, squeeze out the unnecessary water using a clean towel before it is laid down to dry in the open air. When it is dry, carefully re-pack the stuffing between your hands, being careful not to harm the fins and tail, to make them come back to their natural shape. When you can, keep the shark out of the sun and this will help maintain the richness of the yarn colors.
Final Thoughts
It is so lovely to turn what can be viewed as an intimidating creature into a warm and smiling hand-made friend. This shark amigurumi demonstrates that the simplest stitches can make a project that is full of warmth, personality, and charm.
You can create it as a beautiful present, to a collection of ocean-themed items, or you can just spend a relaxing weekend crocheting, and with this easy shark amigurumi pattern, you will come back to it again and again. Each new color combination, each minute finishing touch makes your shark a bit more unique, which is evidence that handmade works always possess some magic.