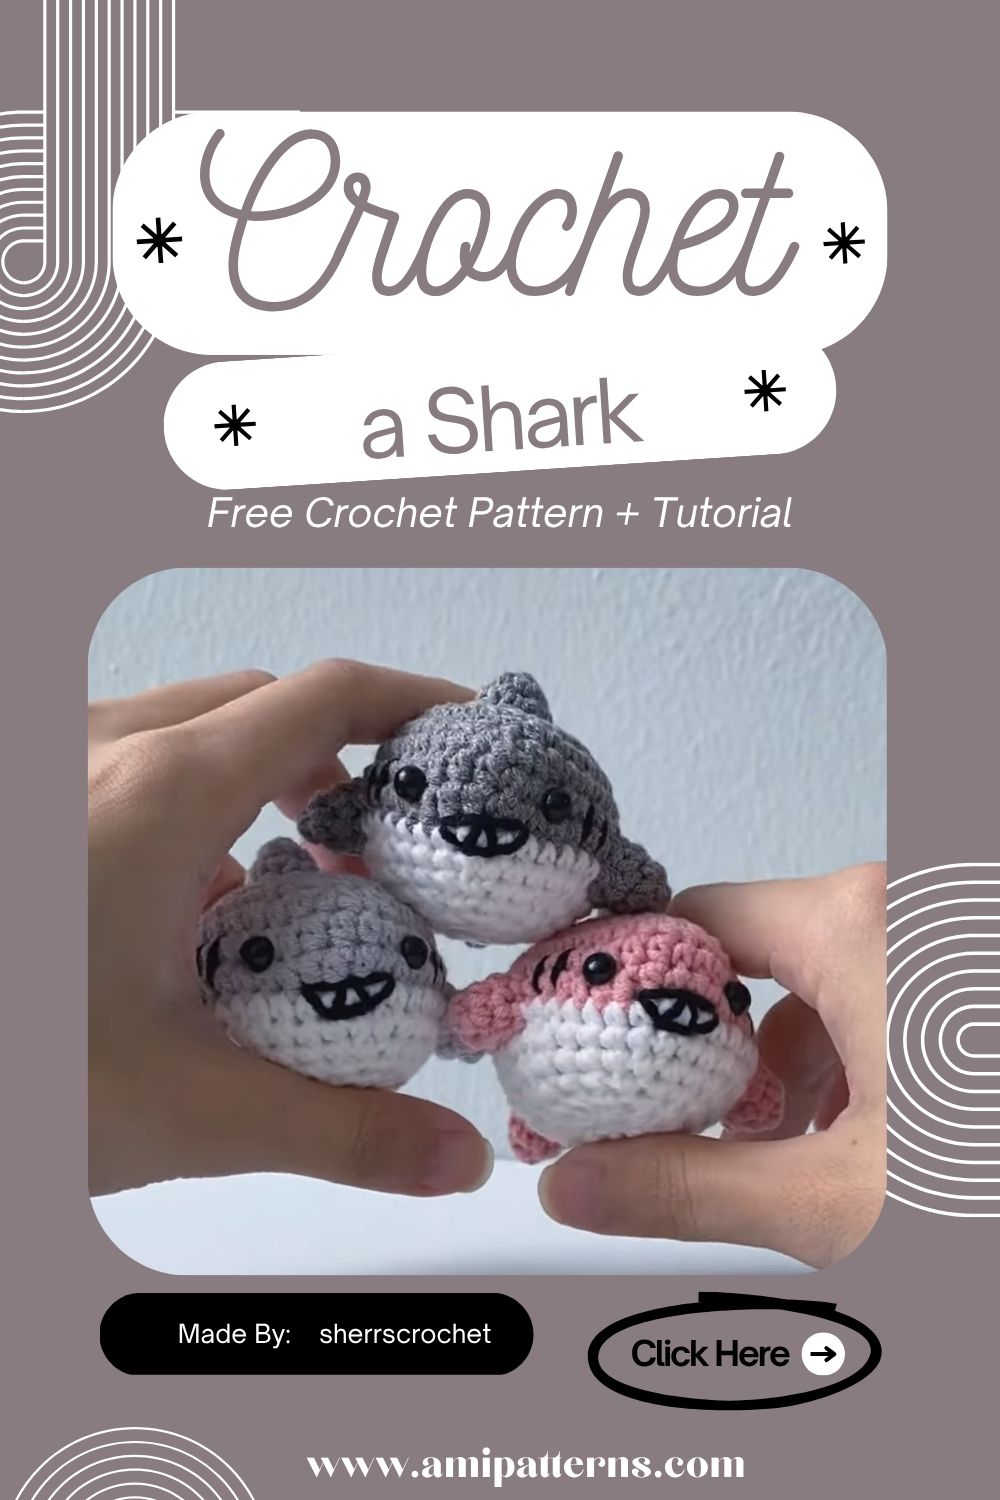
How to Crochet a Shark Amigurumi Pattern That Looks Adorable
Sharks are typically known to be fierce, however, in the world of crochet they are quite cute. Their round bodies, a small set of fins, and smiling faces make them cute little friends rather than terror of the sea. That is why shark amigurumi has become a popular project among crocheters. It is a combination of easy shaping and ample character, so it is enjoyable to create and pleasant to showcase.
Maybe you have been seeking something a bit different than the standard bears and bunnies; this shark is a great solution. It is faster to work, requires minimum color of yarn and it has lots of creativity space.
You can make it as a present, you can decorate a nursery or you can add another self-made object to a growing collection and you will be left with something that is just as cute and unique. This cute shark crochet pattern is easy to make, but intricate enough to help both novices and experts in the craft to stay engaged throughout the project.
Why You’ll Enjoy Making This Shark
The simplicity of the shape of sharks is one of the primary reasons why people enjoy crocheting sharks. The body is predominantly rounded, meaning that you can concentrate on the rhythm of your stitches rather than construction complicatedness.
The smile with tiny embroidery, the fins, and the tail allow the shark to possess an ample personality without any complicated methods. It is also an excellent project that enables you to use up the old yarn you have left over after earlier projects.
Skill Level
Skill level is easy to intermediate. You can complete this without having any problem.
- Make a magic ring
- Crochet single stitches
- Increase and decrease
- Continuous round work.
- Sew pieces of amigurumi.
The body is simple and the fins and the tail also provide the necessary amount of diversity to keep the matter interesting. When you are through fastening on the last fin you will have a merry friend of the ocean that you cannot help smiling at.
Materials You’ll Need
Prepare your supplies beforehand.
- Grey yarn for the body
- Belly yarn: white.
- Black embroidery thread
- Safety eyes
- Polyester fiberfill
- Hook to use with your yarn.
- Stitch marker
- Yarn needle
- Sharp scissors
- Blush optional pink yarn.
Cotton yarn forms crisp stitches and acrylic yarn makes the shark look plushy.
Special Features of This Pattern
This little shark is easy to crochet, but it has some considerate details.
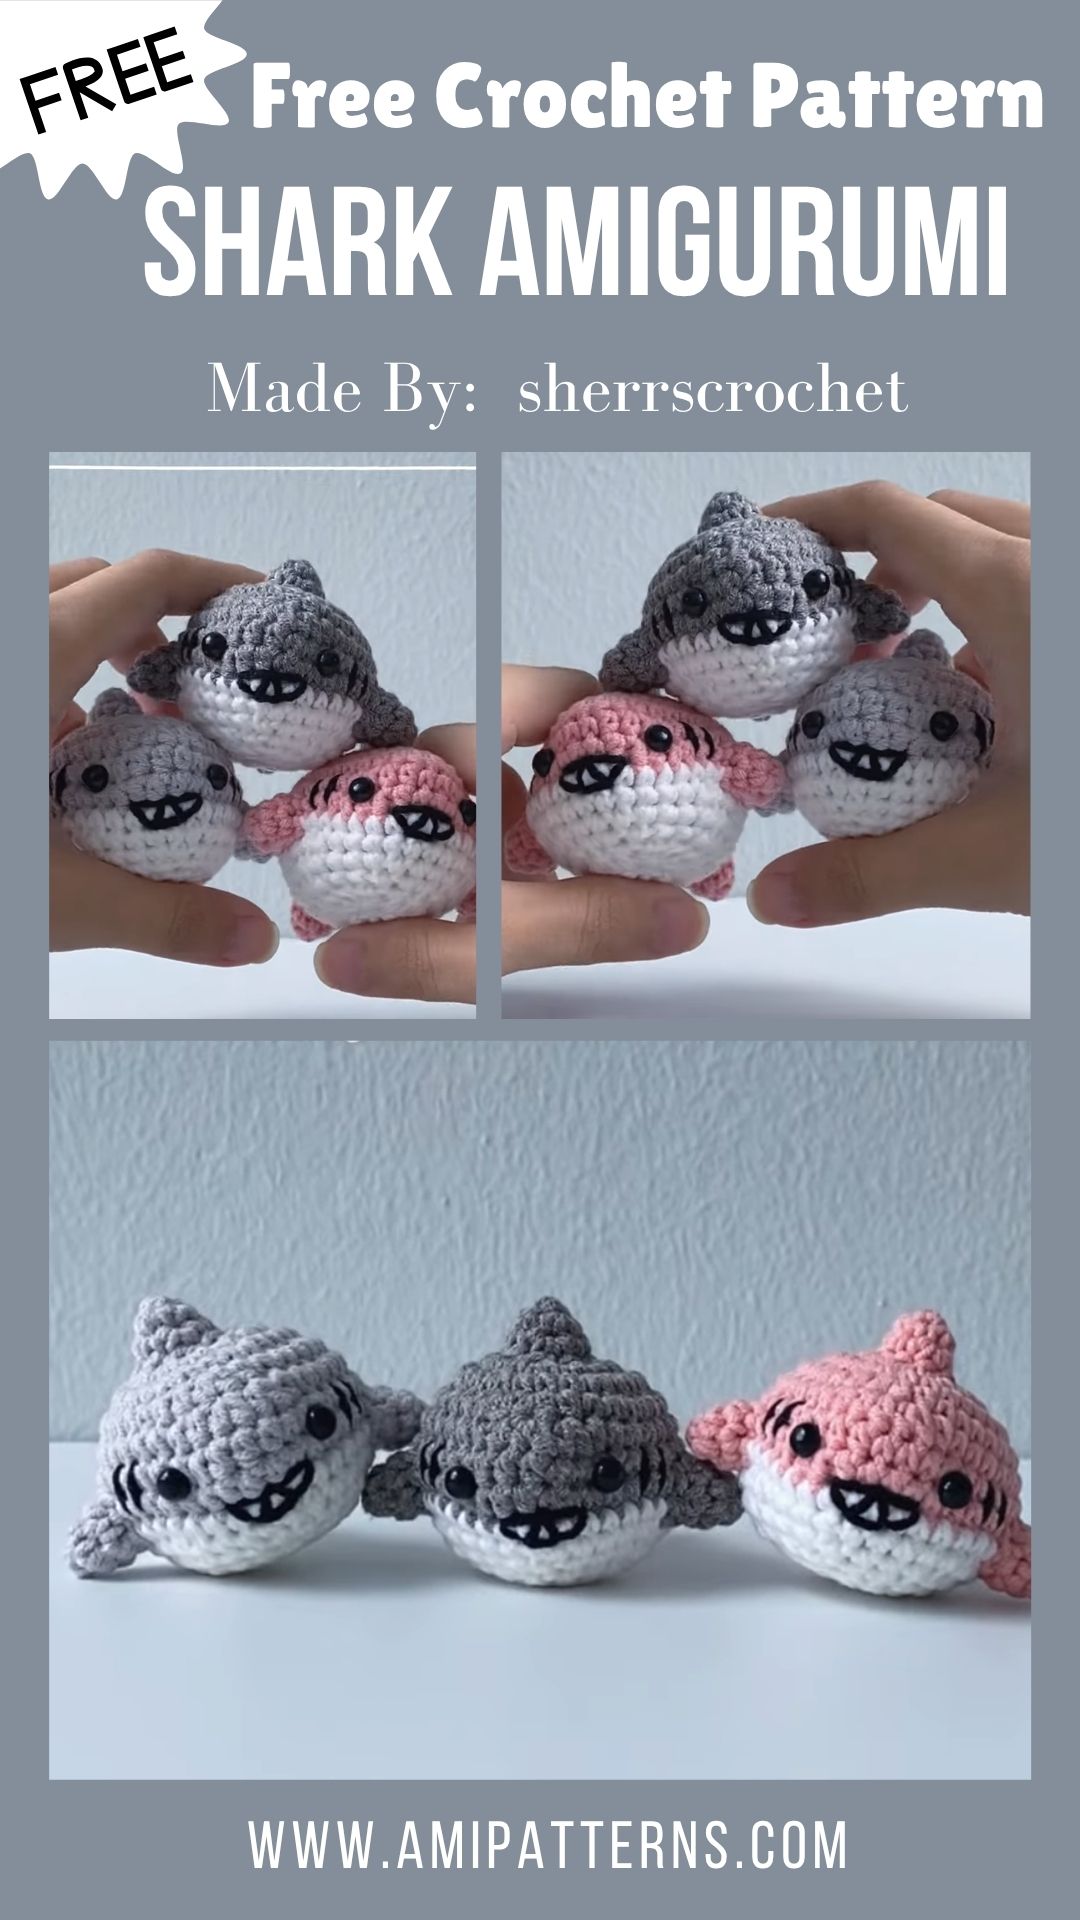
- Smoothly shaped round body.
- Soft white belly
- Large dorsal fin
- Small side fins
- Wide tail fin
- Friendly embroidered smile
- Beginner-friendly construction
- Compact display size
- Easy color customization
- The completed shark is also a beautiful mini ocean amigurumi for shelves, on desks, in nurseries, or in decorations around the beach.
Bring Your Shark to Life
Step 1. Crochet the Body
Begin with a magic ring and crochet a few single stitches into the middle. Gradually build up on the succeeding rounds until you have a smooth rounded form. Keep on crocheting and gradually increase the size of the body. Work a bit at a time to ensure that the filling is evenly spread. The shark is to be oval-shaped and not round.
Step 2. Add the White Belly
Crochet a flat oval panel, using white yarn, tracing the curve of the body. Pin it in place then sew it into the fabric. The belly is added on its own and forms beautiful contrasts and provides the shark with its classic look. Match the edges slowly so as to have even stitches.
Step 3. Shape the Face
Before closing the head insert the safety eyes. Embroider a little smiling mouth with black thread. You feel like being softer in appearance, add a little blush marks of pink under the eyes. The simplest details of the face make the largest personality.
Step 4. Crochet the Back Fin
The feature which makes you recognize your shark immediately is the top fin. Make a tiny triangular fin out of grey yarn. Do not cram it to the point where it takes a dirty form. Stick it somewhere in the middle of the back of the shark. Make sure that both sides are aligned and then sew permanently.
Step 5. Make the Side Fins
Two similar fins are crocheted. These must be curved a little to give an effect of motion. Place one fin on one side of the body, and the other fin on the other side of the body, and place the fins facing the same way. A tiny change can make the entire appearance entirely different.
Step 6. Crochet the Tail
The tail is used to balance the whole design. Make two similar tail pieces and then glue them together. Lightly stuff the tail–or leave it unstuffed–to give it a smoother flowing look. Fix it on the back of the body. After sewing it on, use your fingers to shape the tail until it forms its natural shape.
Step 7. Add Tiny Details
Now you can add even more personality to your shark. Consider adding:
- Tiny embroidered eyebrows
- Rosy cheeks
- Decorative bubbles
- Small starfish appliqués
- Mini sailor scarf
- Little anchor charm
- Soft blue stripes
- Tiny seashell embroidery
- These are the finishing touches that make each shark special.
The project is also a great handmade shark nursery décor piece.
Step 8. Assemble Everything
Assemble the fins, tail and belly with strong sewing and then weave in the ends of the remaining yarns. Use your hands to gently rub the stuffing into the body until the body appears smooth and well shaped. Make a last glance in all directions. It is sometimes just a few stitches higher that can make a much more balanced look when you move a fin. Ready to display or give your cute crochet shark.
Fun Ways to Display Your Crochet Shark
The best part about this little shark is that it can be placed in virtually any area. It is not only a toy but it can be a fun decorative item that will give a home made feel to your home. The following are some artistic ideas of how you can display your finished shark:
- Put it on a shelf of books with shells and oceanic ornaments.
- Put it in a nursery with other amigurumi ocean-themed.
- Place it in the reading corner of a child to add some fun.
- Put it in a homemade baby gift basket.
- Prepare some sharks of various pigments of blue to have some fun in the water.
- Keep it on your desk in the craft room or home office.
- Style it on a tiered tray with beach-inspired decorations.
- Present as a birthday present to a person who is fond of marine animals.
- Take a picture with other sea animals to add to your crochet book.
- Retail completed work at craft shows or in your handicraft store.
Its amiable demeanor and small size will make it a decoration you will be glad to have long after you are done crocheting it.
Put Your Own Spin on the Design
The best thing about amigurumi is to make your own project. With the same pattern, making minor alterations can make your shark a totally different person. Try experimenting with:
- Blue yarn, not grey, navy, teal or pastel.
- Glitter yarn for the fins.
- Tiny embroidered freckles.
- A small life raft.
- A sailor hat.
- A colorful bow tie.
- The belly has small embroidered waves.
- A winter scarf which can be removed.
- Little felt fish that had been sewn next to the shark.
- Various eye sizes to playful expressions.
- When you are drawing a few sharks, change the color and facial expression of each one, so that each shark looks like a different character.
The completed project also creates an adorable soft sea animal crochet toy that will be a delight to have on display by children and adults alike.
Video Tutorial Pattern Here:
Why This Pattern Is Worth Making Again
There are crochet designs that are enjoyable the first time around, and this shark is such that it will consistently come back to you when you need an easy and fulfilling project.
The fact that it is relatively easy to make and the fins, tail, and facial features provide ample space to be creative makes it an easy task to make. It also consumes comparatively low quantities of yarns and hence it is suitable in utilizing the remains of past projects.
It is hard not to think of making an entire ocean of whales, turtles, octopuses and starfish to make it feel at home once you have made one.
Pro Tip
Crochet the body a little at a time, rather than all at once. This makes the shark smooth and even without forming lumps.
Caring for Your Handmade Shark
With a bit of care, you’ll have a crochet shark that will keep looking fresh after years. Occasionally dust it with the help of a soft brush or lint roller to get rid of loose fibers. Should it require washing then hand wash with cold water using a gentle detergent.
Do not twist or wring the toy after washing. Rather, place it in a clean towel to get all the moisture before it is laid flat to dry in the air. After full drying, re-position the body, fins and tail using the hands to restore the shark to its original shape. It will also be useful to keep it out of the direct sunlight so that the color of your yarn does not fade away.
Final Thoughts
Crochet yourself a shark is a great way to remember how the most ferocious animals can be made adorably adorable with a few yards of yarn and a bit of creativity. Each stitch brings a touch of character, whether it is its round form and soft fins or its jovial smile, until you have a handmade thing you can but love.
Making it as a thoughtful gift, as a part of your own collection, or as a way of decorating an ocean-themed room, this cute shark crochet pattern will provide the right amount of simplicity and creativity. When you have your first shark, the next one will come in a different color in no time. And that is the beauty of amigurumi: there is always another occasion to make something really special.
Frequently Asked Questions
Is this pattern appropriate for beginners?
Yes. This project can be done by anyone who is familiar with the fundamental methods of amigurumi. The shaping is easy and the individual fins are easy to fit.
Which yarn should I choose?
Cotton yarn will give a sharp edge to the stitches and acrylic will give a less dense finish. Each is a good choice based on the appearance you want.
Is it possible to create a larger shark?
Absolutely. The size of the finish will be larger, but the construction will remain the same by using a larger hook and a heavier yarn.
Is it safe for children to play with it?
Little children use embroidered eyes instead of safety eyes to minimize chances of the small bits being lost.
Is it possible to sell finished sharks?
Finished handmade sharks may be sold at craft fairs or online handmade markets (with the permission of the pattern designer, or using your own original pattern).