Amazing Crochet Small White Koi Fish Pendant Pattern
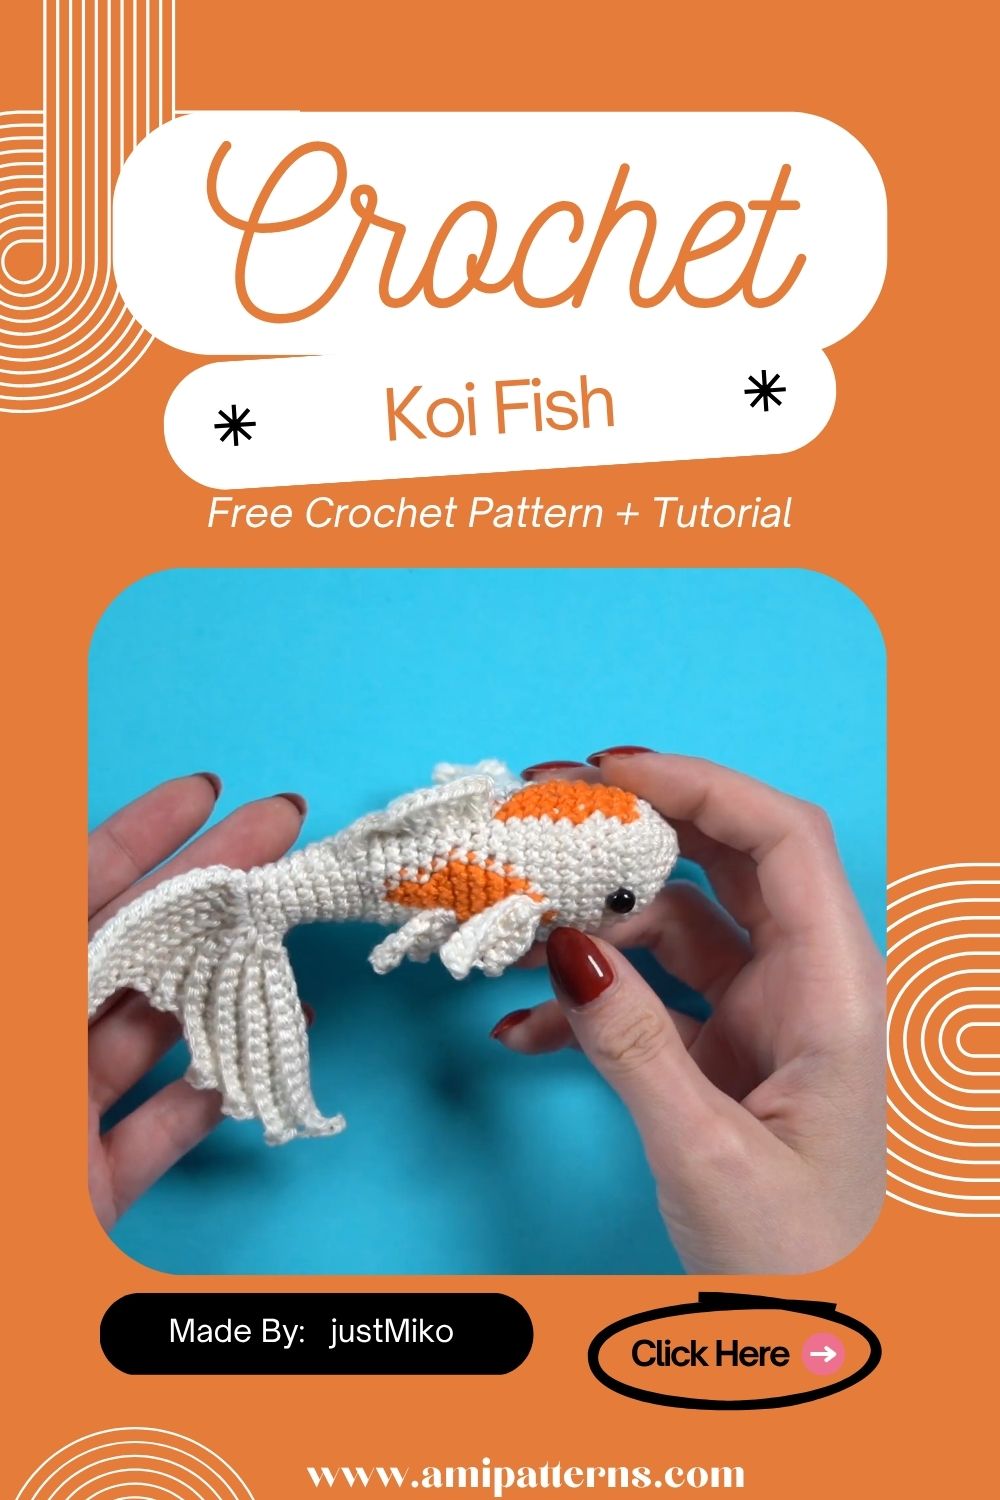
It’s surprising how beautiful a small crocheted koi fish is! Even a small size version has enough character with its curved body, flowing fins and light tail. Crochet Small White Koi Fish Pendant & Keychain Amigurumi Pattern is a pretty option when you’d like to make something compact, decorative and a little different from the standard crochet animals.
The completed piece of fish can be created as a pendant, bag charm, key chain or a small hanging decoration. The use of white yarn adds a sense of tranquillity and simplicity to the piece, creating a serene atmosphere, and the addition of subtle details can hint at the graceful markings of a koi fish without making the project overly challenging.
It’s also a great project to store things in! Just a little bit of yarn is needed, so it is perfect for leftover yarn from larger projects. After making one fish maybe you’d like a variety of colors and make a whole little collection of fish!
Why you’ll love this little Koi Fish
Miniature crochet is just really cute. The project can be finished relatively quickly, but the results are still detailed and special.
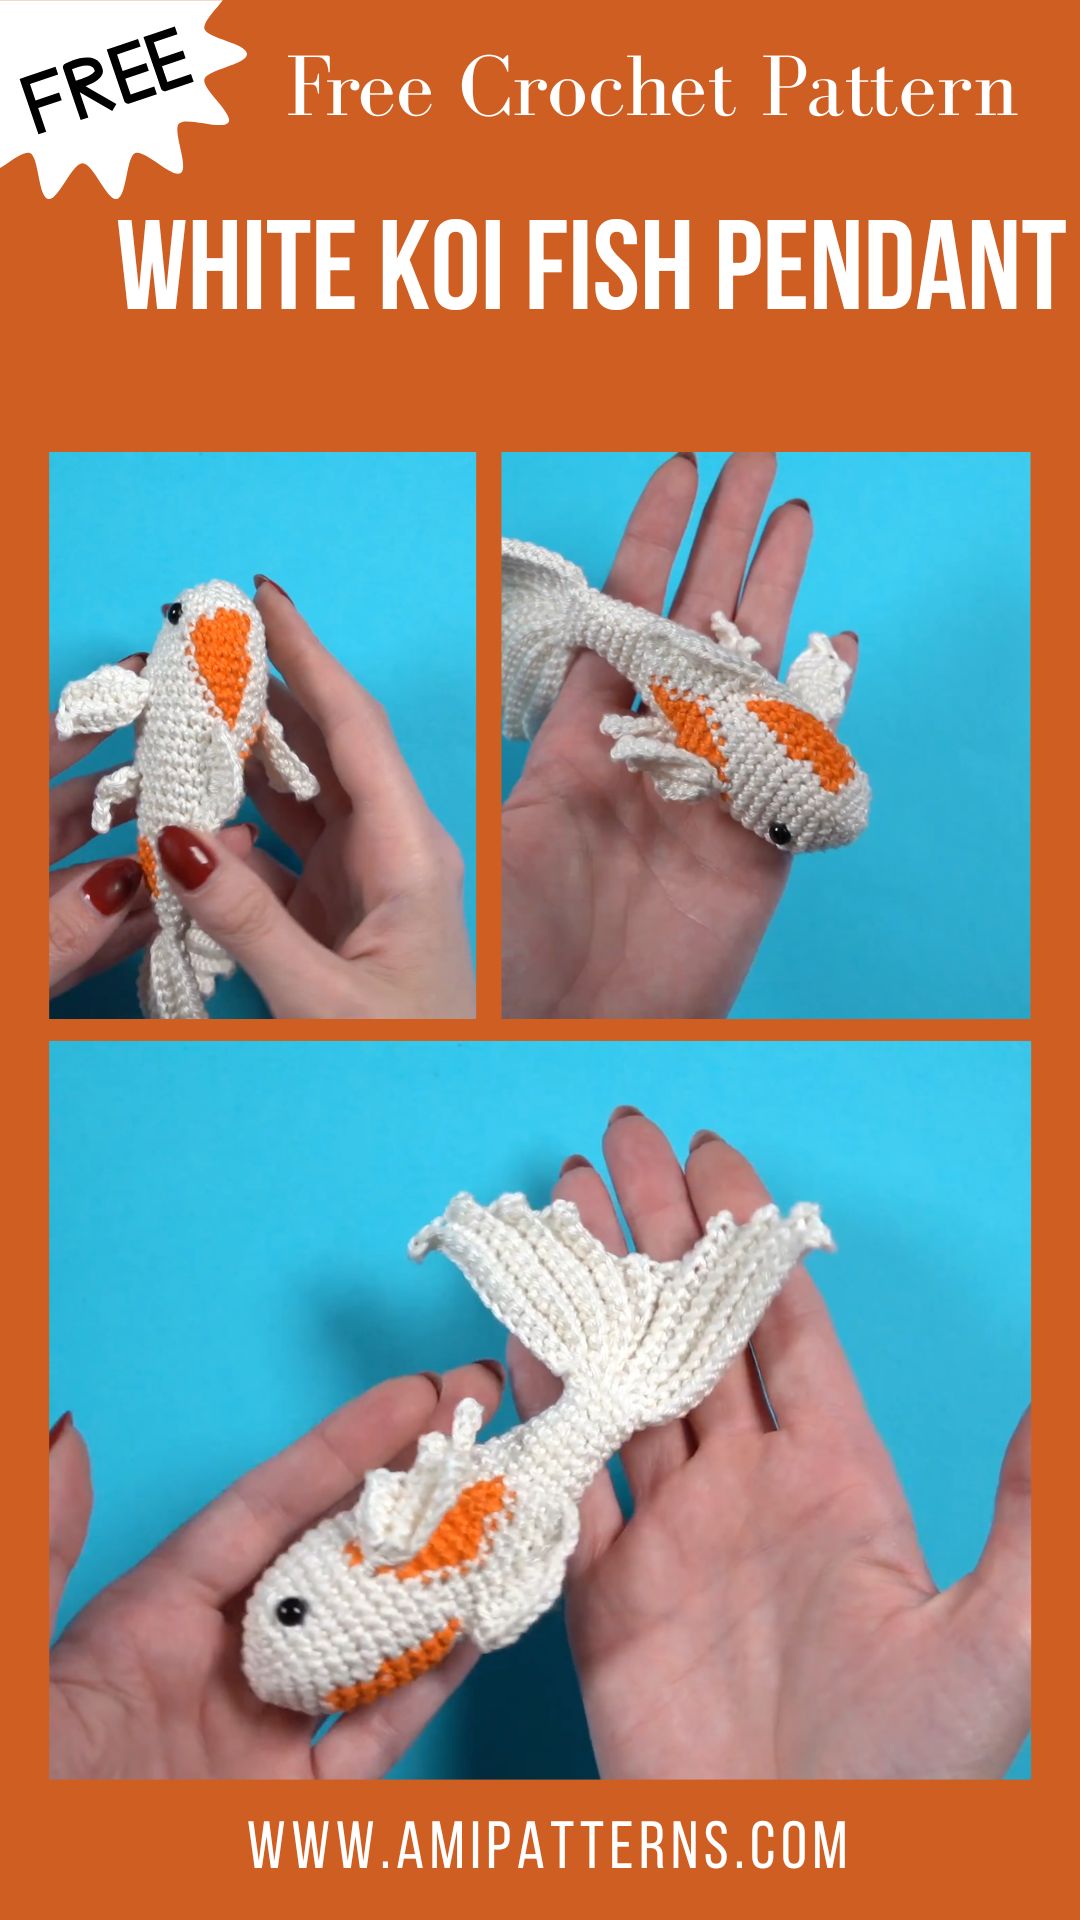
This koi fish is made up of a few easy-to-draw shapes:
- A rounded body
- Small side fins
- flowing tail
- Tiny eyes
- Optional decorative markings
- piece of rope or chain which is attached to a pendant or keyring.
The final fish size is small, so even slight variations in the shape can make a significant difference. The body can be plump for a “cute amigurumi” look or be kept thin for a more delicate amigurumi pendant.
For those looking for small koi fish crochet patterns, this pattern can easily be scaled down to work with the yarn and hook of your choice.
Skill Level
Time: 60-90 minutes
Ideal for comfort; should be able to operate:
- Magic ring
- Single crochet
- Increases
- Decreases
- Chain stitches
- Slip stitches
- Round robin working
- Basic sewing
- Embroidery
Materials You’ll Need
Prep up the following supplies before you begin:
- White cotton or acrylic yarns.
- Small quantity of orange or red yarn for marking
- Black embroidery thread
- The right size crochet hook for your yarn.Appropriate crochet hook size for your yarn.
- Polyester fiberfill
- Stitch marker
- Yarn needle
- Sharp scissors
- Clasp A keychain with a key hole or Lobster clasp.
- A small ring of metal designed for use in lacing.
- Optional necklace chain
- Lightweight cotton yarn is great for a small pendant!
- Use thicker yarn and larger hooks if you wish to use a thicker decorative fish.
Choosing Yarn for a Miniature Fish
Cotton yarn is the yarn of choice for this project as it creates crisp stitches and it keeps small shapes in place.
In case you desire a softer and slightly fluffy look, acrylic yarn is the perfect choice.
If you’re going to be creating a pendant or key chain, skip the very thick yarns, unless you’re making a large charm on purpose. A finer yarn will produce a more elegant dress.
Your hook should make a secure fabric. If there are big gaps between the stitches, use a smaller size hook.
Before Starting the Crochet Steps
The koi is constructed from a small stuffed body, separate fins and tail.
A secure hanging point will also be necessary for a pendant. A metal jump ring can be sewn onto the top of the body or a small loop can be crocheted into the upper section.
A metal clasp is typically the most convenient keychain option.
The attachment must be carefully sewn and will most likely be used often, so be sure to sew it with more than one stitch.
How to Crochet the Small White Koi Fish
Step 1: Crochet the Main Body
Knot and make a magic ring with white yarn.
Make 6 single crochet stitches in the ring.
Pull the ring closed and set up a stitch marker.
Add the same amount to each round over the next few rounds.
The shape should gradually become wider.
Then, continue to finish several rounds without any increases.
This forms the mid-body that is rounded in all fish.
To create a little amigurumi koi, make the body a little plump.
If you want a pendant that looks as though it is made of solid metal, simply make the body a little slim.
Step 2: Shape the Head and Body
Continue working single crochet rounds.
When approaching the opposite end of the field, start to subtract slowly.
This gives the fish the “tapered” appearance.
Include polyester fiber fill as needed while creating.
The body must be firm and yet not overstuffed so that it does not lose shape and make the stitches strain.
Repeat the process reducing until small.
Fill in the remaining stuffing and tighten the body.
Weave at the end of yarn.
Step 3: Form the Tail
The elegant shape of the koi is defined by its tail.
Crochet 2 small crochet triangles or fan shapes with white crochet yarn.
The tail may be a bit wider at the end of the body.
Stitch the two together at the bottom.
Securely sew the tail onto the narrow end of the fish.
Fold the tail over to the side before tying the stitches.
Even a little curve to the tail makes the fish appear more active than a straight tail.
Step 4: Crochet the Side Fins
Cut out 2 small fins.
Any oval or triangle shape can be used as long as it’s simple and tapered.
Do not allow the fins to bend.
Sew one fin to each side of the body.
Mount them just behind the head area.
These can be angled down for a laid-back look or up for more of a ‘swim pose’.
Due to the size of the fish, do not make the fins too large. They should be added to the body not overwhelmed.
Step 5.Attach the eyes
With the black embroidery thread, embroider two little eyes.
Distribute evenly on both sides of the head.
For slightly larger fish use a small safety eye.
In the case of a small pendant, embroidery tends to appear tidier and to attach more readily.
Once the embroidery is completed, review both the front and back for comparison.
An even spacing will create a more balanced look.
Step 6: Draw Koi-Inspired Markings
The white body is stunning in its own right, but a few color markings is enough to make it a familiar Japanese koi.
Add patches with orange or red yarn.
There’s no need to draw a complex design.
Try placing:
- A patch around the crown of the head
- Two small spots are found on the back
- small dot next to the tail
Small crocheted circles may be sewn onto the body or the markings can be embroidered directly onto the body.
If you don’t want your patches to be symmetrical, don’t make them perfectly so.
Step 7: Place a Tiny Mouth
Embroidered lines can make up the mouth, which is small.
Knit in black thread and do not knit too many stitches.
Keep it subtle.
Don’t show too much detail on the face of a miniature fish, it makes the face look too crowded.
A simple mouth is typically all that is needed along with small eyes.
Step 8: Attach the Pendant Loop
For a pendant make a small crochet loop.
Multiple stitches can be tied together and the ends can be firmly tied to the head of the fish.
Or sew on a metal jump ring at the top of the middle of the body.
The metal ring is typically more durable for repeated use.
Once you have decided on the necklace chain you wish to use, connect it after you are sure it is secure.
Step 9: Turn It Into a Keychain
To make a key chain, use a lobster clasp or key ring in the top loop.
Do a couple of good stitches around the attachment.
Test the clasp before attaching fish to its keys or bag by gently pulling it.
The importance of a secure attachment is because the key chain is subjected to a lot more movement than a decorative pendant.
Choosing Colors for Your Koi
While white is a beautiful base, there are several variations possible.
Try:
- White and orange
- White and red
- Cream and rust
- White with pale pink
- Ivory (accented with gold)
- White and black
- Even several koi can be created with distinct markings and combined together to create a mini kit.
Consider pastel colors instead of bright orange or red for a less intense look.
Creative Uses for Your Crochet Koi
Discover some creative ways to use your crochet Koi.
This diminutive fish can be very versatile.
Use it as:
- A necklace pendant
- Keychain
- Bag charm
- Backpack decoration
- Zipper pull
- Gift-box decoration
- Hanging ornament
- Desk decoration
- Plant-pot accent
- section of a small exhibition.
You can also crochet multiple koi and hang them from a small branch to make a simple decoration inspired by the underwater world.
Pro Tip
Use pins for the fins and tail until they are permanently sewn on. Gently bend the tail and turn the fin angles, so that the fish appears to be swimming.
Common Problems and Easy Fixes
When those issues arise, here are some common problems and easy fixes.
When its a round fish.
Decrease in fewer rounds or a shorter body section before decreasing.
The stuffing can be seen
You might be using too large a stitch. Try a smaller hook and maintain steady tension.
The tail remains hanging down.
The tail stitches should be fewer of them or a firmer yarn. Another option for reinforcing the base is to add more stitching.
The fins seem to unevenly spaced
Before attaching the fins, pin them both up and check where they are from the front and the top.
The keychain attachment is floppy
Lay on more threads and re-fasten with a few rows of firm yarn or embroidery thread.
How to Take Care of Your Crochet Koi
It’s hard to keep small crochet charms from getting dusty.
Use a soft brush or lint roller to clean.
Use mild detergent and a damp cloth to clean with for marks.
If the fish is equipped with metal hardware, do not soak it, as this may have an impact on the clasp or jump ring.
Let it dry before storing.
Avoid using white yarn on fabrics that may bleed dyes.
Make a Whole Koi Collection
If you have completed your white koi, you can try a different size and pattern.
Make one with a red head patch.
Another can be orange in color with markings along the back.
Consider a cream colored koi with a gold hue.
Even miniature and medium-sized and display together.
That is where a simple crochet project might be a small creative collection.
Final Thoughts
A small crochet project doesn’t have to be plain as demonstrated by a tiny koi fish. The round body, flowing tail, light finishes and simple patterns offer a wealth of visual interest without complex stitches.
It’s versatile – the best part. It can be worn as a pendant, attached to a key case or used to add a fish to an accessory bag or to make a mini display with several fish!
Begin with the classic white yarn, then add some orange or red accents to it, and go wild from there. Once you know the basic form, change the proportions, colors and prop additions to make YOUR versions!
This Crochet Small White Koi Fish Pendant & Keychain Amigurumi Pattern is a relaxing and fun pattern to craft, whether you’re creating it for yourself or just as an additional little creature to add to your crochet collection.