
Free Crochet Pizza Triangle Pattern Headband for Kids
Headbands are a great way to make an ordinary outfit fun and exciting for kids! Top it with a pizza slice and you have a crochet accessory that you can’t ignore. The Free Crochet Pizza Triangle Pattern Headband is a cute and easy-to-make headband that’s also a fun pizza-themed decoration for your child’s birthday, a dress-up day, a school day or just an afternoon at home.
What’s great is that you don’t have to crochet the whole pizza for this accessory to be used. Just a small triangle, some rainbow-coloured fillings and a nice hat to place on top are sufficient to achieve the effect.
This pizza slice can be as elaborate or plain as you wish. Small pieces of red, brown or green yarn can be used for toppings, cream for melted cheese and red yarn for tomato sauce. The headband itself can be neutral or the same color as the pizza.

Also a pretty yarn scraper project. Those little bits that aren’t quite enough for a sweater or scarf can transform into pepperoni, olives, mushrooms or vibrant veggies.
Why Kids Will Love This Pizza Headband
Children have been known to love accessories that are slightly unusual compared to regular clothes.
The pizza slice on the headband is fun yet easy to comprehend. The shape of the triangle instantly brings up the image of pizza and the small toppings lend a personality touch.
The project can be interactive as well.
Allow your child to decide on the toppings.
Some kids might be into pepperoni all day while others might only be into mushrooms and olives. Other people may select some totally different mix simply because they enjoy the colors.
This is a great pizza crochet accessory for the children and will allow you to create many different looks.
Skill Level
This is a beginner to intermediate level activity.
Be familiar with:
- Chain stitches
- Single crochet
- Half double crochet
- Slip stitches
- Increasing
- Decreasing
- Basic sewing
- Working with small crochet pieces
- The hat is relatively simple.
The pizza slice will require some shaping and not complicated stitching.
Materials You’ll Need
Gather:
- Yellow/Golden yarn for the cheese
- Red yarn for the sauces and pepperoni
- For cheesy details, cream or off-white yarns will do.
- Optional toppings of green, brown or black yarn
- The base of the headband is made of yarn.
- A crochet hook appropriate to your yarn.A crochet hook to match your yarn.
- Yarn needle
- Sharp scissors
- Stitch marker
- Polyester fiberfill
- Headband (plastic or fabric)
- Cotton yarn is used to make a firm, neat appearance, or acrylic yarn for a softer accessory.
When decorating, ensure that all decorations are properly fastened for children. For an extremely small child, do not use the small detachable pieces which could choke.
How to Crochet the Pizza Headband
A centered slice provides the headband a classic novelty look.
Can also be positioned slightly off-center for a more whimsical look.
Before crocheting the base, measure the headband around the child’s head.
The final headband should not be tight and should fit nicely.
When crocheting a sleeve for a plastic headband, be sure to make the sleeve slightly longer than the headband so that the ends can be crocheted together neatly.
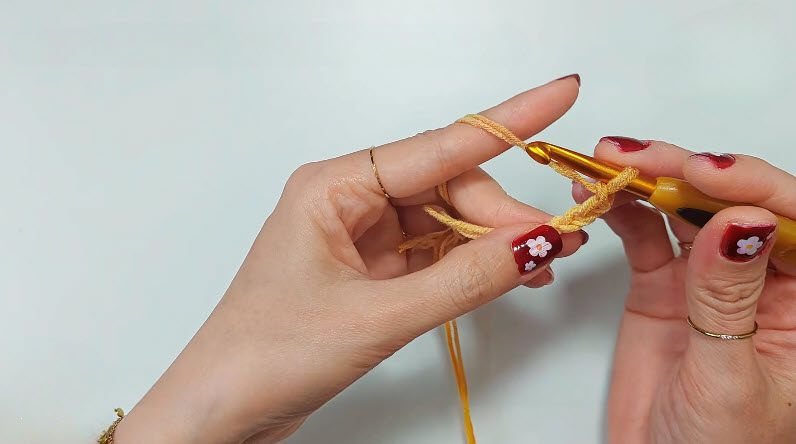
Step 1: Crochet the Headband Base
Begin with the yarn you’ve decided on for the headband.
Make a chain foundation of the desired length.
Single crochet down the chain.
Keep on creating rows until the strip is wide enough to cover the headband.
To maintain the edges straight, count stitches at the end of each row.
The width of the strip doesn’t have to be very large. The aim is just to make a cosy crochet cover.
Step 2: Shape the Headband Cover
Put the crochet strip over the top of the headband while you work.
Make sure it doesn’t bunch, but fits the surface.
For a flexible fabric covered headband, one might want to make the sleeve a little narrower.
For a thicker plastic headband, add some more stitches or rows.
When the strip is the length desired, fasten off.
Leave a long yarn tail to sew with.

Step 3: Attach the Crochet Cover
Crochet the strip around the headband.
Use a yarn needle to sew the long edges together.
Work carefully so as not to make any awkward bumps.
Secure both ends.
Inspect the inside headband and cut off any loose yarn.
Test run fingers over the completed cover to ensure that it does not have sharp or bulky edges.
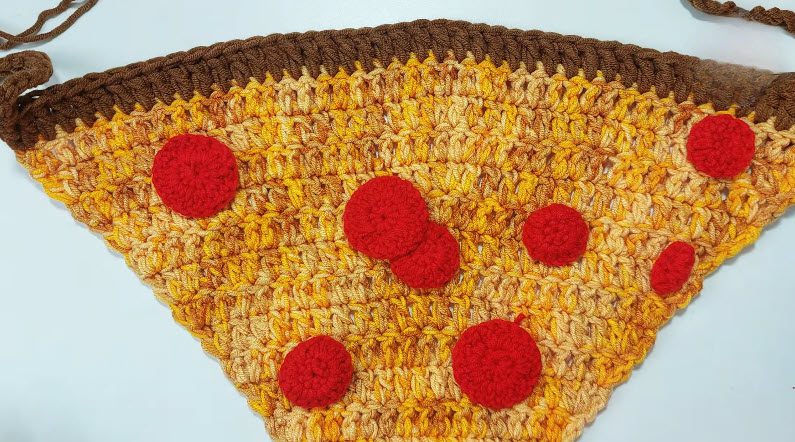
Step 4: Crochet in the shape of a Pizza Triangle
Now it’s time for the fun part.
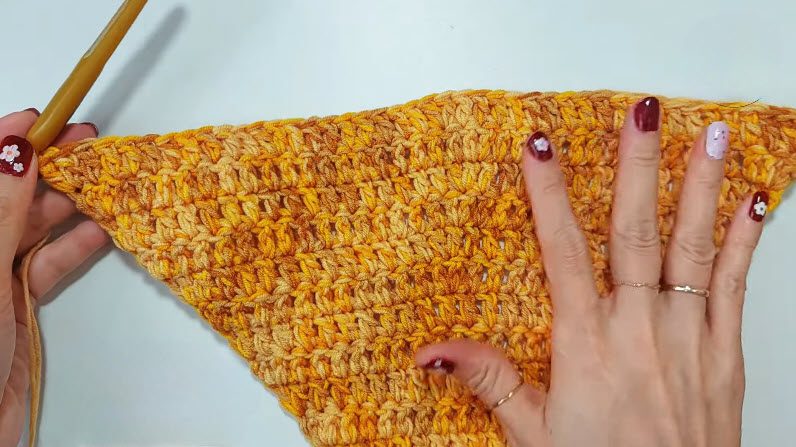
Use golden yellow yarn to make the pizza slice.
Begin at the small corner of the triangle.
Work a few stitches and then add more stitches at the outside edges.
The piece widens as the rows are added.
Keep repeating until you get the pizza to the desired size.
The final result should be a triangle, but the crust should be thicker at the wide end.
You can create a small piece as an inconspicuous add-on or a bigger piece as a novelty headband.
Step 5: Make the Pizza Crust
The wide end of the triangle is the crust.
Change to a golden brown or darker yellow yarn.
Repeat a couple of rows at the top edge.
To create a slightly thicker crust, add an extra layer.
To add additional dimension, stuff the crust lightly before closing.
Don’t overstuff it.
Fiberfill does not have to be used in large quantities as it provides the rounded look to the crust.
Step 6: Add the Cheese Layer
To make a melted cheese area use cream or yellow yarn.
A small triangle could be crocheted and sewn onto the top of the main slice.
Or embroider a couple of wavy lines to imply some melted cheese.
Don’t be concerned if all the cheese edges are not straight.
If the pizza is handmade, try to keep the edges slightly irregular for a more natural appearance.

Step 7: Add Pepperoni
Crocheting pepperoni is one of the simplest of toppling.
Create multiple little red circles.
Begin with a magic ring and make some increased rounds.
Unfasten off and leave a yarn tail.
Sew the circles on the pizza.
If you’re going for a more whimsical look, use various sizes.
Three large pieces of pepperoni may be arranged to form a triangle shape, or a number of smaller pieces of pepperoni may be placed on the slice.
Step 8: Add More Toppings
Now it’s time to add toppings to the pizza.
Try adding:
- Mushrooms
- Green peppers
- Black olives
- Sausage
- Onions
- Tiny tomato pieces
- Fresh herbs
- Small crochet pieces or embroidery.
Embroidery can be quicker than making individual pieces for small amounts of fillings.
When used on a small child, sew all details securely.
Step 9: Add the Pizza Slice to the Headband
Place the finished pizza piece at the middle or at the side of the pizza.
Pin it in place.
If you can, try the headband on before you sew it together.
Take care not to cut the slice too far forward or backward.
When you are satisfied with the placement, sew it in tightly to the crocheted headband.
Do multiple laps around the base.
Under normal usage the pizza should remain secure.
Step 10: Add Final Details
Take a close look at the finished headband.
Embroidered cheese lines, sauce details or herb-like stitches can be added.
Some basic finishing details will enhance the dimensionality of the slice.
To add a bit more light, you could put a little decorative yarn into the cheese.
Do not use anything that may scratch the child’s skin or come off easily.

Creative Pizza Styles
Not all headbands need to be in the shape of a classic pepperoni pizza.
Try different themes.
Cheese Pizza
Use yellow and cream yarn, no topping.
Pepperoni Pizza
For a classic appearance, add a few red circles.
Veggie Pizza
Utilize green peppers, mushrooms, onions and olives.
Rainbow Pizza
Serve bright-coloured toppings.
Dessert Pizza
Make a yummy sweet version with pink, brown and cream yarn.
It’s a great activity for a themed birthday party.
Fun Ways to Use the Pizza Headband
This item is an accessory that can be worn on a daily basis.
Kids can wear it for:
- Birthday parties
- Pizza-themed parties
- School events
- Costume days
- Dress-up games
- Family photos
- Food-themed celebrations
- Halloween costumes
- Playdates
- Homemade photo shoots
- Can also be used for a fun pretend play kitchen.
Complete the play food theme with a crochet pizza slice, apron, or chef hat.
Pro Tip
Before permanently sewing the pizza slice onto the headband, pin it in place and let your child try it on. The final accessory can really look better when modified by a slight angle.
Common problems and easy fixes
The pizza triangle seems to be twisted.
See your increases on both sides. If the increase is not even, then the triangle will move.
The pizza slice continues to flap forwards.
Could be too bulky or weighty for the headband. Reduce the size of the slice or reinforce the point of attachment.
The headband is too tight
To make the crochet cover longer use a slightly longer headband base or just add a bit more length.
The toppings continue to flow
Use more than one stitch to hold the sews down, don’t just use one.
The crust is flat in appearance.
While closing it, stuff in a little fiberfill.
More Customization Ideas
After you’ve made one pizza band, you can try out the shape.
Try making:
- mini pizza slice
- oversized slice
- Two small slices
- pizza-and-cheese design
- heart-shaped pizza
- cartoon style pizza with slices of various colors.
- A matching pizza hat bandana
You might even make a mini collection of food-themed headbands with the word burger, strawberry, cupcake or taco! This is where the project will get really fun. With one simple construction there can be dozens of ideas.
Final Thoughts
You don’t have to take a crochet pizza headband seriously. It’s a colorful, playful and wearable party, photos or everyday wear and tear.
While the basic structure is easy to create, the toppings will allow you to make it your own when you’re done. Try making a classic pepperoni pizza; a colorful veggie pizza or let your child pick all the toppings.
Place the idea into a matching set with a crochet pizza toy, apron or chef hat. This crochet pizza headband is a good pick if you’re looking for a fun accessory to add a little handmade flair to a kid’s look. A small project, but with a lot of character.