Cute Crochet Unicorn Amigurumi Pattern
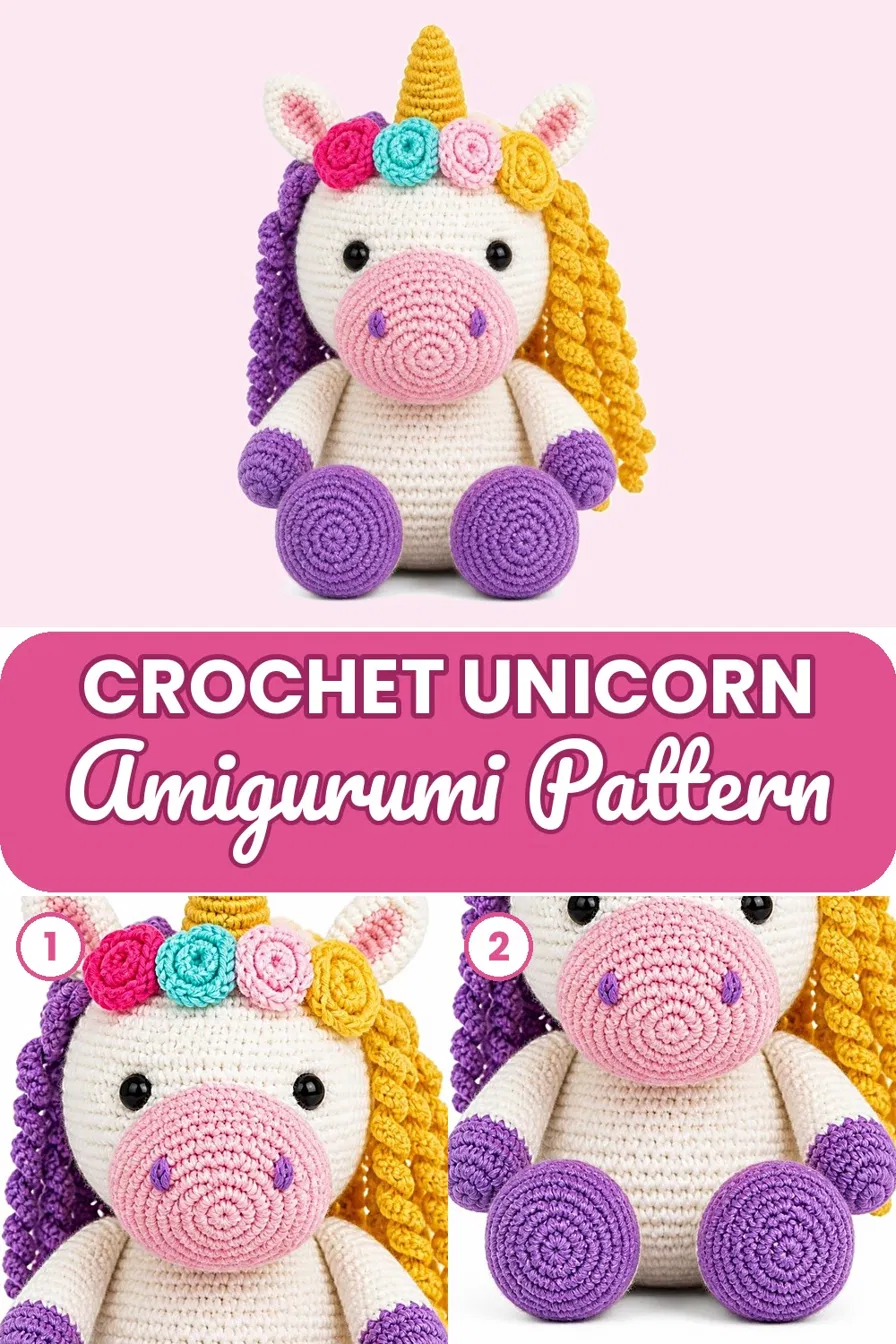
Creamy white cotton, plump purple feet, and a crown of tiny roses give the Cute Crochet Unicorn Pattern a storybook look, and the finished plush sits happily on a shelf, a bed, or a nursery corner as a cuddly keepsake.
A round head, a chunky seated body, a pink muzzle with tiny purple nostrils, and a mane split between purple and mustard curls make the amigurumi unicorn instantly recognisable. Every piece uses simple single crochet, so a patient beginner can finish it comfortably, while the rosette flowers add a rewarding challenge. Two-tone colours keep the project playful, and it requires no complicated colourwork.
Pattern Overview
Finished size is about 20 to 22 cm (8 inches) seated, worked in DK cotton with a 3.0 mm hook. Tight stitches keep the stuffing hidden and the shape firm.
Materials
- DK cotton yarn: cream 100 g, purple 50 g, mustard 40 g, pink 25 g
- Scraps (5 g each): hot pink, turquoise, light pink
- 3.0 mm crochet hook
- 12 mm black safety eyes, 1 pair
- Polyester fiberfill
- Yarn needle, stitch markers, scissors
Abbreviations: MR = magic ring, sc = single crochet, inc = 2 sc in one stitch, dec = sc two together, BLO = back loop only, hdc = half double crochet, dc = double crochet, sl st = slip stitch, FO = fasten off, ch = chain. Work every round in a continuous spiral and mark the first stitch.
Special Techniques
- Magic ring: Every piece starts with a tight centre that leaves no hole.
- Colour change: Switch yarn during the last pull-through of the final stitch of a round for a clean join.
- BLO round: Working the back loop only creates a neat edge where the foot colour meets the leg colour.
- Embroidered nostrils: Two or three short stitches in purple add the finishing facial detail.
- Rolled rosettes: A long ruffled strip curls into a flower once it is wound and sewn at the base.
Time Box
- Prep: 30 minutes to gather yarn, label colour bags, and set up markers
- Stitching: 8 to 10 hours across all parts
- Finishing: 1.5 hours for stuffing, sewing, and embroidery
Crochet Unicorn Pattern Instructions
Step 1: Magic Ring
Make a loop, pull the yarn through, and work 6 sc inside it. Pull the tail tight to close.
 Step 2: Head (cream)

- R1: MR 6
- R2: inc x6 (12)
- R3: (1 sc, inc) x6 (18)
- R4: (2 sc, inc) x6 (24)
- R5: (3 sc, inc) x6 (30)
- R6: (4 sc, inc) x6 (36)
- R7: (5 sc, inc) x6 (42)
- R8: (6 sc, inc) x6 (48)
- R9: (7 sc, inc) x6 (54)
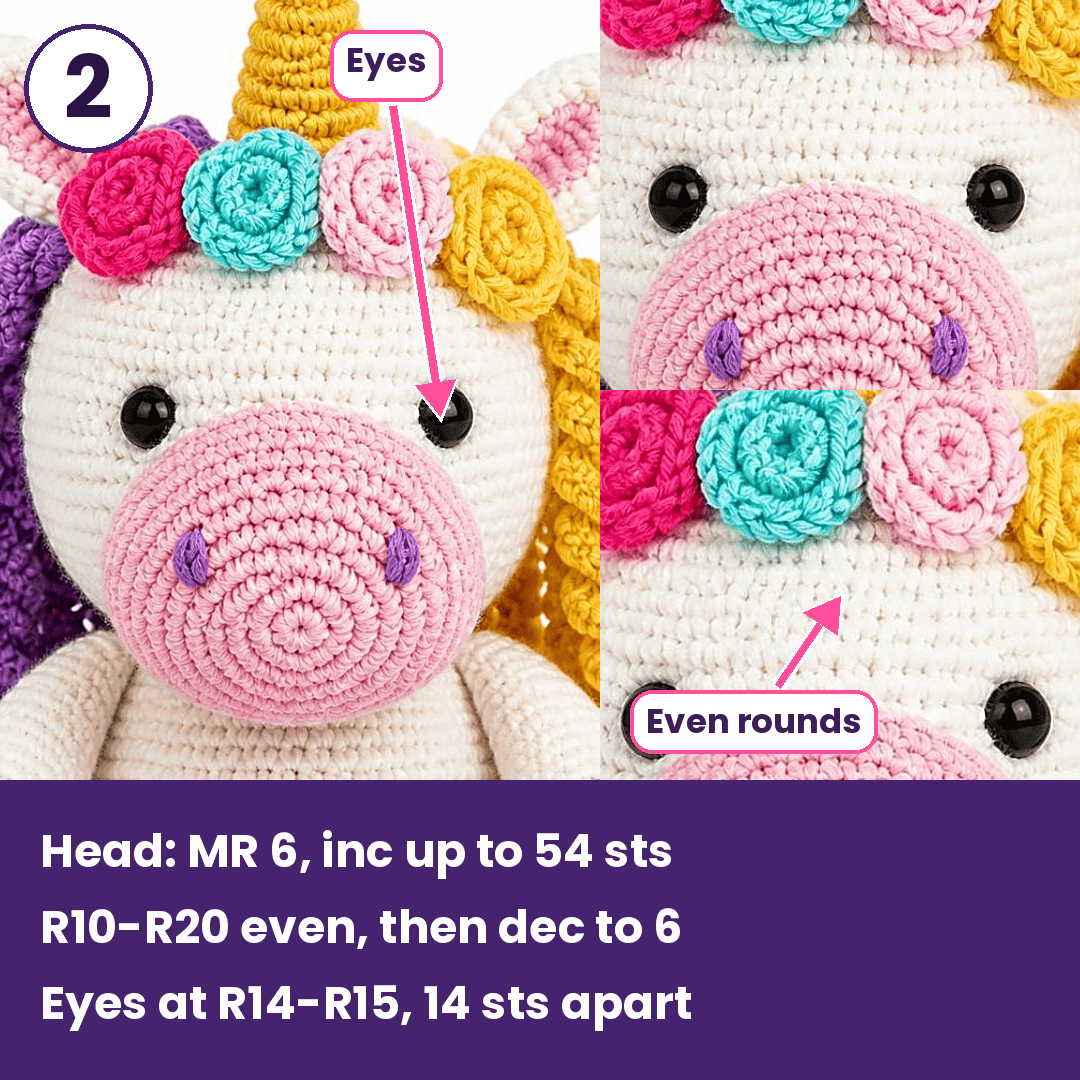
- R10–R20: sc around (54)
- R21: (7 sc, dec) x6 (48)
- R22: (6 sc, dec) x6 (42)
- R23: (5 sc, dec) x6 (36)
- R24: (4 sc, dec) x6 (30)
Push the safety eyes in between R14 and R15, about 14 stitches apart, then stuff firmly.
- R25: (3 sc, dec) x6 (24)
- R26: (2 sc, dec) x6 (18)
- R27: (1 sc, dec) x6 (12)
- R28: dec x6 (6). FO and close.
Eyes placed too early are hard to move later, so test the position with pins first.
Step 3: Muzzle (pink)
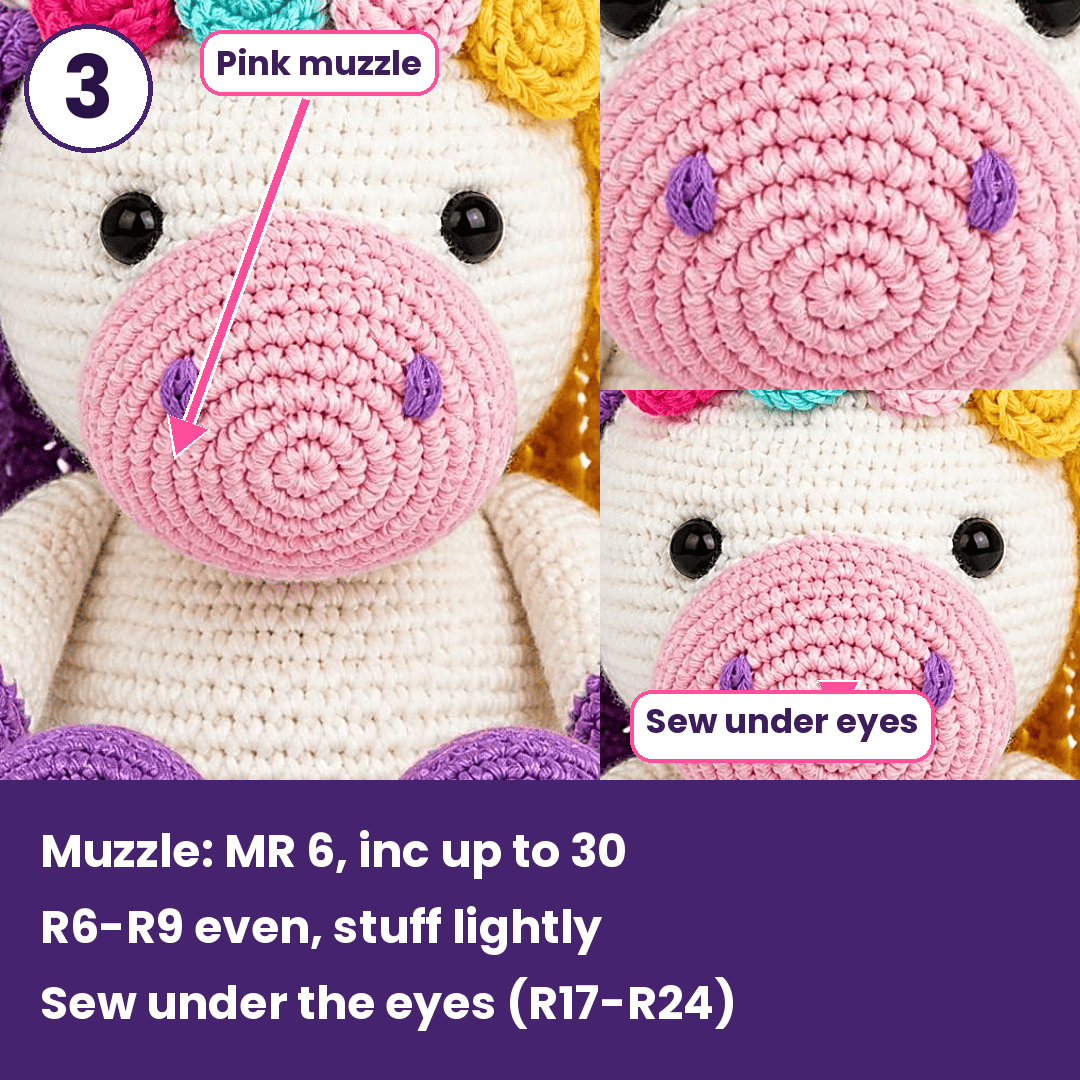
- R1: MR 6
- R2: inc x6 (12)
- R3: (1 sc, inc) x6 (18)
- R4: (2 sc, inc) x6 (24)
- R5: (3 sc, inc) x6 (30)
- R6–R9: sc around (30)
Sl st, FO, and leave a long tail. Stuff lightly, then sew the muzzle below and between the eyes over R17–R24.
Pro-Tip: Pin the muzzle on and check it from the front before sewing. A muzzle that sits half a round too high makes the face look surprised.
Step 4: Body (cream)
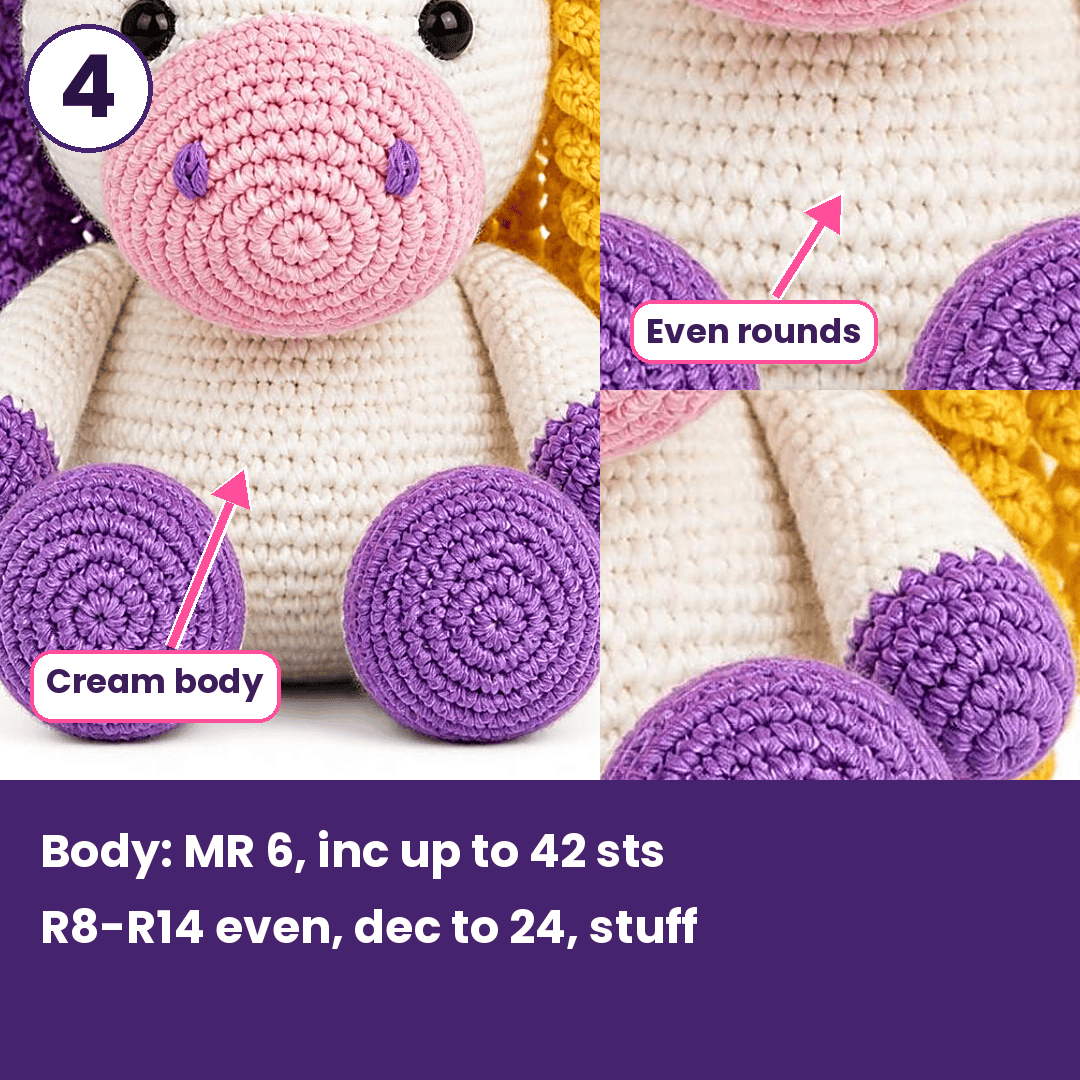
- R1: MR 6
- R2: inc x6 (12)
- R3: (1 sc, inc) x6 (18)
- R4: (2 sc, inc) x6 (24)
- R5: (3 sc, inc) x6 (30)
- R6: (4 sc, inc) x6 (36)
- R7: (5 sc, inc) x6 (42)
- R8–R14: sc around (42)
- R15: (5 sc, dec) x6 (36)
- R16–R17: sc around (36)
- R18: (4 sc, dec) x6 (30)
- R19–R21: sc around (30)
- R22: (3 sc, dec) x6 (24)
Stuff firmly, sl st, FO, and leave a long tail.
Step 5: Legs (make 2)
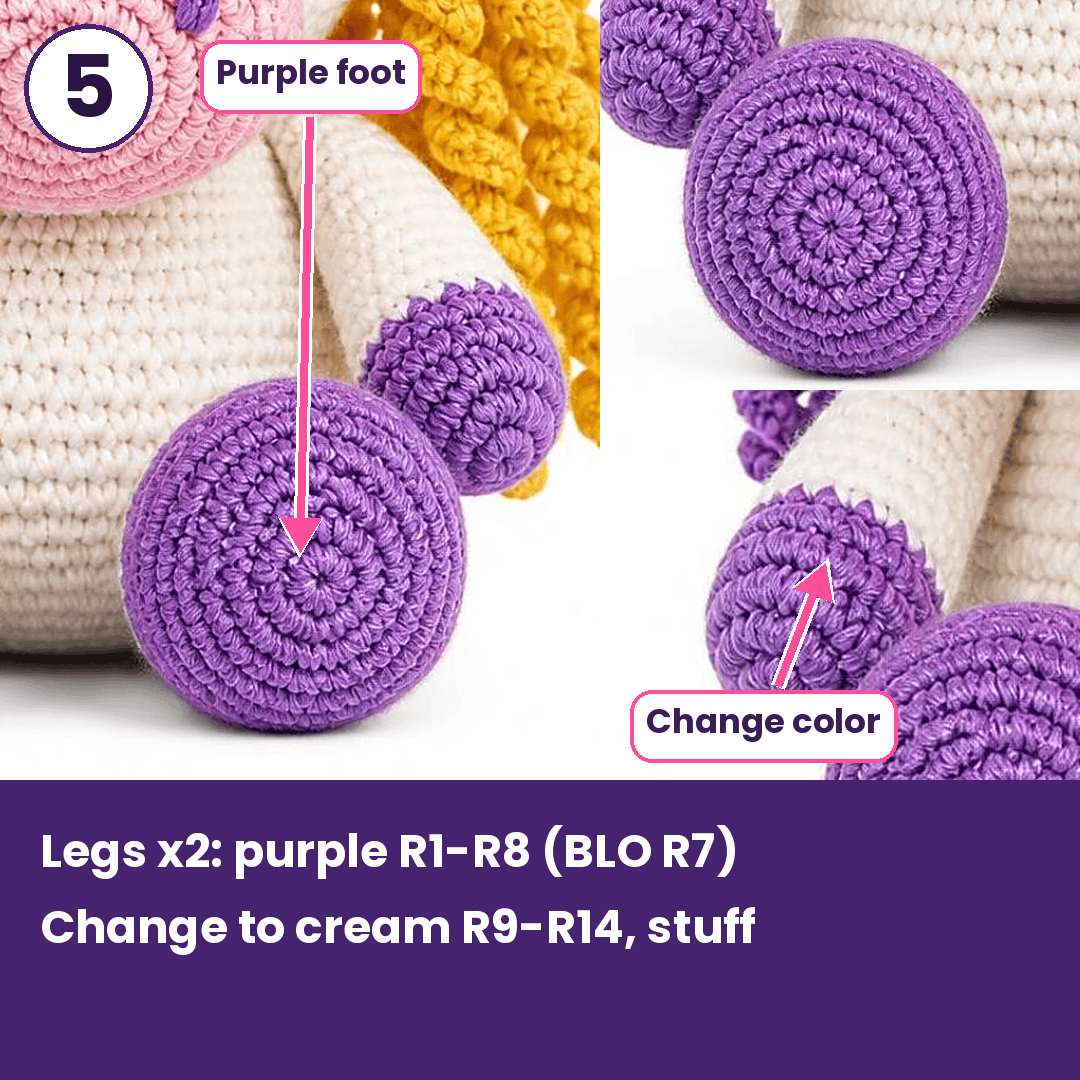
Start with purple:
- R1: MR 6
- R2: inc x6 (12)
- R3: (1 sc, inc) x6 (18)
- R4: (2 sc, inc) x6 (24)
- R5: (3 sc, inc) x6 (30)
- R6: (4 sc, inc) x6 (36)
- R7: BLO sc around (36)
- R8: sc around (36)
Change to cream:
- R9–R11: sc around (36)
- R12: (4 sc, dec) x6 (30)
- R13–R14: sc around (30)
Stuff, flatten the top, and FO with a long tail.
Step 6: Arms (make 2)
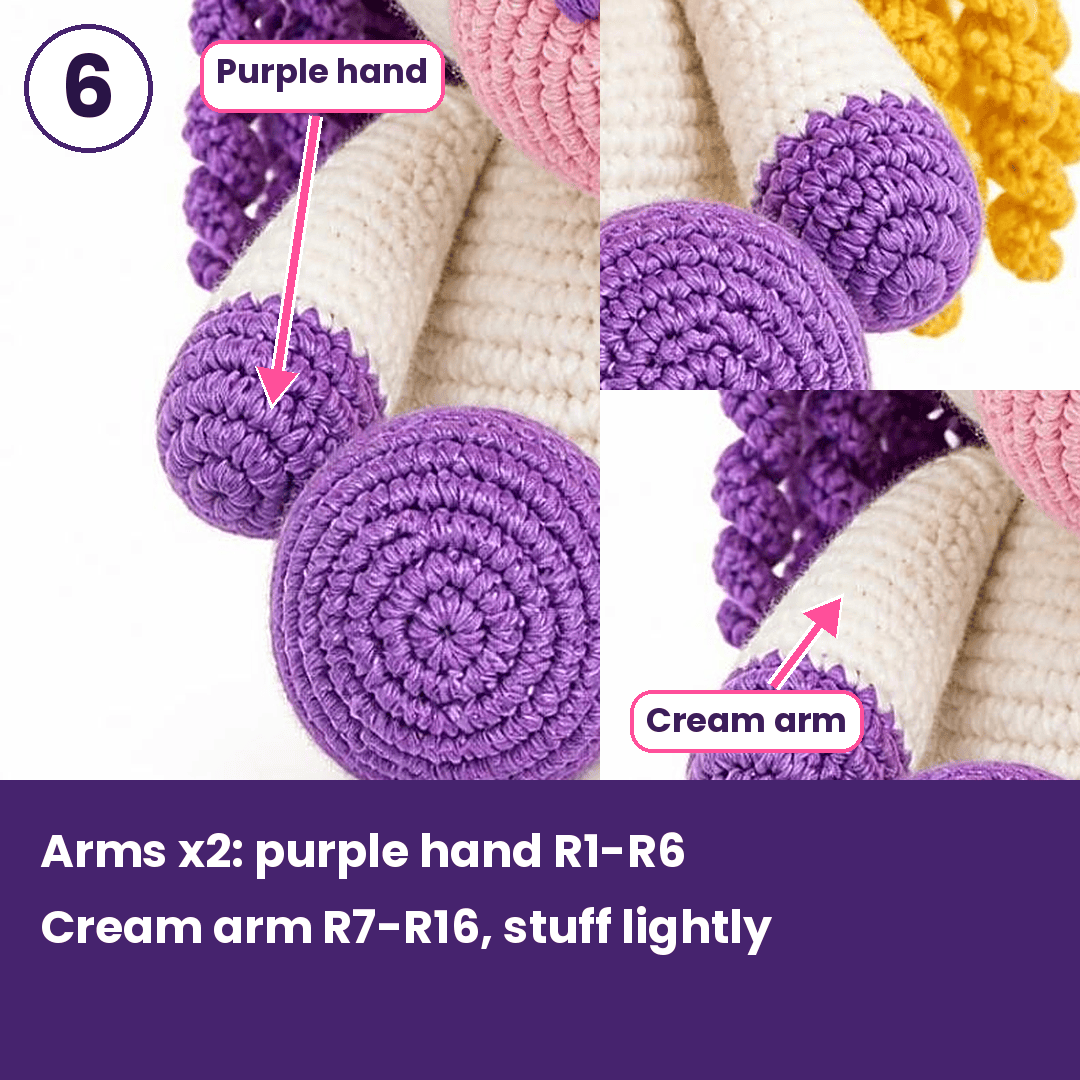
Start with purple:
- R1: MR 6
- R2: inc x6 (12)
- R3: (1 sc, inc) x6 (18)
- R4–R6: sc around (18)
Change to cream:
- R7–R16: sc around (18)
Stuff lightly and FO with a long tail.
Step 7: Ears (make 2) and Inner Pieces
Ear (cream):
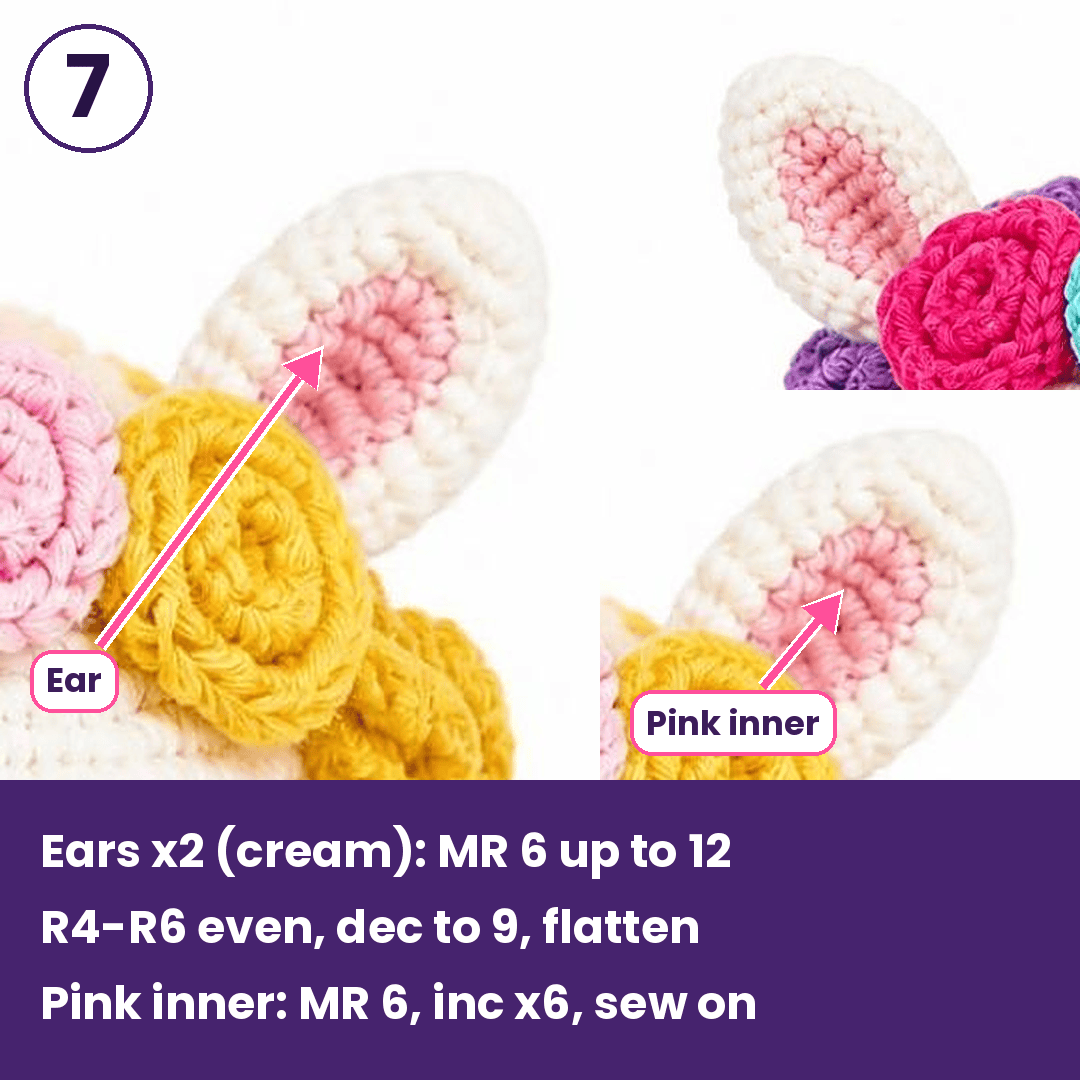
- R1: MR 6
- R2: (1 sc, inc) x3 (9)
- R3: (2 sc, inc) x3 (12)
- R4–R6: sc around (12)
- R7: (2 sc, dec) x3 (9)
Leave unstuffed, flatten, and FO with a long tail.
Pink inner: MR 6, inc x6 (12), sl st, FO. Sew onto the front of each ear.
Step 8: Horn (mustard)

- R1: MR 5
- R2–R3: sc around (5)
- R4, 6, 8, 10, 12, 14, 16: sc around with 1 inc (adds one stitch each round, reaching 12)
- R5, 7, 9, 11, 13, 15, 17: sc around
Stuff, FO, and sew between the ears.
Step 9: Rosette Flowers (make 4)
Colours: hot pink, turquoise, light pink, mustard.

- Ch 31.
- Sc in the 2nd ch from the hook and the next 3 ch (4 sc).
- Hdc in the next 4 ch.
- 2 dc in each of the remaining 22 ch.
- FO with a long tail.
Roll the strip tightly from the sc end and sew the base so the spiral holds.
Pro-Tip: Keep the roll snug at the centre and let the ruffled edge loosen naturally. A tight outer edge flattens the petals.
Step 10: Curly Hair
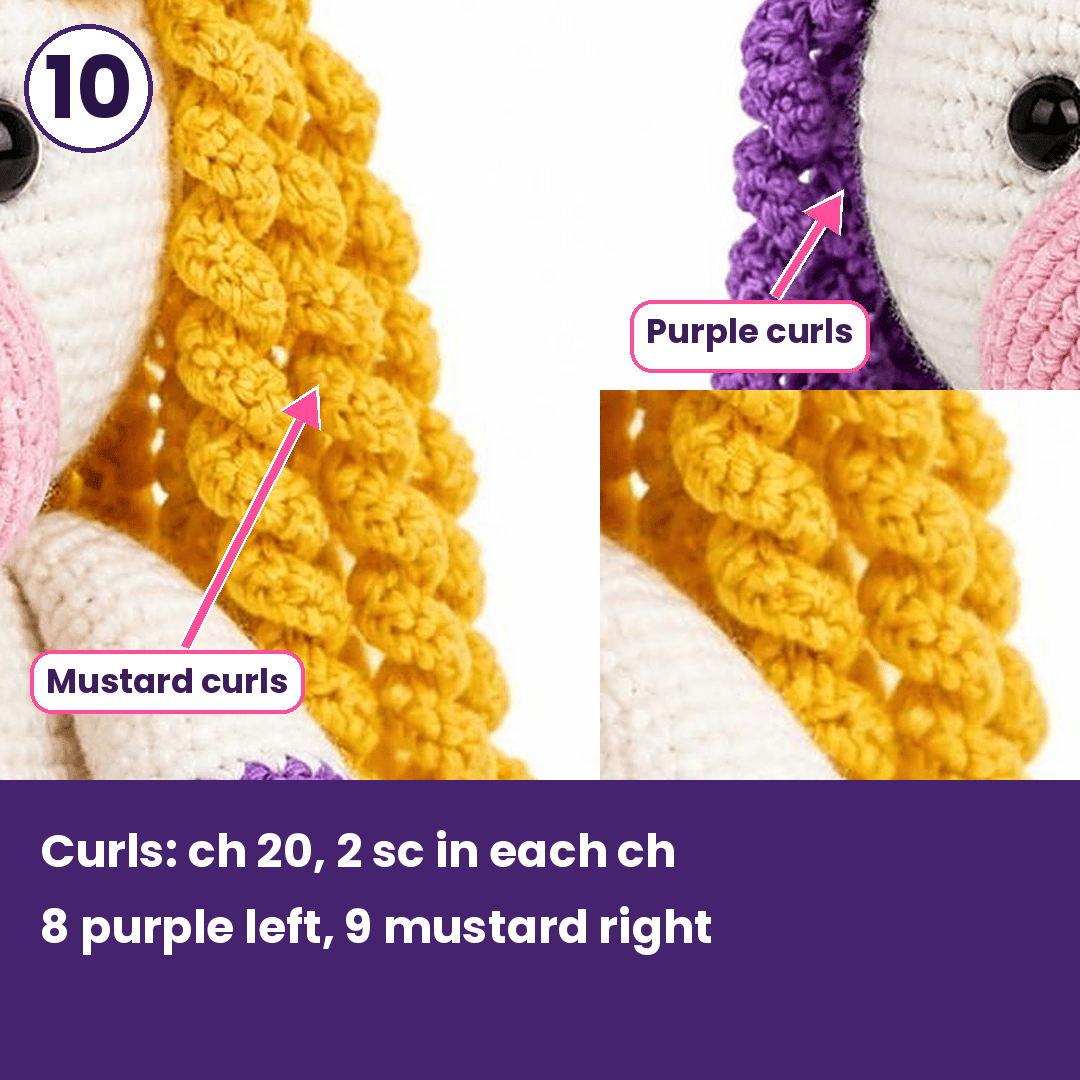
- Ch 20 (vary between 15 and 25 for different lengths).
- 2 sc in the 2nd ch from the hook, then 2 sc in every ch across.
- FO. The strip twists into a spiral on its own.
Make about 8 purple curls for the left side and 9 mustard curls for the right side.
Assembly
Step 11: Putting It All Together
- Embroider two small purple nostrils on the muzzle with 2–3 short stitches each.
- Sew the head to the body opening.
- Attach the legs at the bottom front, purple feet facing forward.
- Sew the arms at the shoulders so they hang down.
- Attach the ears, horn, then the flowers in a row across the front of the head.
- Sew the curls along the sides and back of the head.
- Weave all tails inside the body.
Common Mistakes to Avoid
- Skipping the stitch marker, which leads to lost rounds and lopsided pieces
- Stuffing in a few big clumps instead of small tufts, which leaves lumps
- Setting the eyes too close together, which shrinks the face
- Cutting curl strands too short, so the mane looks thin
- Sewing the legs at an angle, which makes the plush tip forward
Uses and Benefits
Prop the unicorn on a bookshelf, tuck it into a toddler’s arms, or perch it on top of a gift basket for a birthday surprise. Cotton yarn stays soft but sturdy, and tight stitches keep the stuffing safely inside. Making it also builds useful skills like colour changes, shaping, and neat sewing, so each finished toy improves the next one.
Beginner Tips
- Pick a light cream yarn so stitches are easy to see
- Count stitches at the end of every round
- Stuff before the opening gets too small
- Sew each part on with pins first
- Weave tails in as you go to avoid a messy finish
Personalization Ideas
Color Swaps
Try pastel mint and lilac for a dreamy version, or black and gold for a bolder look.
Mane Styles
Use a single rainbow of curls, or cut the strands shorter for a playful bob.
Extra Details
Add a tiny star charm to the horn, or stitch a heart on the chest in pink.
Size Changes
Switch to chunky yarn and a 5.0 mm hook for a larger cuddle buddy, or use fingering yarn for a mini keepsake.
Gift-Giving Ideas (Bonus Section)
Wrap the plush in tissue paper with a ribbon at its neck, or tuck a handwritten care card under one arm. A matching mini rosette clipped to a hair tie turns the unicorn into a pair for a birthday gift.
FAQs
What yarn works best for the unicorn?
DK cotton gives crisp stitches and stays soft. Acrylic works too if you prefer easy washing.
Is the unicorn safe for babies?
Safety eyes can detach. For children under three, embroider the eyes instead.
How do I keep the curls from flattening?
Wash gently and reshape them with your fingers while damp.
Can I make it without the flowers?
Yes. Skip Step 9 and sew the horn between the ears for a simpler look.
Ready for Cuddles
Your rainbow-crowned friend now has a face, a mane, and a seat of its own. Each round of cream, purple, and mustard turns plain yarn into a toy that begs to be hugged. Place it where it can be seen, and start planning the next colour combination.