Free Crochet Penguin Amigurumi Pattern Winter Plush
Soft charcoal wings, a snowy belly, and a tiny orange beak give the Free Crochet Penguin Amigurumi Pattern Winter Plush its cuddly charm. Moreover, a chocolate beanie and fringed scarf turn the little bird into a shelf friend, a gift, or a handmade winter decoration.
Cold-weather crafting feels better with a chubby companion on your lap. That is why our crochet penguin amigurumi pattern builds the body, head, wings, and feet in simple rounds. Then it dresses the finished toy in a knitted-look beanie and scarf. Best of all, the ribbed brim and fringe set the design apart, while beginner-friendly stitches keep every step relaxed.

Crochet Penguin Amigurumi Pattern Overview
The finished penguin stands about 9 inches (23 cm) tall without the hat. Besides the flat scarf, every piece is worked in continuous spiral rounds. First, dark gray covers the body, head and wings. Next, white forms the belly and face patch, and finally mustard orange makes the beak and feet.
Materials for the Crochet Penguin Amigurumi Pattern
- DK or light worsted cotton yarn in dark gray, white, mustard orange and chocolate brown
- 3.0 mm crochet hook
- 9 mm black safety eyes, one pair
- Polyester fiberfill
- Stitch markers (2 or 3)
- Yarn needle
- Small scissors
- Optional: a small piece of cardboard for the pom pom
If you want to compare yarn weights before buying, the Craft Yarn Council yarn weight standards show how DK and worsted differ. As a result, you can swap brands with confidence.
Special Techniques
- Magic ring
- Single crochet (sc), increase (inc) and decrease (dec)
- Back loop only (BLO) for the ribbed hat brim
- Whip stitch seam for joining pieces
- Fringe knotting for the scarf
Time Box
- Prep and yarn sorting: 15 minutes
- Stitching all pieces: 5 to 6 hours
- Stuffing, assembly and dressing: 1 hour
Crochet Penguin Amigurumi Pattern Instructions
1. Body (dark gray)
First, begin at the bottom.
- R1: 6 sc in magic ring (6)
- R2: inc in each stitch (12)
- R3: (1 sc, inc) x6 (18)
- R4: (2 sc, inc) x6 (24)
- R5: (3 sc, inc) x6 (30)
- R6: (4 sc, inc) x6 (36)
- R7: (5 sc, inc) x6 (42)
- R8 to R18: sc around (42)
- R19: (5 sc, dec) x6 (36)
- R20: sc around (36)
- R21: (4 sc, dec) x6 (30)
- R22: sc around (30)
- R23: (3 sc, dec) x6 (24)
Afterward, stuff firmly, finish off and leave a long tail.
Pro-Tip: Stuff in small pinches rather than big handfuls. Consequently, the belly curve stays smooth and no lumps show through the stitches.
2. Belly Patch (white)
Ch 16.
- R1: 2 sc in 2nd ch from hook, 13 sc, 4 sc in the last ch, then 13 sc along the other side (32)
- R2: inc, 14 sc, inc x2, 14 sc, inc (36)
- R3: sc around (36)
- R4: inc, 16 sc, inc x2, 16 sc, inc (40)
- R5: sc around (40)
Then slip stitch, finish off and leave a tail for sewing. Light tension matters here because it keeps the white patch flat instead of cupped.
3. Head (dark gray)
- R1: 6 sc in magic ring (6)
- R2: inc in each stitch (12)
- R3: (1 sc, inc) x6 (18)
- R4: (2 sc, inc) x6 (24)
- R5: (3 sc, inc) x6 (30)
- R6: (4 sc, inc) x6 (36)
- R7 to R13: sc around (36)
- R14: (4 sc, dec) x6 (30)
- R15: (3 sc, dec) x6 (24)
Before stuffing, insert the safety eyes between R9 and R10, about 7 stitches apart. After that, stuff the head and continue:
- R16: (2 sc, dec) x6 (18)
- R17: (1 sc, dec) x6 (12)
- R18: dec x6 (6)
Finally, close the hole and weave in the end.
4. Face Patch (white)
Ch 8.
- R1: 2 sc in 2nd ch from hook, 5 sc, 4 sc in the last ch, then 5 sc along the other side (16)
- R2: inc, 6 sc, inc x2, 6 sc, inc (20)
Next, sew the patch to the lower half of the face so the gray forms a cap on top.
5. Beak (orange)
- R1: 6 sc in magic ring (6)
- R2: (1 sc, inc) x3 (9)
- R3 and R4: sc around (9)
However, do not stuff the beak firmly. Instead, flatten it slightly and sew it between the eyes, a little below them.
6. Wings (make 2, dark gray)
- R1: 6 sc in magic ring (6)
- R2: (1 sc, inc) x3 (9)
- R3: (2 sc, inc) x3 (12)
- R4 to R9: sc around (12)
- R10: (2 sc, dec) x3 (9)
- R11 to R13: sc around (9)
Then stuff each wing very lightly and leave the tail for sewing.
7. Feet (make 2, orange)
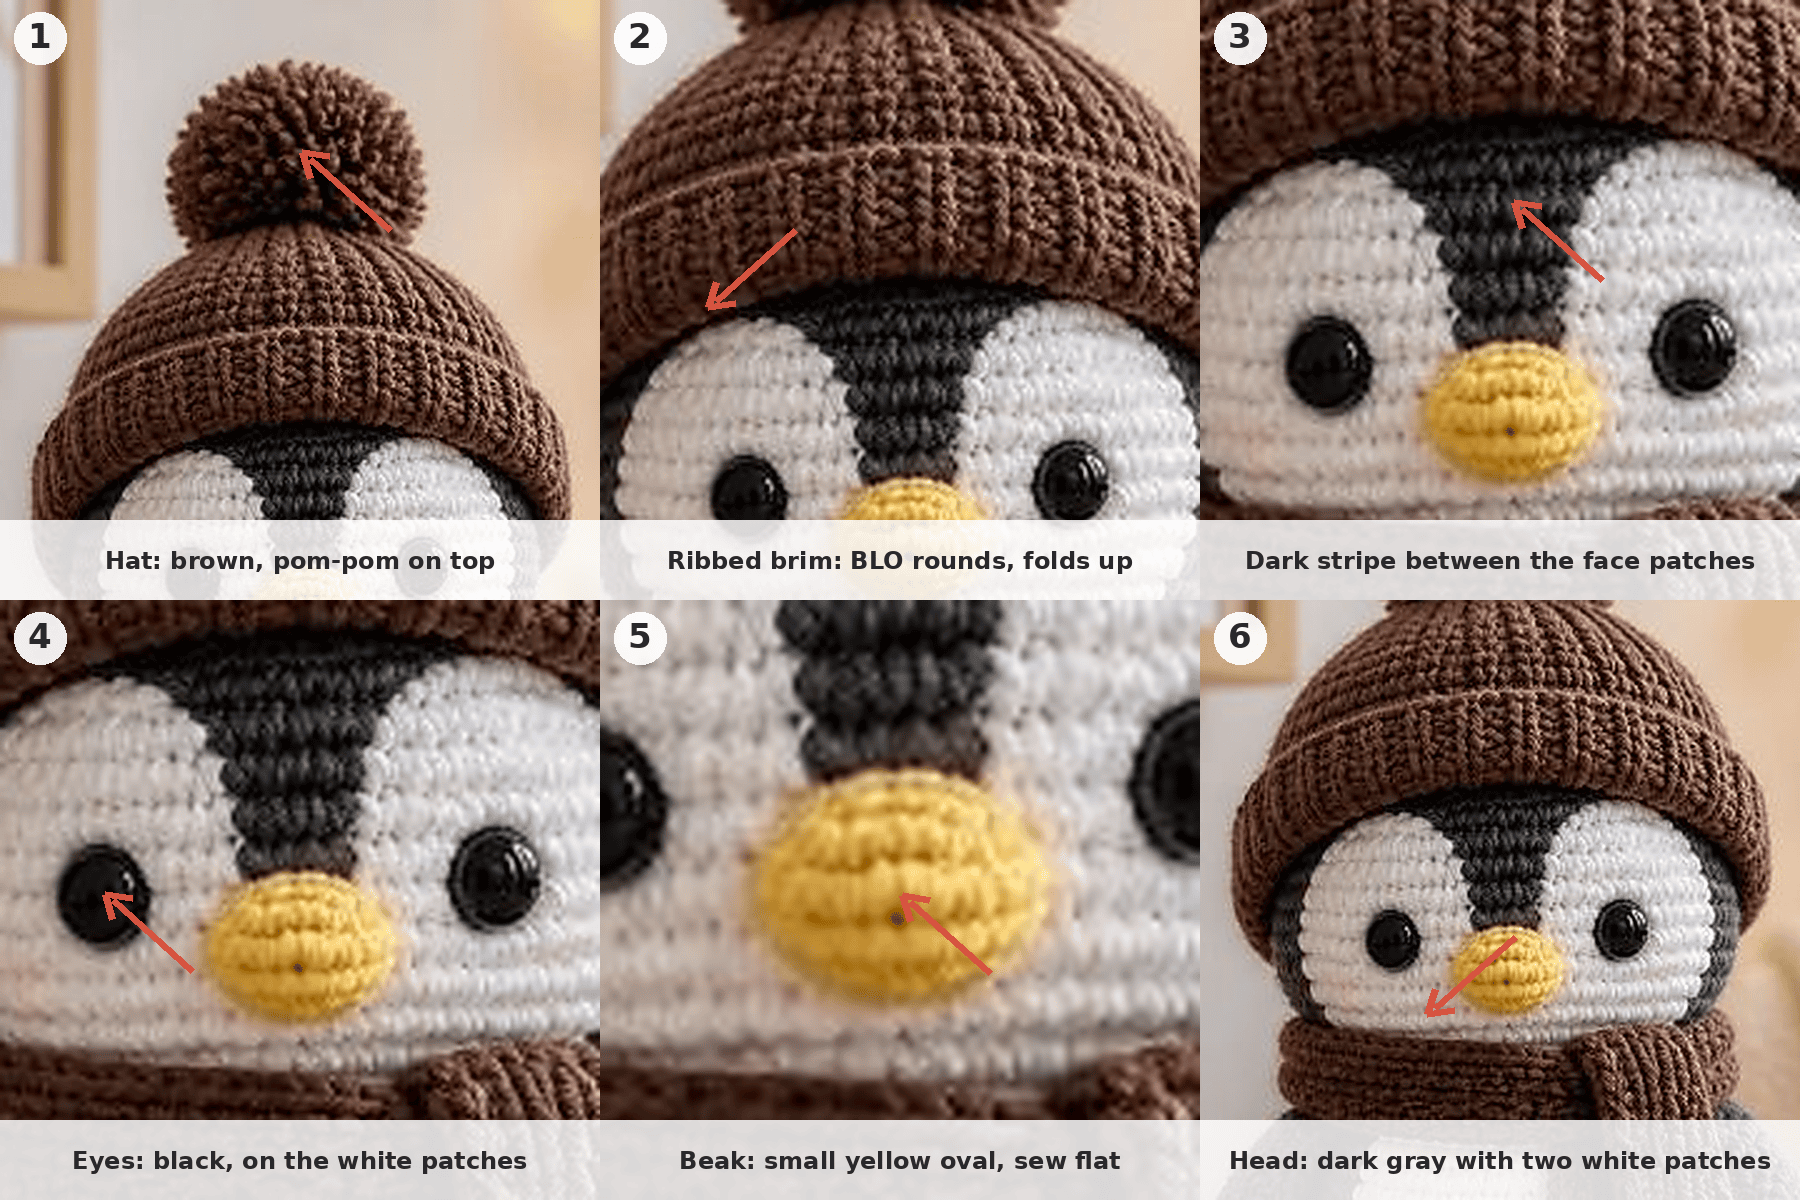
- R1: 6 sc in magic ring (6)
- R2: inc in each stitch (12)
- R3: (1 sc, inc) x6 (18)
- R4 and R5: sc around (18)
- R6: (1 sc, dec) x6 (12)
After that, flatten the piece and sc across the opening to close. Finally, pinch two short yarn stitches along the front edge to shape the toes.
Pro-Tip: Clip a marker into the first stitch of every round on the feet and beak. Otherwise, tiny pieces make it easy to lose your place.
8. Beanie (chocolate brown)
- R1: 6 sc in magic ring (6)
- R2: inc in each stitch (12)
- R3: (1 sc, inc) x6 (18)
- R4: (2 sc, inc) x6 (24)
- R5: (3 sc, inc) x6 (30)
- R6: (4 sc, inc) x6 (36)
- R7 to R11: sc around (36)
- R12 to R14: sc in back loop only around (36)
Next, slip stitch, finish off and fold the ribbed brim up. Lastly, make a pom pom about 1.5 inches wide and tie it to the top.
9. Scarf (chocolate brown)
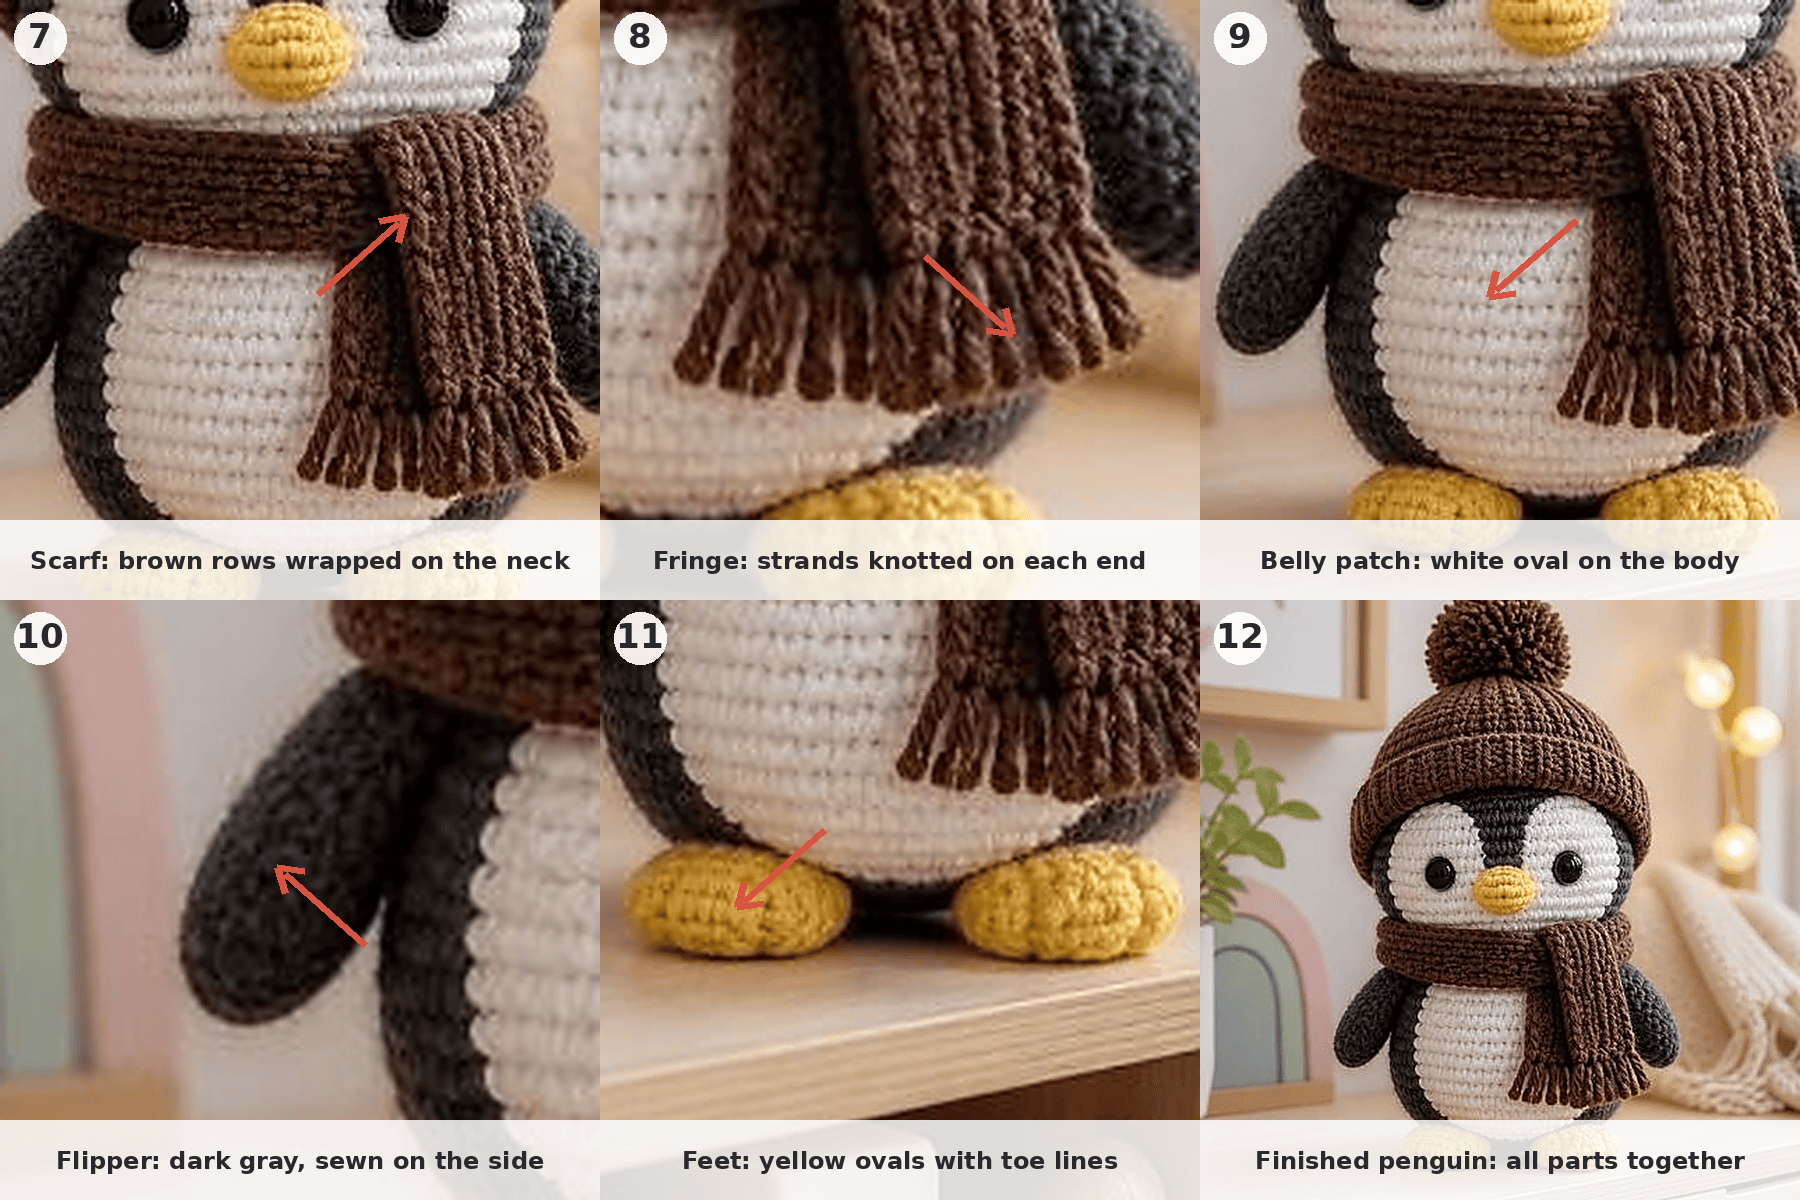
First, ch 8 and sc in the 2nd ch from hook and across (7). Then ch 1, turn and sc across, repeating until the strip measures about 14 inches. Afterward, cut 3 strands of yarn per fringe knot, attach 3 knots to each short end and trim evenly.
Assembling the Crochet Penguin Amigurumi Pattern
- First, sew the head to the top of the body, centering it over the front.
- Next, pin the belly patch to the front and stitch around the edge with small whip stitches.
- Then attach the wings at the sides, level with the top of the belly.
- After that, sew the feet under the front of the body so the toes peek forward.
- Also sew on the beak and the face patch.
- Finally, pull the beanie over the head, tack it in place and wrap the scarf around the neck to hide the seam.
Common Mistakes in the Crochet Penguin Amigurumi Pattern
- Skipping the stitch count at the end of each round often makes the body lopsided.
- Using a hook that is too large lets stuffing peek through.
- Placing the eyes after stuffing is much harder to fix, so insert them early.
- Sewing the beak too high gives the penguin a surprised look.
Uses & Benefits
A plush penguin makes a great holiday gift, a nursery shelf decoration, or a cozy desk companion during winter. Besides that, small hands love its round shape, and collectors enjoy displaying it beside other amigurumi animals. Making one also sharpens your skill at shaping spheres, joining flat pieces, and hiding seams. Because the pattern uses basic stitches, you finish with a polished toy and fresh confidence for the next project.
Beginner Tips for the Crochet Penguin Amigurumi Pattern
- First, count stitches every round until the pattern feels automatic.
- Choose smooth cotton yarn, because it keeps stitches visible and easy to read.
- Tuck the yarn tail into the first round before stuffing.
- Also take breaks and stretch your hands after each piece.
- Finally, compare both wings and feet side by side before sewing them on.
Personalizing the Crochet Penguin Amigurumi Pattern
Color Swaps
For example, try a pale blue body with a cream belly for an arctic look, or go pink for a nursery gift.
Accessory Options
Alternatively, swap the beanie for a tiny crown or add a small bow tie in place of the scarf.
Size Changes for the Crochet Penguin Amigurumi Pattern
Likewise, use chunky yarn and a 5 mm hook to make a larger cuddle-sized penguin.
Bonus Section: Washing and Cleaning Instructions
First, spot clean with a damp cloth and mild soap whenever possible. For a deeper clean, place the penguin in a mesh bag and wash gently in cool water. Then squeeze out the extra water with a towel rather than wringing, reshape the body, and let it air dry away from direct heat. Remove the beanie and scarf beforehand, because the brown dye could bleed onto the white belly.
Crochet Penguin Amigurumi Pattern FAQs
What yarn works best for the penguin?
DK cotton gives the clearest stitches and holds its shape well. However, soft acrylic also works.
Is the crochet penguin amigurumi pattern beginner-friendly?
Yes, because it relies on basic stitches and simple increases. Therefore, anyone who can work a magic ring can finish it.
Can I sell items made from the crochet penguin amigurumi pattern?
Many makers sell finished toys. Nevertheless, check the policy of the platform you sell on first.
A Cozy Little Companion
Once the scarf is wrapped and the pom-pom sits on top, your penguin is ready for its first snowy-day cuddle. Meanwhile, place it by a window, tuck it into a gift basket, or keep it close while you plan the next winter project.