Crochet Chick Frog Hat Amigurumi Pattern for Beginners
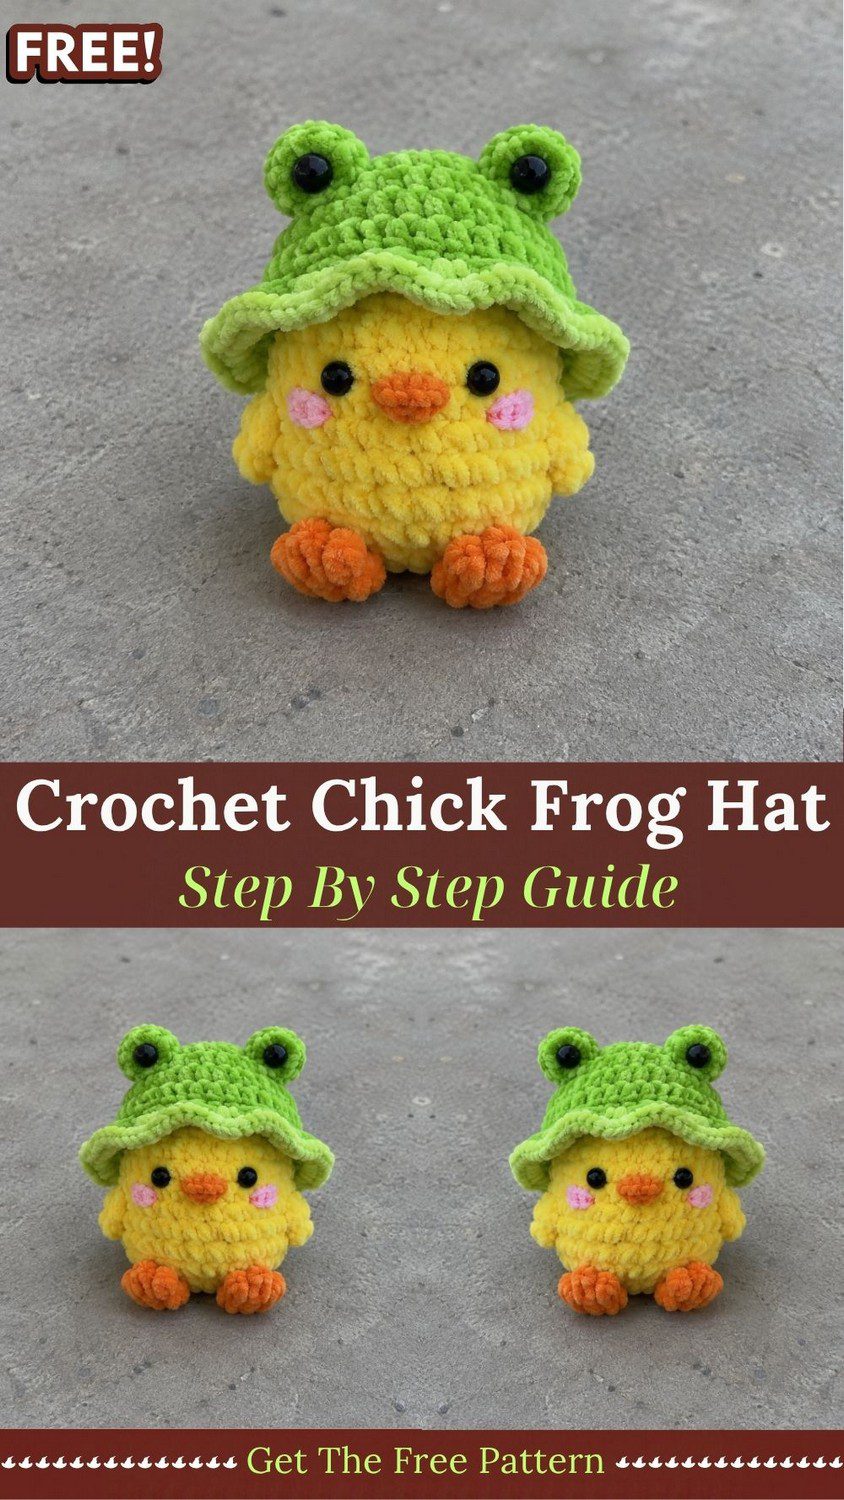
A fluffy yellow chick in a lime green frog hat wearing a very serious face: that is the crochet chick frog hat a pocket-sized toy that refuses to stay on the shelf. This crochet chick frog hat pattern is beginner-friendly and it works up in about two hours with soft chenille yarn and basic amigurumi stitches.
What happens when a baby chick borrows a frog’s hat? Pure silliness. Because velvet chenille hides every stitch flaw beginners get a plush polished toy on the first try. Only single crochet increases and decreases are needed and each piece works up in minutes. As a result the chick looks far fancier than a beginner pattern would suggest.
Crochet Chick Frog Hat Overview
Every piece of this project begins the same way: a small circle that grows round by round. First, the plump yellow body gets worked and stuffed. Next come two tiny wings and a pair of chunky orange feet. Then the lime green hat takes shape, complete with a wavy brim and two frog eyes. Finally, a few minutes of sewing bring everything together. With a 5 mm hook and super bulky velvet chenille, the finished chick stands about 4 inches (10 cm) tall and 3.5 inches (9 cm) wide at the brim.
Gauge does not matter much for a toy. However, tight stitches keep the stuffing hidden, so aim for about 3 sc per inch.
The pattern uses US terms:
- MR: magic ring
- sc: single crochet
- inc: two sc in one stitch
- dec: single crochet two stitches together
- sl st: slip stitch
- R: round
Numbers in brackets show the stitch count at the end of each round.
Materials for the Crochet Chick Frog Hat
- Super bulky velvet chenille yarn in sunny yellow, about 25 g
- Super bulky velvet chenille yarn in lime green, about 20 g
- Super bulky velvet chenille yarn in orange, about 8 g
- 5.0 mm crochet hook
- Four 8 mm black safety eyes
- Two 10 mm pink felt circles, plus fabric glue or a needle and thread
- Polyfill stuffing
- Large blunt yarn needle, stitch markers, and scissors
Time Box
- Prep: about 10 minutes to sort yarn and gather supplies
- Stitching: about 1 hour 15 minutes for all pieces
- Finishing: about 35 minutes for sewing and the face
In total, plan on roughly 2 hours from the first ring to the last stitch.
Special Techniques
Magic Ring
Start every piece with a magic ring. If the ring feels fiddly, try the beginner option instead: chain 2, then work 6 sc into the second chain from the hook. Either way, pull the tail tight after the first round.
Invisible Decrease
Insert the hook through the front loops of two stitches, pull up a loop, and finish like a regular sc. As a result, the decreases blend into the fuzzy surface.
Sewing With Chenille
Chenille thins out when it is pulled through fabric again and again. Therefore, cut sewing strands about 18 inches long and use a large blunt needle.
Common Mistakes to Avoid
Loose stitches cause the biggest problem. Since velvet chenille has no grip, wide stitches let the stuffing peek through, and the body loses its shape. In that case, drop down a hook size.
Skipping the stitch marker is another classic. Round pieces have no obvious start, so a missed increase goes unnoticed until the body turns lopsided. To avoid it, mark the first stitch of every round.
Eyes set too low or too far apart also change the whole mood. For example, wide-set eyes make the chick seem sleepy instead of sweet. Therefore, pin them first and adjust before closing.
Finally, overstuffing makes the body hard and stretches the stitches. Instead, add small handfuls and squeeze gently until the chick feels plump but still squishy.
Uses and Benefits of the Crochet Chick Frog Hat
Perch the chick on a desk, nestle it beside a pillow, or tuck it into an Easter basket, and it brings an instant, genuine smile. Because velvet chenille feels so soft, the toy suits gentle cuddles and bedside shelves. Moreover, each piece uses only a small amount of yarn, so leftovers find a happy home. Keep one for yourself, then stitch a few more as party favors, classroom gifts, or market stall treats, since the pattern repeats quickly.
Beginner Tips
First, practice the magic ring, or the chain 2 start, on scrap yarn before touching the body. After a few tries, the real piece feels easy.
Also, count the stitches at the end of every round. A quick count catches mistakes early, so ripping back stays small.
Meanwhile, leave tails about 8 inches long. Longer tails make sewing easier, and you will not need to re-thread the needle halfway through.
Crochet Chick Frog Hat Instructions
Work every piece in continuous rounds unless a step says otherwise.
Step 1: Body (yellow)
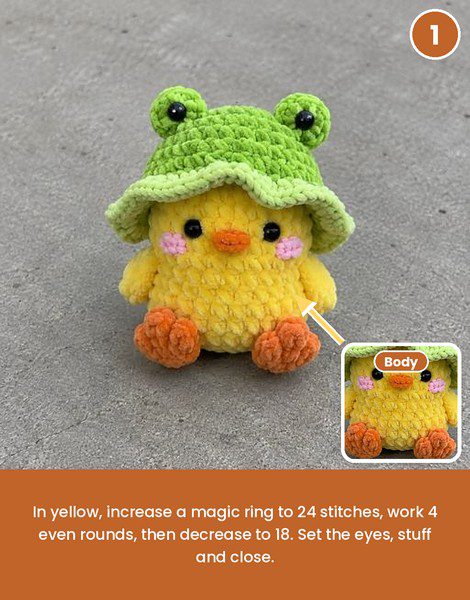
- R1: MR, 6 sc (6)
- R2: inc x6 (12)
- R3: (sc, inc) x6 (18)
- R4: (2 sc, inc) x6 (24)
- R5-8: sc around (24)
- R9: (2 sc, dec) x6 (18)
Insert the 8 mm safety eyes between R5 and R6, about 7 stitches apart. Next, stuff the body firmly. Then continue:
- R10: (sc, dec) x6 (12)
- R11: dec x6 (6)
Top up the stuffing before the last decrease round, then fasten off and close the top.
Pro Tip: Keep the stitch marker in the first stitch of R4. Because the widest round sets the body width, a correct 24 matters most.
Step 2: Wings (make 2, yellow)
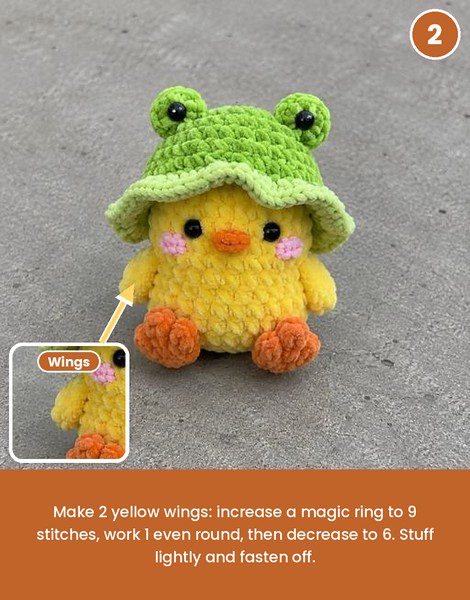
- R1: MR, 6 sc (6)
- R2: (sc, inc) x3 (9)
- R3: sc around (9)
- R4: (sc, dec) x3 (6)
Afterward, stuff lightly, fasten off, and leave a tail.
Step 3: Feet (make 2, orange)
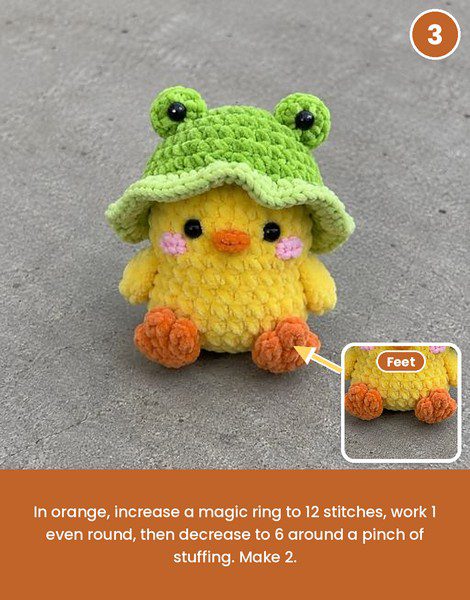
- R1: MR, 6 sc (6)
- R2: inc x6 (12)
- R3: sc around (12)
Stuff lightly, then continue:
- R4: dec x6 (6)
Lastly, fasten off and leave a tail.
Step 4: Beak and Cheeks
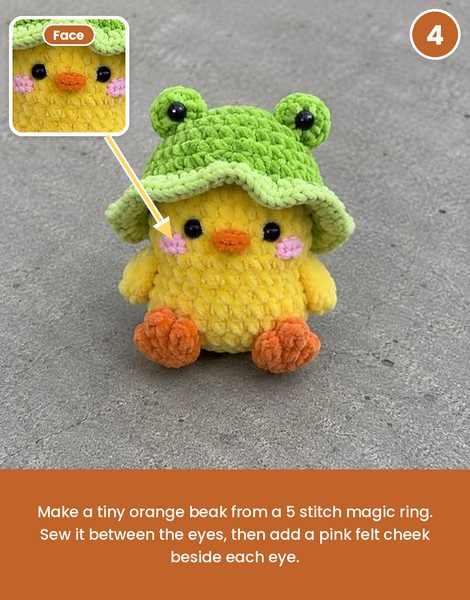
Make the beak in orange: MR, 5 sc (5). Sl st, fasten off, and leave a tail. Then cut two 10 mm circles from pink felt for the cheeks.
Step 5: Frog Hat (green)
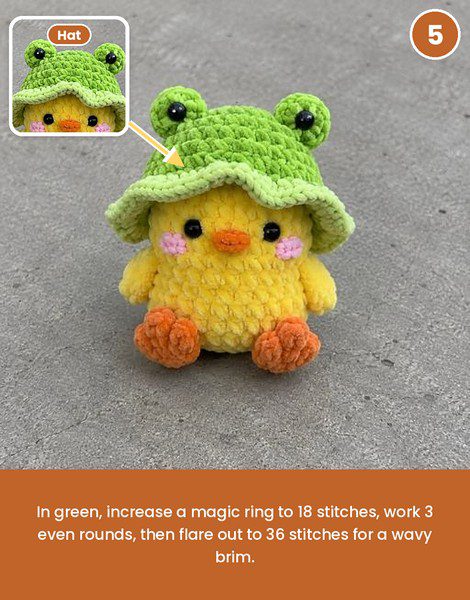
- R1: MR, 6 sc (6)
- R2: inc x6 (12)
- R3: (sc, inc) x6 (18)
- R4-6: sc around (18)
- R7: (sc, inc) x9 (27)
- R8: (2 sc, inc) x9 (36)
- R9: sc around (36)
After R9, sl st, fasten off, and weave in the tail.
Pro Tip: For a two-tone hat, switch to a lighter shade of green at R7. That way, the wavy brim stands out from the crown.
Step 6: Frog Eyes (make 2, green)
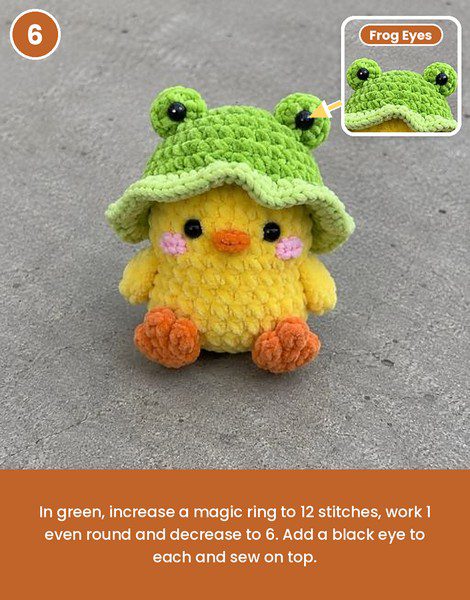
- R1: MR, 6 sc (6)
- R2: inc x6 (12)
- R3: sc around (12)
Push an 8 mm safety eye through the center of R1, then stuff lightly. After that, work R4:
- R4: dec x6 (6)
To finish, fasten off and leave a tail.
How to Assemble the Crochet Chick Frog Hat
Step 7: Putting It Together
- First, sew a wing to each side of the body at R4-R6, with the wide end up.
- Next, attach the feet to the front of the base at R2-R3, about 5 stitches apart, with the toes pointing forward.
- Then sew the beak between the eyes at R4-R5.
- After that, glue or stitch a felt cheek about 2 stitches outside each eye.
- Slip a pinch of stuffing into the hat crown, then pull the hat over the top of the body so the brim rests just above the eyes. Pin the inside of the crown at R6 to the body at R9, and sew all the way around.
- Afterward, sew the frog eyes to the top of the crown at R2-R3, about 7 stitches apart.
- Finally, weave in all remaining ends.
Personalization Ideas
Color Swaps
A pink chick with a purple hat, or a white chick in a blue frog hat, works just as well.
Hat Swaps
Instead of frog eyes, add two small ears to turn the hat into a bunny, bear, or cat version.
Size Changes
A 3.5 mm hook with worsted cotton makes a mini chick of about 2.5 inches.
Face Details
Embroider closed smiling eyes for a sleepy chick, or add a tiny bow beside the hat.
Keychain and Ornament Upgrades (Bonus Section)
Sew a small loop of yarn to the back of the hat, then clip on a key ring to turn the chick into a bag charm. Similarly, tie a ribbon through the same loop for a holiday ornament. In addition, a thin strip of felt glued under the feet keeps a desk version from sliding.
Crochet Chick Frog Hat FAQs
What yarn works best for a crochet chick frog hat?
Super bulky velvet chenille gives the plush finish. However, soft worsted cotton also works if the hook drops to 3.5 mm.
Is the crochet chick frog hat really beginner friendly?
Yes. Every piece uses only single crochet, increases, and decreases. Besides, the chain 2 start replaces the magic ring.
Are safety eyes okay for babies?
Safety eyes are not suitable for children under 3. Instead, embroider all four eyes with black yarn.
How should I clean the chick?
Spot clean with a damp cloth and mild soap, then air dry. Avoid soaking, because chenille mats easily.
One Little Chick, One Big Smile
A yellow chick in a borrowed frog hat proves that small projects can carry huge personality. Start with the body then let the hat steal the show. Before long, a whole flock could be sitting on shelves desks and gift boxes.
So grab some velvet chenille roll a ring tonight, and see how fast this crochet chick frog hat turns into your next favorite handmade gift.