Crochet Cat Armchair Caddy Pattern for Cozy Couch Days
Lost the remote again? This cat armchair caddy crochet pattern fixes that in the cutest way possible. It is made with chunky cream and dusty pink yarn, so it rests on your sofa arm like a sleepy kitten. There is a snug spot on top for your favorite mug, and three striped pockets on the side keep your remotes and phones close. Because it is soft, squishy, and simple to stitch, your couch corner ends up tidy and a little more charming.
Every couch has that one spot where the remote vanishes, the phone slides off, and the coffee sits dangerously close to the edge. Instead of fighting the chaos, give it a sleepy cat to sit on. What makes this cat armchair caddy crochet pattern special is its built-in cup basket tucked into the cat’s back. In addition, you get three roomy chenille pockets that actually hold their shape.

Cat Armchair Caddy Crochet Pattern Overview
The finished size is about 11 inches wide and 24 inches long. As a result, the panel drapes over the top of a standard armrest and hangs down the side. The cat sits on top, while the pockets stay hidden on the side. Everything is worked in single crochet, so the fabric stays dense enough to carry a mug without sagging.
Gauge: 11 sc and 8 rows = 4 inches (10 cm) with a 6 mm hook
Materials for the Cat Armchair Caddy
- Super bulky chenille yarn in cream, about 3 skeins (roughly 400 yards)
- Super bulky chenille yarn in dusty pink, about 2 skeins (roughly 270 yards)
- 6.0 mm (J-10) crochet hook
- Black embroidery thread or thin yarn for the face
- Polyester fiberfill
- Stitch markers
- Large yarn needle
- Scissors
Crochet Abbreviations (US Terms)
- MR: magic ring
- ch: chain
- sc: single crochet
- inc: two single crochets in the same stitch
- dec: single crochet two stitches together
- sl st: slip stitch
- BLO: back loop only
- rnd: round
Special Techniques for This Crochet Pattern
Three small skills carry the whole project. First, the magic ring gives every round piece a tight, hole-free center. Second, the invisible decrease keeps the head and body smooth, since bulky chenille shows every gap. Third, clean stripe changes matter on the panel and pockets. For that reason, switch colors during the last yarn-over of the final stitch in the old color.
Pro-Tip: Chenille thins out when it is pulled through fabric again and again. Therefore, cut sewing lengths no longer than 18 inches and work with several shorter strands instead of one long one.
Time Box
- Prep: about 20 minutes to sort yarn, mark the stitch counts, and check gauge
- Stitching: about 9 to 10 hours across all pieces
- Finishing: about 1.5 hours for sewing, embroidery, and weaving in ends
Altogether, the project takes near 11 to 12 hours, which is easy to spread across a long weekend.
The Cat Armchair Caddy Crochet Pattern Step by Step
Step 1: Head (Cream)
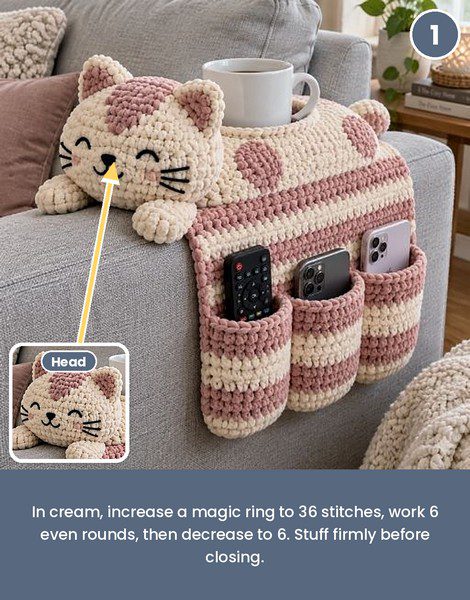
To begin, work in continuous rounds and mark the first stitch of each round.
- Rnd 1: MR, 6 sc (6)
- Rnd 2: inc in each stitch around (12)
- Rnd 3: (sc, inc) x 6 (18)
- Rnd 4: (2 sc, inc) x 6 (24)
- Rnd 5: (3 sc, inc) x 6 (30)
- Rnd 6: (4 sc, inc) x 6 (36)
- Rnds 7–12: sc around (36)
- Rnd 13: (4 sc, dec) x 6 (30)
- Rnd 14: (3 sc, dec) x 6 (24). Stuff firmly.
- Rnd 15: (2 sc, dec) x 6 (18)
- Rnd 16: (sc, dec) x 6 (12)
- Rnd 17: dec x 6 (6)
Next, fasten off, weave the tail through the front loops, and pull tight. Six even rounds give the head its wide, chubby cheeks, so resist the urge to skip one.
Step 2: Ears (Make 2, Cream)
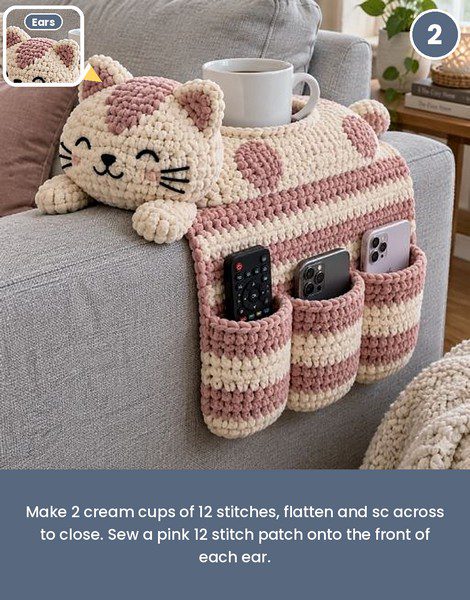
- Rnd 1: MR, 6 sc (6)
- Rnd 2: (sc, inc) x 3 (9)
- Rnd 3: (2 sc, inc) x 3 (12)
- Rnds 4–5: sc around (12)
After that, flatten the piece and sc across the opening through both layers (6 sc). Leave a long tail for sewing.
Inner ear patch (make 2, dusty pink): MR, 6 sc. Next rnd: inc in each stitch (12). Then sl st, fasten off, and sew one patch to the front of each ear.
Step 3: Face and Forehead Patch
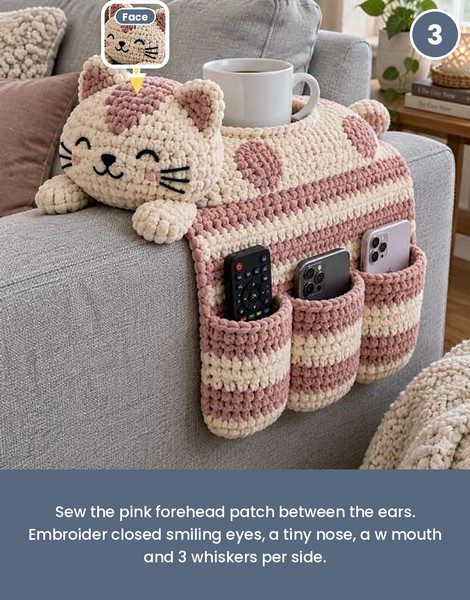
Forehead patch (dusty pink): MR, 6 sc. Rnd 2: inc x 6 (12). Rnd 3: (sc, inc) x 6 (18). Sl st and fasten off. Afterward, sew it between the ear positions at the top of the head.
Face embroidery (black):
- Eyes: two small upward arcs about 8 stitches apart, giving the closed, smiling look
- Nose: a tiny rounded triangle centered below the eyes
- Mouth: a short “w” shape stitched directly beneath the nose
- Whiskers: three straight lines on each cheek, fanning slightly outward
Pin the eyes in place before stitching, because even a one-stitch shift changes the whole expression.
Step 4: Paws (Make 4, Cream)
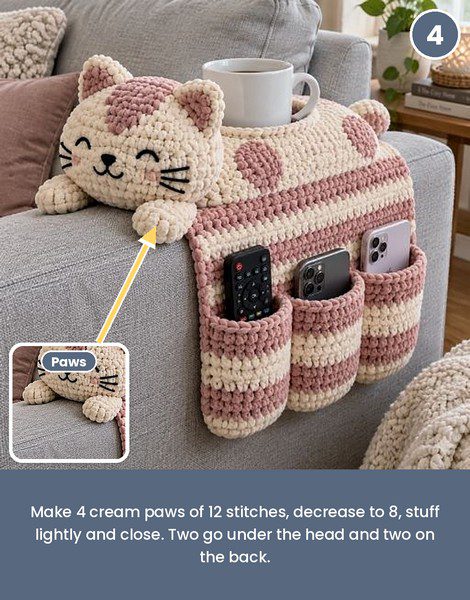
- Rnd 1: MR, 6 sc (6)
- Rnd 2: inc x 6 (12)
- Rnds 3–4: sc around (12)
- Rnd 5: (sc, dec) x 4 (8)
Stuff lightly, then dec x 4 to close. Finally, fasten off and leave a tail.
Step 5: Body (Cream)
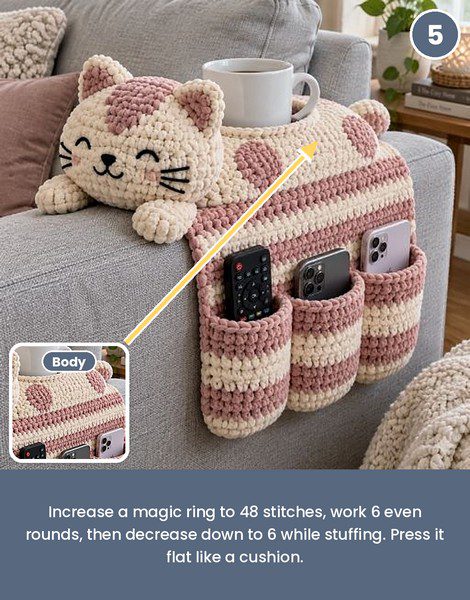
- Rnd 1: MR, 6 sc (6)
- Rnd 2: inc x 6 (12)
- Rnd 3: (sc, inc) x 6 (18)
- Rnd 4: (2 sc, inc) x 6 (24)
- Rnd 5: (3 sc, inc) x 6 (30)
- Rnd 6: (4 sc, inc) x 6 (36)
- Rnd 7: (5 sc, inc) x 6 (42)
- Rnd 8: (6 sc, inc) x 6 (48)
- Rnds 9–14: sc around (48)
- Rnd 15: (6 sc, dec) x 6 (42)
- Rnd 16: (5 sc, dec) x 6 (36)
- Rnd 17: (4 sc, dec) x 6 (30). Begin stuffing.
- Rnd 18: (3 sc, dec) x 6 (24)
- Rnd 19: (2 sc, dec) x 6 (18)
- Rnd 20: (sc, dec) x 6 (12)
- Rnd 21: dec x 6 (6)
Add stuffing as you go, then close and fasten off. Afterward, press the finished body gently so it sits flat and cushion-like.
Pro-Tip: Stuff the body a little lighter than the head. A slightly soft body rests more comfortably on the armrest, and it still supports the basket.
Step 6: Body Spots (Make 3, Dusty Pink)
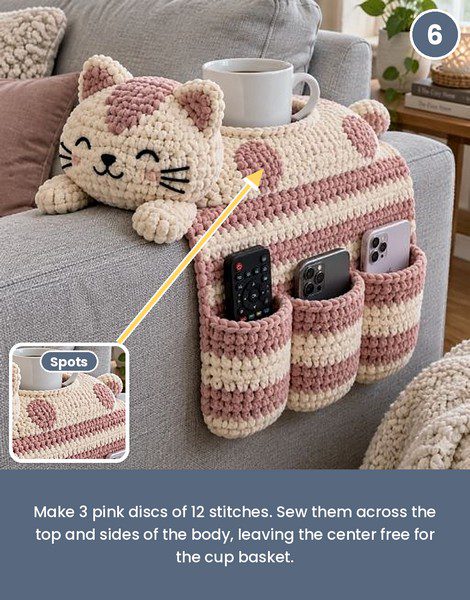
MR, 6 sc. Rnd 2: inc x 6 (12). Sl st and fasten off. Then sew the spots across the top and sides of the body, leaving the center free for the cup basket.
Step 7: Cup Holder Basket
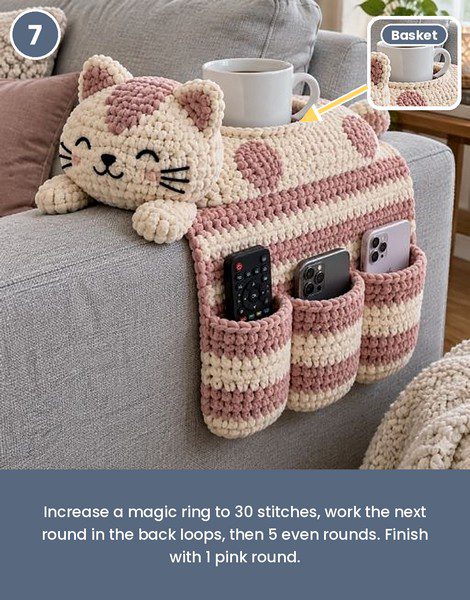
- Rnd 1: MR, 6 sc (6) in cream
- Rnd 2: inc x 6 (12)
- Rnd 3: (sc, inc) x 6 (18)
- Rnd 4: (2 sc, inc) x 6 (24)
- Rnd 5: (3 sc, inc) x 6 (30)
- Rnd 6: sc in BLO around (30)
- Rnds 7–11: sc around (30)
- Rnd 12: switch to dusty pink, sc around (30)
Sl st, fasten off, and leave a tail for sewing. The basket measures about 3.5 inches wide, so it suits most standard mugs. Moreover, working the sixth round in the back loops creates a crisp corner, which lets the basket stand up straight instead of slumping.
Step 8: Armrest Panel
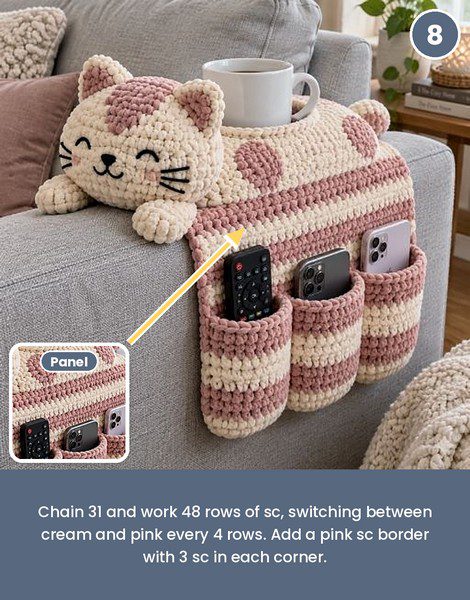
Start in cream.
- Row 1: ch 31, sc in the 2nd ch from the hook and across (30)
- Row 2 onward: ch 1, turn, sc across (30)
Alternate 4 rows of cream and 4 rows of dusty pink until the panel has 48 rows. After that, work a sc border around the entire panel in pink, placing 3 sc in each corner. Finally, fasten off and weave in the ends. Count the rows on one edge as you go, because matching stripe widths make the panel look intentional rather than accidental.
Step 9: Pockets (Make 3)
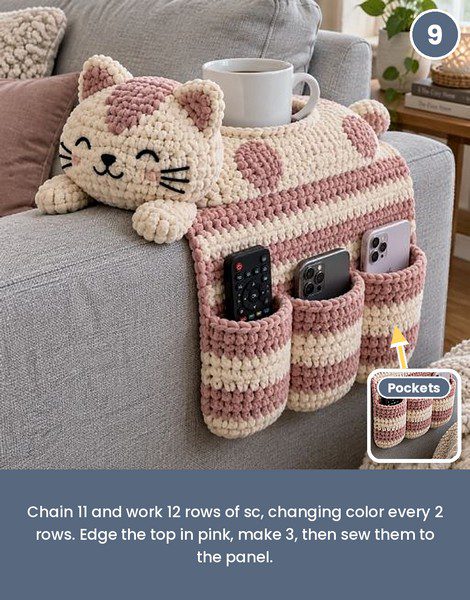
Start in dusty pink.
- Row 1: ch 11, sc in the 2nd ch from the hook and across (10)
- Rows 2–12: ch 1, turn, sc across (10)
Change color every 2 rows so the pocket finishes with six stripes. Then sc evenly across the top edge in pink to firm up the opening. Lastly, fasten off and leave long tails on the bottom corners.
Pro-Tip: Hold a remote against the first pocket before making the other two. Adding or removing two rows is much easier now than after sewing.
How to Assemble the Cat Armchair Caddy
- First, pin both ears to the head at roughly the ten and two o’clock positions, then sew them on with small, snug stitches.
- Next, attach two paws under the front of the head so they dangle over the panel edge. Sew the remaining two paws to the back of the body as little rounded bumps.
- Then sew the head to one end of the panel’s cream section, keeping the face tilted slightly toward the room.
- After that, center the body behind the head and stitch it down along its bottom edge.
- Set the cup basket on the body’s center and whip stitch around its base.
- Line the three pockets up along the lower edge of the hanging flap. Because each pocket is 10 stitches wide and the panel has 30, they fit side by side perfectly. Sew the sides and bottoms, leaving the tops open.
- Finally, weave in every loose end and trim neatly.
Common Mistakes to Avoid
Many first-time makers crochet chenille too loosely, and as a result the pockets turn floppy and droop under the weight of a phone. A 6 mm hook with firm tension solves it. Another frequent slip is skipping stitch markers on the round pieces, which leads to lopsided heads. Finally, overstuffing the body makes the cup basket tilt, so aim for plump but not rock hard.
Uses and Benefits of This Armchair Caddy
Slide a remote into one pocket, tuck a phone and charger cable into another, and park a mug in the basket without hunting for a side table. In addition, the caddy keeps the armrest protected from spills and wear. Since the panel drapes instead of buckling, it works equally well on sofas, recliners, and bedroom chairs. Meanwhile, the cat adds a bit of personality to otherwise plain furniture.
Beginner Tips for the Cat Armchair Caddy Crochet Pattern
- Practice the magic ring on scrap yarn before starting the head.
- Use a light-colored yarn for the first few rounds so stitches are easier to see.
- Count stitches at the end of every round, especially during increases.
- Take short breaks, because chunky chenille can tire the wrists quickly.
- Choose a hook with a smooth rounded head so it slides through the fibers easily.
Personalization Ideas
Color Swaps
Sage and cream give a calm, spa-like feel, while mustard and white look cheerful on a grey sofa. For a neutral setup, try oatmeal and soft brown.
Face Details
Add tiny pink cheeks with a dab of yarn, or embroider open eyes for a more alert expression. Besides that, a small bow near one ear gives the cat a sweeter look.
Pocket Tweaks
Make one pocket taller for tablets or magazines, or add a fourth pocket and widen the panel by 10 stitches. Likewise, a button loop on the side can hold a pair of reading glasses.
Size Adjustments
For a wide recliner arm, add 6 to 10 chain stitches to the starting chain and make the pockets slightly wider. On the other hand, for slim arms, remove a few stripes from the panel length.
Washing and Storage Guide (Bonus Section)
Chenille is soft but delicate, so spot clean first with a damp cloth and a drop of mild soap. If a full wash is needed, hand wash in cool water, press out the moisture without wringing, and dry the piece flat on a towel. Avoid the dryer, because heat can flatten the pile and weaken the stuffed parts. For storage, lay the caddy flat or loosely rolled in a breathable cotton bag, never in plastic.
Cat Armchair Caddy Crochet Pattern FAQs
How much yarn does the cat armchair caddy need?
Plan for roughly 400 yards of cream and 270 yards of dusty pink in super bulky chenille. Tight tension uses a little less, but it is still wise to keep one spare skein of each for safety.
Can I use worsted yarn for this crochet pattern instead of chenille?
Yes, although the caddy will turn out smaller and less plush. To get closer to the chunky look, hold two strands together with a 5 mm hook.
Is the cup basket safe for hot drinks?
The basket holds standard mugs steadily. However, spilled liquid can stain chenille, so use a lid on hot drinks and keep the mug from being filled to the brim.
How do I stop the caddy from sliding off the armrest?
Tuck the flap snugly between the cushion and the arm, and place a thin non-slip grip pad underneath. In addition, the weight of full pockets keeps the panel in place.
Is the cat armchair caddy crochet pattern suitable for beginners?
Absolutely! Every piece uses basic single crochet increases and decreases. Therefore, anyone comfortable with a magic ring and simple stripes can finish it successfully.
Settle In With Your Sleepy Couch Cat
A few skeins, a chunky hook, and some relaxed weekends are all it takes to turn a cluttered armrest into the coziest corner in the house. Once the cat is in place, the remotes stay findable, and the mug finally has a spot that is truly its own.
So weave in that last end, set the caddy on your sofa, and sink into the cushions. Chances are the first thing guests ask is whether you can make one for them, which is why a spare skein of dusty pink is worth keeping close.