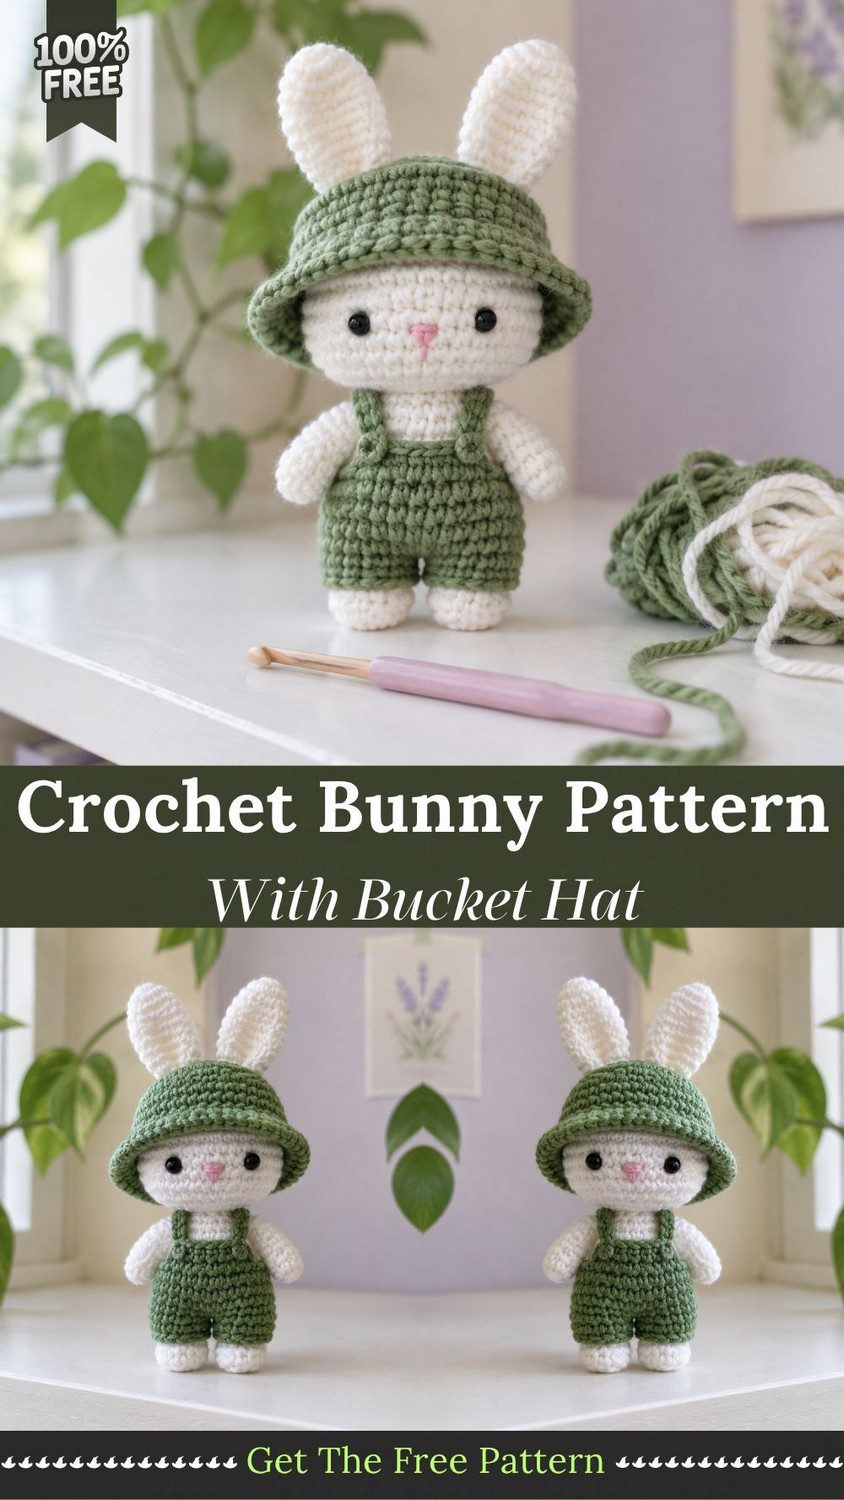
Crochet Bunny Pattern With Bucket Hat
Fuzzy green wool, a rolled brim, and two tall ears poking out the top make this Crochet Bunny Pattern With Bucket Hat a perfect pocket-sized project. Because it is small enough for one palm, the amigurumi bunny is a sweet desk buddy who looks ready for a picnic.
Plenty of bunny patterns exist, but few explain how to dress a tiny one properly. So this Crochet Bunny Pattern With Bucket Hat gives every part its own step, from the white feet peeking under the green legs to the straps over the shoulders. Yarn, hook, and size were checked against similar mini bunny and overalls patterns first, which means the numbers are dependable.
Crochet Bunny Pattern With Bucket Hat Overview
Generally, similar mini bunnies measure about 3 inches in fine yarn, around 5.5 inches in sport weight, and up to 7 inches in worsted. For this pattern, though, the bunny stands about 5 inches (12.5 cm) tall including the ears when worked in DK yarn with a 2.75 mm hook. In addition, the hat brim spans roughly 2 inches (5 cm). Also, heavier yarn gives a bigger bunny, while thinner yarn gives a smaller one. Overall, every piece is worked in continuous rounds, except the bib and straps.
Materials for the Crochet Bunny With Bucket Hat
- DK weight yarn in white, about 45 yards (41 m)
- DK weight yarn in green, about 30 yards (27 m)
- A soft wool blend gives the fuzzy look, while cotton gives sharper stitches
- Pink yarn or floss scrap for the nose
- 2.75 mm crochet hook
- Two 4 mm black safety eyes
- Polyester fiberfill
- Stitch marker, tapestry needle, sewing pins, and scissors
Abbreviations for This Crochet Bunny Pattern (US Terms)
Before you start, note that MR means magic ring, sc means single crochet, inc means two sc in one stitch, and dec means invisible decrease. Also, FLO means front loop only, ch means chain, and FO means fasten off.
Special Techniques for the Bunny Pattern With Bucket Hat
Magic Ring for the Bunny Ears and Hat
First, every round piece begins with a magic ring. Because of this, no hole shows at the ear tips or the hat top.
Invisible Decrease for a Smooth Crochet Bunny
First, insert the hook through the front loops of two stitches, pull up a loop, and finish one sc. As a result, the head and body stay smooth.
Joining the Bunny Legs
Although they start apart, two separate legs become one pair of pants through a short chain. However, take it slowly, since this join sets the shape of the whole bottom half.
Front Loop Brim for the Bucket Hat
When you work one round in the front loops, it creates a flat shelf. As a result, the hat brim spreads outward nicely.
Time Box for the Crochet Bunny With Bucket Hat
- Prep: about 15 minutes to wind yarn and gather supplies
- Stitching: about 3.5 hours for all pieces
- Finishing: about 1 hour for sewing and the face
Crochet Bunny Pattern With Bucket Hat Instructions
Step 1: Bunny Head (White)
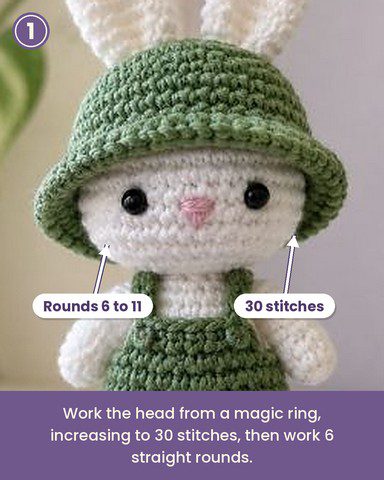
First, make a MR and work in spiral rounds.
- Round 1: 6 sc in MR (6)
- Round 2: inc in each st (12)
- Round 3: (sc 1, inc) x 6 (18)
- Round 4: (sc 2, inc) x 6 (24)
- Round 5: (sc 3, inc) x 6 (30)
- Rounds 6–11: sc in each st (30)
Why it matters: because the hat later covers Rounds 1 to 8, the face sits neatly below the brim.
Step 2: Crochet Bunny Eyes and Nose
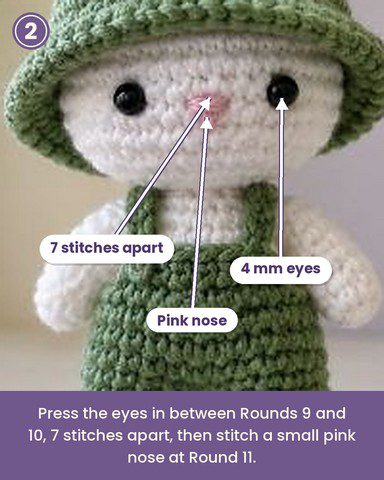
First, press the safety eyes in between Rounds 9 and 10, 7 stitches apart. Next, embroider a tiny pink nose across 3 stitches at Round 11, centered between the eyes.
Step 3: Stuff and Close the Bunny Head
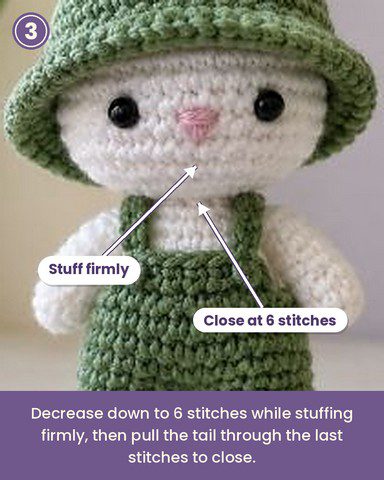
- Round 12: (sc 3, dec) x 6 (24)
- Round 13: (sc 2, dec) x 6 (18)
Then stuff firmly.
- Round 14: (sc 1, dec) x 6 (12)
- Round 15: dec x 6 (6)
Finally, fasten off and pull the tail through the last stitches.
Step 4: Bunny Ears (Make 2)
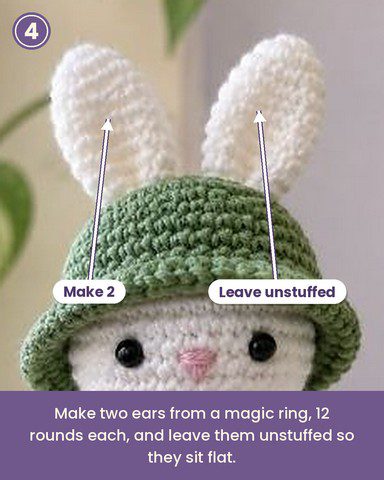
First, make a MR.
- Round 1: 6 sc in MR (6)
- Round 2: inc in each st (12)
- Rounds 3–10: sc in each st (12)
- Round 11: (sc 2, dec) x 3 (9)
- Round 12: (sc 1, dec) x 3 (6)
Then fasten off with a long tail. Also, leave the ears unstuffed and flatten them.
Step 5: Crochet Bunny Body (White)
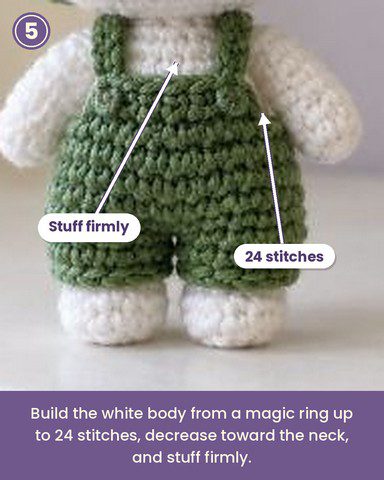
First, make a MR.
- Round 1: 6 sc in MR (6)
- Round 2: inc in each st (12)
- Round 3: (sc 1, inc) x 6 (18)
- Round 4: (sc 2, inc) x 6 (24)
- Rounds 5–7: sc in each st (24)
- Round 8: (sc 2, dec) x 6 (18)
- Rounds 9–10: sc in each st (18)
- Round 11: (sc 1, dec) x 6 (12)
Then stuff firmly.
- Round 12: dec x 6 (6)
Afterward, fasten off and close.
Step 6: Bunny Arms (Make 2)
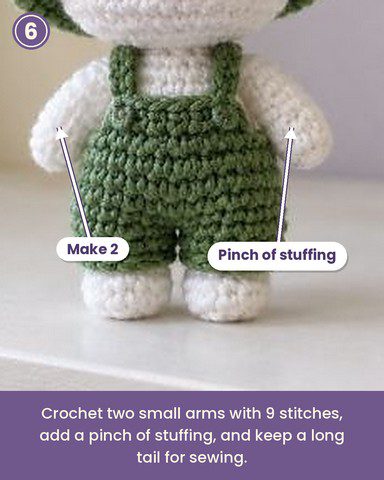
Once again, make a MR.
- Round 1: 6 sc in MR (6)
- Round 2: (sc 1, inc) x 3 (9)
- Rounds 3–6: sc in each st (9)
- Round 7: (sc 1, dec) x 3 (6)
Then fasten off with a long tail. Afterward, add a tiny pinch of fiberfill.
Step 7: Bunny Legs (Make 2)
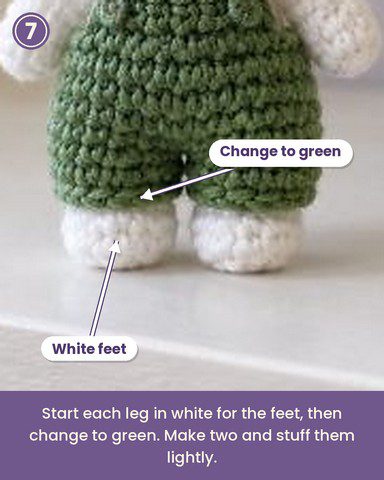
First, begin with white and make a MR.
- Round 1: 6 sc in MR (6)
- Round 2: inc in each st (12)
- Rounds 3–4: sc in each st (12)
- Round 5: change to green, sc in each st (12)
- Rounds 6–7: sc in each st (12)
Then stuff lightly. After that, fasten off the first leg. However, keep the second leg on the hook for Step 8.
Step 8: Crochet Bunny Pants (Green)
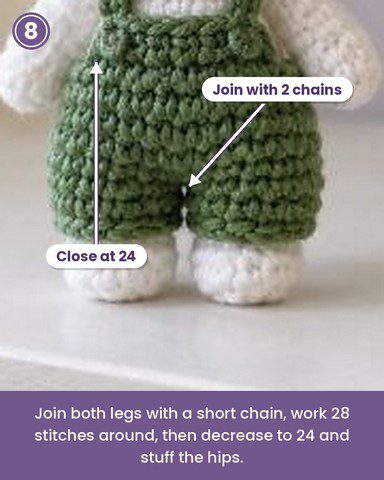
Chain 2 from the second leg, then sc in any stitch of the first leg. Next, continue with 12 sc around the first leg, 2 sc into the chain, 12 sc around the second leg, and 2 sc into the other side of the chain (28).
- Rounds 2–4: sc in each st (28)
- Round 5: (sc 5, dec) x 4 (24)
- Round 6: sc in each st (24)
Next, stuff the hips firmly. Then fasten off with a long tail.
Pro-Tip: Mark the join stitch before continuing. Otherwise, the first round of the pants is easy to lose.
Step 9: Bunny Bib and Straps (Green)
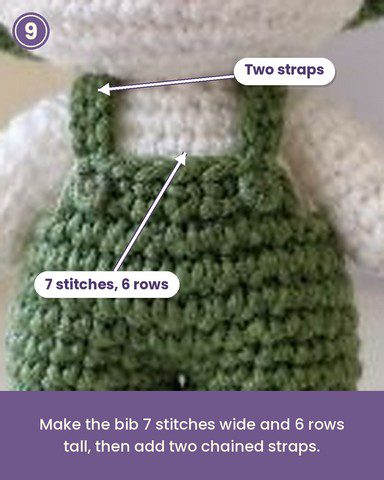
Chain 8, then sc in the 2nd chain from the hook and across (7).
- Rows 2–6: ch 1, turn, sc in each st (7)
Fasten off, and then for each strap, join yarn at a top corner, chain 14, sc in the 2nd chain from the hook and across (13), and finally fasten off with a long tail.
Step 10: Bucket Hat for the Crochet Bunny (Green)
Finally, make a MR for the last piece.
- Round 1: 6 sc in MR (6)
- Round 2: inc in each st (12)
- Round 3: (sc 1, inc) x 6 (18)
- Round 4: (sc 2, inc) x 6 (24)
- Round 5: (sc 3, inc) x 6 (30)
- Rounds 6–8: sc in each st (30)
- Round 9: FLO (sc 4, inc) x 6 (36)
- Round 10: (sc 5, inc) x 6 (42)
- Round 11: sc in each st (42)
Then fasten off with a long tail.
Pro-Tip: Keep the brim rounds loose. That way, the edge rolls gently instead of cupping.
Assembling the Crochet Bunny With Bucket Hat
Step 11: Join the Bunny Body and Pants
First, rest the white body on the closed top of the pants. Then whip stitch the base of the body to the last round of the pants all the way around.
Step 12: Attach the Bunny Head
Next, center the head on the body and whip stitch around the neck. Also, tilt it very slightly forward for a friendlier look.
Step 13: Attach the Bunny Arms
After that, sew one arm to each side at Round 9 of the body, angled slightly outward.
Step 14: Attach the Bib and Straps
First, sew the bottom edge of the bib to the front waist, centered. Next, pin the straps to the top corners, cross them over the shoulders, and sew the ends to the back waist.
Step 15: Attach the Bunny Ears
Once you flatten each ear, sew its base to the hat top at Round 3, with a gap of 4 stitches between them. After that, lean them slightly outward.
Step 16: Attach the Bucket Hat
Set the hat on the head with the brim just above the eyes, then whip stitch around the crown through the head. Finally, add a few extra stitches at the back so it stays put.
Common Mistakes to Avoid in This Bunny Pattern
- Loose tension: Gaps let the fiberfill show, so drop a hook size if needed.
- Overstuffed ears: Stuffed ears turn stiff, so leave them flat.
- Uneven legs: Count rounds on both legs before joining them.
- Tight hat: A hat sewn too snugly distorts the head, so pin it first.
- Crooked eyes: Because they ruin the face, always count the 7 stitches between them.
Beginner Tips for the Crochet Bunny Pattern With Bucket Hat
Start with smooth DK yarn, since stitches stay easy to see. In addition, use a stitch marker on every round, because small pieces hide the beginning quickly. When a count feels off, pull the round out right away. Meanwhile, make the ears first as practice, because they use only basic increases and decreases.
Uses and Benefits of the Crochet Bunny With Bucket Hat
Once finished, the bunny leans against a desk lamp, sits on a bookshelf, tucks into a gift basket, or waits on a nightstand. Besides adding charm, the project sharpens skills with magic rings, invisible decreases, and tidy sewing. Since only small amounts of yarn are needed, leftovers get used quickly. Moreover, dressing the bunny in different colors turns one pattern into a whole family. Finally, wrapped in tissue, it becomes a thoughtful present for birthdays, baby showers, and spring celebrations.
Personalization Ideas for Your Crochet Bunny
New Bucket Hat Colors for the Bunny
First, try mustard, dusty pink, or navy for a different personality.
Overall Colors for the Crochet Bunny
Instead of green, swap in denim blue or soft lavender.
Bunny Face Details
Likewise, add a light blush with pink yarn, or stitch tiny whiskers.
Tiny Bunny Accessories
For example, hold a mini carrot in one arm, or add a small scarf in winter.
Troubleshooting Guide for the Crochet Bunny Pattern
First, if the head tips backward, add a little stuffing to the neck. Similarly, when ears flop, stitch two extra anchor stitches at the base. Also, if the hat slides, sew through the brim and head at three more points. Finally, when stuffing shows through gaps, switch to a smaller hook for the next piece.
FAQs About the Crochet Bunny Pattern With Bucket Hat
How tall is the finished crochet bunny with bucket hat?
Overall, it stands about 5 inches (12.5 cm) including the ears, using DK yarn and a 2.75 mm hook.
What yarn suits this crochet bunny pattern best?
A soft wool blend gives the cozy texture, whereas cotton gives crisper stitches.
Can beginners make this Crochet Bunny Pattern With Bucket Hat?
Yes, because the pattern uses only sc, increases, decreases, and simple sewing.
Can the crochet bunny stand on its own?
Yes, since firm stuffing in the legs and hips helps it stay upright.
Your Bunny in a Bucket Hat Is Ready to Hop
Who knew something this small could feel so special? Because of its white feet, tiny straps, and soft rolled hat brim, this Crochet Bunny Pattern With Bucket Hat makes a toy with more charm than its size suggests. Therefore, go slowly with the stuffing and sewing, since they decide how neat the finished bunny looks. Once it sits on a shelf, it will make any ordinary day feel a little brighter.