How to Crochet Mouse Amigurumi Pattern for Good Vibes
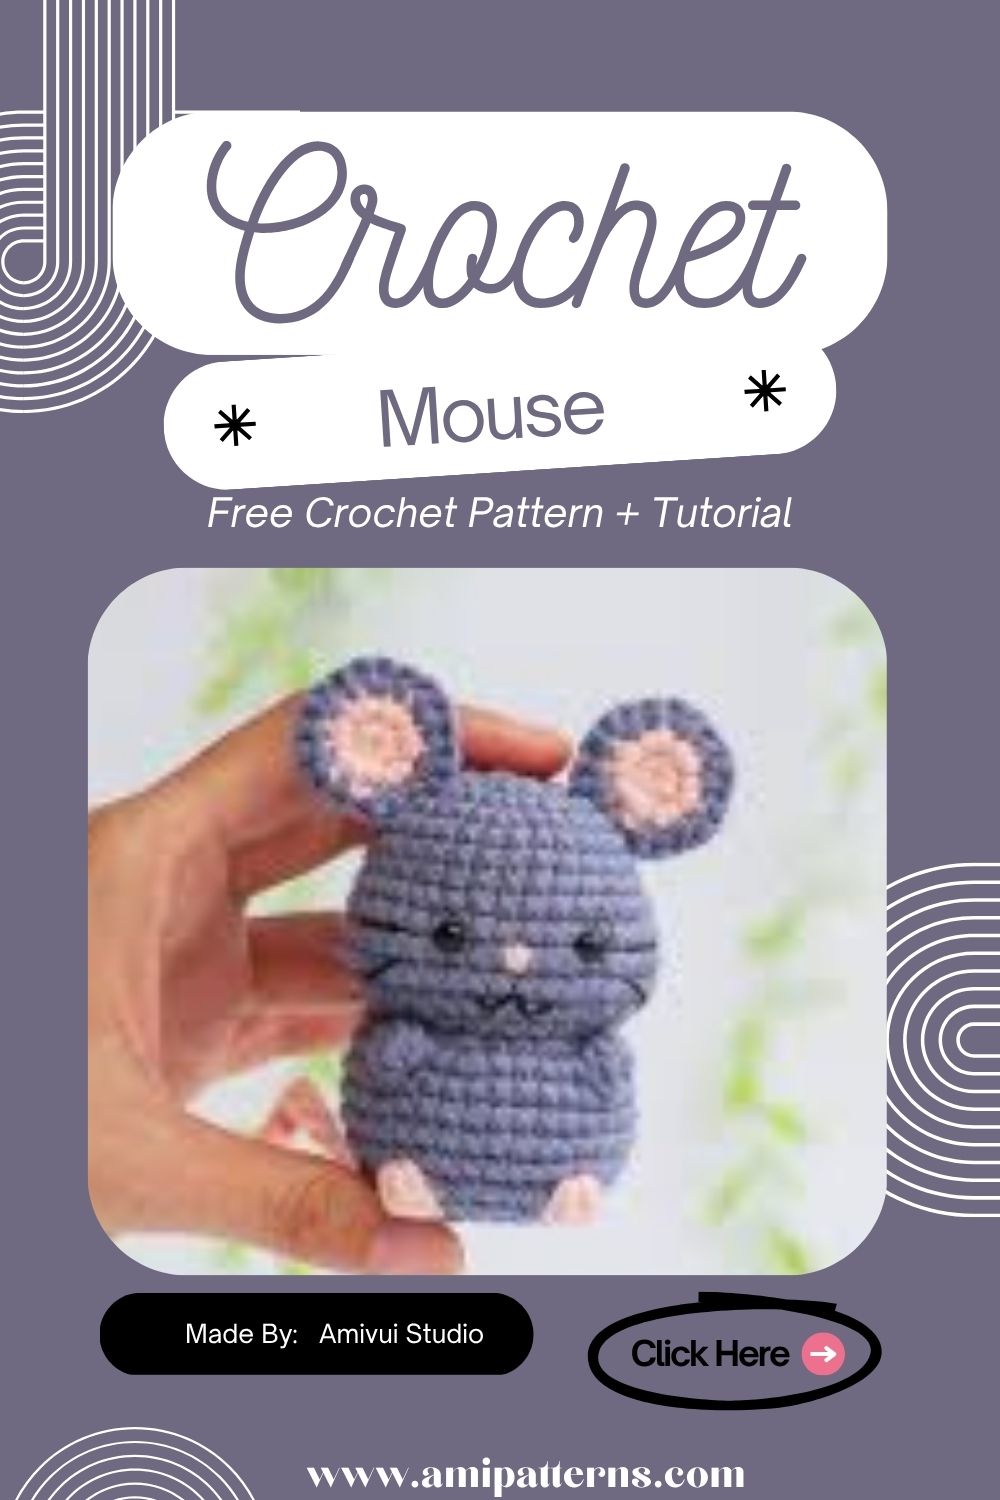
A little crochet mouse really is very cute! Round ears, a small nose, a soft body, and a curled tail can make a few strands of yarn come to life. This Crochet Mouse Amigurumi Pattern is a fun crochet pattern for anyone who loves to make small puppy toys with lots of character.
The mouse is small enough to work with at the end of the day, but it provides lots of chances to practice fun amigurumi skills! You’ll sew in rounds, add increases and decreases to shape the body, create simple facial details, and make a few small pieces.
This completed mouse can be placed on a shelf, adorning a desk, a part of an animal theme display or just join your expanding crochet assortment. The colors and accessories can also be changed to make mice with totally different personalities.
Are you looking for a relaxing project to add to your list but want to avoid a lot of yarn? This one is worth the addition!

Why This Crochet Mouse Is Such a Fun Project
It’s easy to fall in love with small amigurumi projects. These aren’t something that take weeks to finish and can see the character grow after just a few rounds!
The body shape of this mouse is simple, but the ears, face and tail make it expressive. The design can be simple or have small additions for a more interesting look.
It’s also a handy stash buster. Another mouse can be made by adding just a bit of gray, cream, brown, pink, or pastel yarn to your mouse.
It offers practice using several fundamental techniques for beginners without making the project seem too challenging. This crochet pattern is suitable for crocheting a small mouse and is easily adjustable in size and yarn.
Skill Level
Beginner to intermediate. When you’re new to amigurumi, allow yourself time with the first few rounds. When the shape begins to take shape, it becomes easy to follow the rest.
Materials You’ll Need
Prior to playing, you should acquire all the necessary elements.
Yarn
- Body yarn that can be used as the main color.
- Pink yarn for inside ears and nose
- Black embroidery thread
- Contrasting yarn (optional) for accessories
- Cotton yarn will provide a neat and defined appearance to the mouse. Acrylic yarn is softer and can be easily obtained in a variety of colors.
Tools
- Crochet hook appropriate for your yarn
- Polyester fiberfill
- Stitch marker
- Yarn needle
- Sharp scissors
- Safety Eyes or black embroidery thread
- Embroidered eyes are safer than plastic safety eyes for a toy made for a baby or toddler.
How to Crochet the Mouse Amigurumi
Step 1: Crochet the Body
Start with main yarn and form a magic circle. Make 6 single crochet stitches into the ring.
Close the center and set up a stitch marker. Round out the base by adding equal amounts for the next rounds.
After the bottom is sufficiently big, use single crochet stitches without increases.
The body should gradually lengthen but still maintain a round contours.
Once the desired size is reached, start to decrease.
Fill the space with polyester fiberfill as the opening gets smaller.
Don’t push in a huge amount of stuffing at once. Smaller pieces are easier to spread out evenly and aid in avoiding lumpiness.
Securely complete the final decreases and close up the opening.
Step 2: Make the Head
The head may be a little smaller than the body.
Beginning with a magic ring, make 6 single crochets.
Gradually increase over different sets.
Keep working with no increases until a round head is formed.
In case you are using safety eyes, set them up before you close your head.
Start the rounds of decrease.
Fill in the opening with fiberfill slowly as it shrinks.
Be careful not to overstuff, but do ensure it’s touching the sides.
Close the opening and leave a yarn tail to sew with.
Step 3: Make the Round Ears
The distinguishing feature of the mouse is its ears.
Using the main yarn, make 2 circular or slightly oval pieces.
Work with a magic ring, and make a few increases.
Make the same number of repetitions as before for a few rounds more.
If you want a more subtle design, crochet smaller pink circles and insert the pinks inside the big ears.
To attach the ears, they should be slightly folded.
Place them on the upper part of the head.
They can be used straight up for an alert expression or angled slightly out for a casual expression.
This is also a perfect opportunity to try out a cute crochet mouse design by altering the size of the ears.
Step 4: Make the Nose
Make a small nose using pink yarn.
A small triangle or oval is good.
Little stuffing, if any, is required.
Secure nose with stitches down the front, near the eyes.
Before tightening the stitches, check the position from the front.
If the nose is placed too high, the mouse appears surprised, and if it is too low, the mouse has a softer expression.
Step 5: Add the Face
If you are not using safety eyes, use black embroidery thread to embroider the eyes.
Next, add a small curvy smile.
For extra short whiskers, you can embroider them from both sides of the nose.
Stick to these details and keep them small.
The more basic the face the more often the mouse looks better.
If you are looking for something more playful, you can add some pink blush under the eyes to give it a bit of warmth.
Step 6: Crochet the Arms
Use main yarn to make 2 small arms.
Single crochet a couple of rounds.
Make them skinny and easy to fill.
This is a small character for which you don’t need big arms.
When cutting and ends, leave a long tail on each piece so that they can be attached to the body.
Step 7: Make the Tail
The tail is used to give some movement to the design.
Measure a chain long enough to form the desired length of tail.
Make work slip stitches or single crochet back along the chain.
If you want a thinner tail, then slip stitches.
If you want a thicker tail you can also use a single crochet.
Before sewing the tail to the back of the body, gently bend the finished tail to your finger.
Generally, a curvy tail makes the mouse appear more active.
Step 8: Assemble the Mouse
Now it’s time to put all the pieces together.
Stitch head firmly on body.
Glue on ears and ensure that they are even.
Add the arms.
Lastly, stitch the tail to the rear.
Don’t immediately tighten every piece. Do everything first and examine the mouse from a few perspectives.
When you’re satisfied with the ratios, tie them securely.
Step 9: Place a Small Gizmo
This step is not required, but can help make your mouse look a little more like a character instead of just an animal shape.
Try making:
- A tiny scarf
- Small bow
- Mini flower
- Little collar
- Tiny backpack
- Mini hat
- Small block of crocheted cheese
One of the easiest scarf to create is a scarf that can be switched to various styles according to the season.
Creative Color Combinations
You don’t necessarily have to use gray, but it’s the classic color of the mouse.
- Use cream that is pink in color for a creamy effect.
- Brown with beige ears adds a cozy woodsy tone.
- Lavender and white can provide you with a whimsical character.
- The dusty blue and cream design exudes a serene and contemporary vibe.
- If you want to go a little bit more colorful, consider pastel shades of pink, yellow and mint.
Uses for Your Crochet Mouse
Once the mouse is completed, it can be utilized in a variety of ways around the house.
Try displaying it on
- bookshelf
- a desk
- nursery
- On a shelf on the craft-room wall
- Along with other crochet animals
- You can display something that relates to animals in an animal-themed display.
- In seasonal decorations
- As a photography prop
- Inside one of the decorative baskets.
Of course you can also do something else and make a small crochet cheese, mushroom, flower or little basket to have your mouse sit next to! This can be a start to a bigger handmade animal project if you like little projects.
Pro Tip
Stitch in place the ears, eyes and nose before permanently stitching them on. It is much easier to develop the expression desired when the face is viewed together first.
Common problems and easy fixes:
The body is “lumpy” looking.
This typically occurs when the stuffing is not even. Take out some stuffing and divide it out again.
The stuffing is showing
Your stitches can be crooked and loose. Use a smaller hook size or pull tighter.
The head is too big
Make sure you increase rounds and compare head to body before completing.
Ears appear as if they’re uneven
Lay both ears up together, check them from the front and then pin them.
The mouse is not positioned correctly
Move arms and body-stuffing. The bottom of the body may also be slightly flattened with the hands.
It’s not just the little things that can make a big difference.
Taking care of your Crochet Mouse
- Brush or roll dust over the finished mouse.
- Spot clean with cool water and mild detergent if it becomes dirty.
- Don’t twist or wring the toy. Rather, wring it out using a towel and let it dry out in the air.
- When dry, form the body and ears into the shape with your hands.
- Avoid long exposure to direct sunlight to maintain the yarn colors.
Final Thoughts
Don’t think complicated stitches are necessary to create a charming handmade mouse. With its rounded body, large ears, small nose and circular tail, this is enough to add a bit of character and lots of personality.
This project is also a good reminder that crochet doesn’t always have to be a large commitment. Just a little of yarn and a little quiet time can be enough to make something you will want to keep.
The magic of a Mouse Amigurumi Pattern is that it’s easy to sew and creates a cute little mouse that can add a bit of extra coziness wherever you want.