
Confident Crochet Penguin Amigurumi Pattern
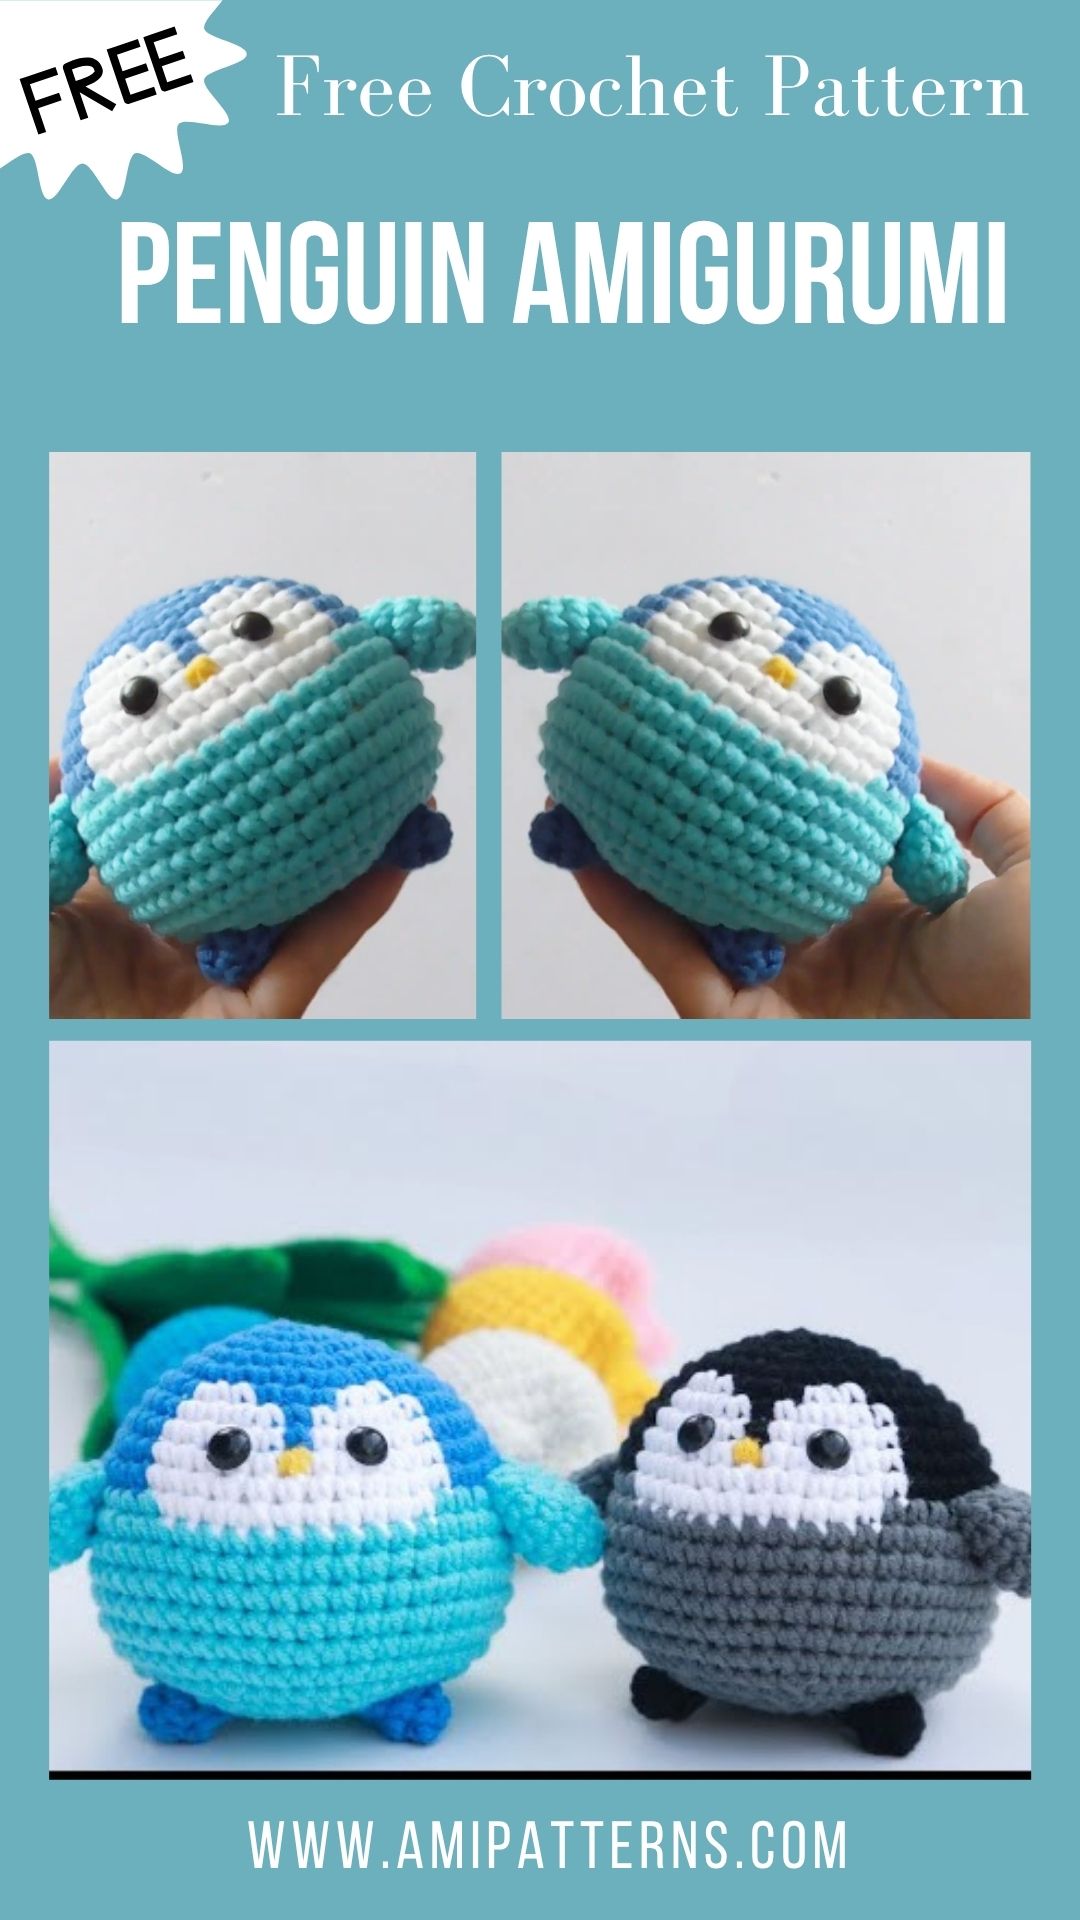
The little soft-knitted penguin is smiling when you’re not even done yet with the face. It is almost impossible not to like the feel of this little toy, with its round body, little wings, bright beak, and stubby feet. This Crochet Penguin Amigurumi Pattern is a fun pattern for all crocheters, a lot of personality can be added to this handmade crochet animal.
It’s a design that is suitable for beginners with some experience in crocheting amigurumi, so no need to be a seasoned crocheter. You will work in rounds, add increases and decreases to the body, add a contrasting belly and finish the penguin with the finishing touches to create the whole character.
It is also a flexible project. Create a traditional black and white penguin, or a penguin with grey instead of black for a softer look, or a colorful fantasy penguin. A small scarf, bow, hat or winter accessory can transform the appearance of each penguin.
This is a nice little project if you have some leftover yarn and an afternoon to spare.
Why You’ll Enjoy This Penguin Pattern
Making small amigurumi projects is enjoyable because there is no need to dedicate too much time to them. The body form starts to emerge in just a few rounds, and by adding the eyes and beak, the personality comes to life.
This penguin will give you an opportunity to practice:
- Play for the whole session without taking a break.
- Increasing and decreasing
- To make a rounded shape of stuffing.
- Changing yarn colors
- Creating flat objects from small bits.Creating small flat pieces.
- Stitching Amigurumi pieces together
- Embroidering basic facial features
It is also an excellent starting point to animal crochet if you have mostly been working with blankets, scarves or other flat projects.
This is one of the easiest penguin amigurumi crochet patterns to modify, but offers plenty of room for creative details.
Skill Level
Time: 1.5 hours
Know how to crochet a magic ring, single crochet stitches, increases, decreases, and slip stitches, basic chain stitches.
It isn’t speed that is most important. Maintain a consistent tension as you work and be sure to check off stitches. Amigurumi is a relatively forgiving technique but a slight adjustment in stitch count can cause the shape of a mini animal to vary.
Materials You’ll Need
Before beginning, gather:
- Yellow yarn for the legs
- Cream or white yarn to make the belly.
- White or cream yarn to make the belly.
- A beak and feet of orange or yellow yarn.
- Black embroidery thread
- Polyester fiberfill
- Crochet hook suitable for your yarn
- Stitch marker
- Yarn needle
- Sharp scissors
- Safety eyes or embroidery thread
Optional:
- Checkers for cheeks – pink yarn.
- Scarf yarn
- Small buttons
- Tiny pom-pom
Amigurumi is an excellent use of cotton yarn because the stitches are distinct. Another useful choice is acrylic yarn, which will help create a more subdued appearance of the finished penguin.
Before Starting the Crochet Steps
The penguin is constructed from a few basic parts. The body is the rounded shape and the white belly is added as a contrasting panel. The wings, beak and feet are crocheted individually and joined in the assembly.
Determine whether you want to make the belly separately or in the body. The additional belly provides enhanced flexibility, and color changes will provide an integrated look.
How to Crochet the Penguin Amigurumi
Step 1: Crochet the Body
Using black yarn, create a magic ring.
Make 6 SC stitches into the ring.
Add levelly over the following rounds until the ground starts to get wider.
Keep on elevating till you have a rounded lower body.
When the body has the desired width, work a number of rounds, no increases.
The outline should now have the appearance of a small oval.
If it isn’t a penguin just yet, don’t worry. Its appearance will be completely altered later with contrasting features of the face and belly.
Step 2: Shape the Upper Body
Continue SC stitches in rounds.
Start to decrease slowly as you get closer to the top.
This makes the upper part of the penguin shorter.
Stuff with polyester fiberfill as you go.
Fill with small pieces, rather than stuffing the filling in the middle.
You need a hard material but soft.
Check the shape from the four sides before closing the opening completely.
If it is flat in one place, increase the amount of filling.
Step 3: Add the White Belly
One of the most distinct features is the belly.
It’s possible to make a little oval knit in a separate manner with white or cream yarn.
Begin with a short chain and chain around both sides to form an oval.
Repeat this until you get your desired belly size.
Carefully sew it in front of the black body.
Or you could apply white yarn to the body and crochet the belly in place on the main shape.
For newbies, the separated-piece way might be simpler since you can place it in the precise area.
Step 4: Make the Wings
Using black yarn, crochet two little wing pieces.
Simply tapered oval or leaf shape will do.
Heavy stuffing is not required.
Actually it is better to leave them flat the majority of the time, as this is how they will appear more natural as penguins.
Sew one wing to each side of the body.
For a relaxed pose, turn them a bit down.
To make your penguin look as if it’s wobbling, lift one wing up before you sew it on.
Step 5: Crochet the Beak
Beak: Use orange or yellow yarn.
Create a small cone or triangle.
The beak is very small and doesn’t require much stuffing.
Put it between the eyes, above the middle of the white belly.
Sew it securely.
Before tightening the stitches, take a moment to see how it is placed from the front.
Just a slight adjustment to the position can give the penguin a happy, inquisitive or curious face.
Step 6: Make the Feet
Crochet 2 little orange feet.
Can be kept plain or formed with 3 small toe pieces.
Mount them to the underside of the body, near the front.
Place them on the level so that the penguin can stand straight.
Penguins can be larger, but if they are, you can put up wider feet to help them balance.
In a small size, small flat feet are generally sufficient.
Step 7: Place Eyes
Attach 2 small safety eyes above the beak.
Embroidered eyes are a safe option for the younger ones.
Use black embroidery thread to make small neat eyes.
If you’re going for a more expressive face, you can also add little white highlights.
Avoid making the eyes appear too big. Being the right size will ensure that the penguin remains in its iconic shape, but looks cute.
Step 8: Add Cheeks and Extra Details
The face can be made to look warmer by adding a little pink blush.
Add some blush powder or embroider some small pink circles.
A small smile can be placed under the beak, if desired.
Less can be more when it comes to facial details.
When you are making a cuddly penguin, the expression should be obvious from a distance.
Create a Tiny Winter Accessory
Penguins are an obvious choice for winter design.
Scarfs are one of the easier accessories to add, and it can be a miniature version.
Just wrap a thin piece of yarn around the penguin’s neck in a loose wrap to make the neck.
You can also make:
- Tiny earmuffs
- A winter hat
- Small bow
- Mini sweater
- Snowflake accessory
- Little backpack
Bright colors for a playful character, muted colors for a more traditional winter look.
Creative Uses for Your Penguin
Penguins are versatile creatures that can be used in a variety of creative ways.
When the penguin is complete, there’s lots of room to display it.
Try using it as:
- A bookshelf decoration
- Desk companion
- Nursery accent
- Winter decoration
- Christmas display
- Photography prop
- A group of animals that are all packed together like animals in a collection.
- Handmade room decoration
- Seasonal centerpiece
A group of penguins makes a cute little colony. Each one will have a different scarf or facial expression, and will appear as individual characters, not copies of the same pattern.
Pro Tip
Tie the belly, wings, eyes and beak down before stapling or sewing them on permanently. View the penguin from the front and side to make small adjustments before everything is fastened.
Common problems and easy fixes
The infant has a floppy body.
Add a bit more stuffing and test for stitch tension. If the stitches are too open use a smaller sized hook.
The abdomen appears to be crooked
Take it away and place it back in position before sewing again. You can easily align it after pinning it first.
The penguin will not stand up straight.
Just look at where feet are placed and ensure that the bottom of the body is filled evenly.
The face does not match with the example.
That’s normal. The placement of the eyes and beak can make all the difference in the expression of an amigurumi.
Don’t make all the details the same – try to make them the same but slightly different to make your penguin unique.
Final Thoughts
It doesn’t take a lot of complicated stitches to make a handmade penguin truly special. The rounded body, stripes on the belly, small wings, orange beak and small feet are all you need to make a cute character!
This pattern is another great amigurumi project to practice. You will learn to shape, stuff, color, embroider and assemble carefully without taking on a big project.
Well, that’s the beauty of the Crochet Penguin Amigurumi Pattern: With just a few basic stitches, you can create an adorable little penguin that comes to life!