
Crochet Munchlax Amigurumi for Pokémon Fans
Crochet builds fabric by pulling loops of yarn through one another with a hook, and this crochet Munchlax amigurumi shows how far a single hook and a ball of yarn can go. It brings a sleepy, chubby Pokémon favorite to life in soft cotton yarn.
Crochet itself reaches back to early nineteenth-century Europe, and people still love it because it feels relaxing, creative, and simple to learn. A hook and some yarn can become clothes, bags, blankets, flowers, and small decorations. Amigurumi, the Japanese style of crocheting small stuffed figures, turns that same hook and yarn into toys. Below, you will find the materials, stitches, photo-based steps, assembly, and troubleshooting.
Crochet Munchlax Amigurumi Pattern and Key Features
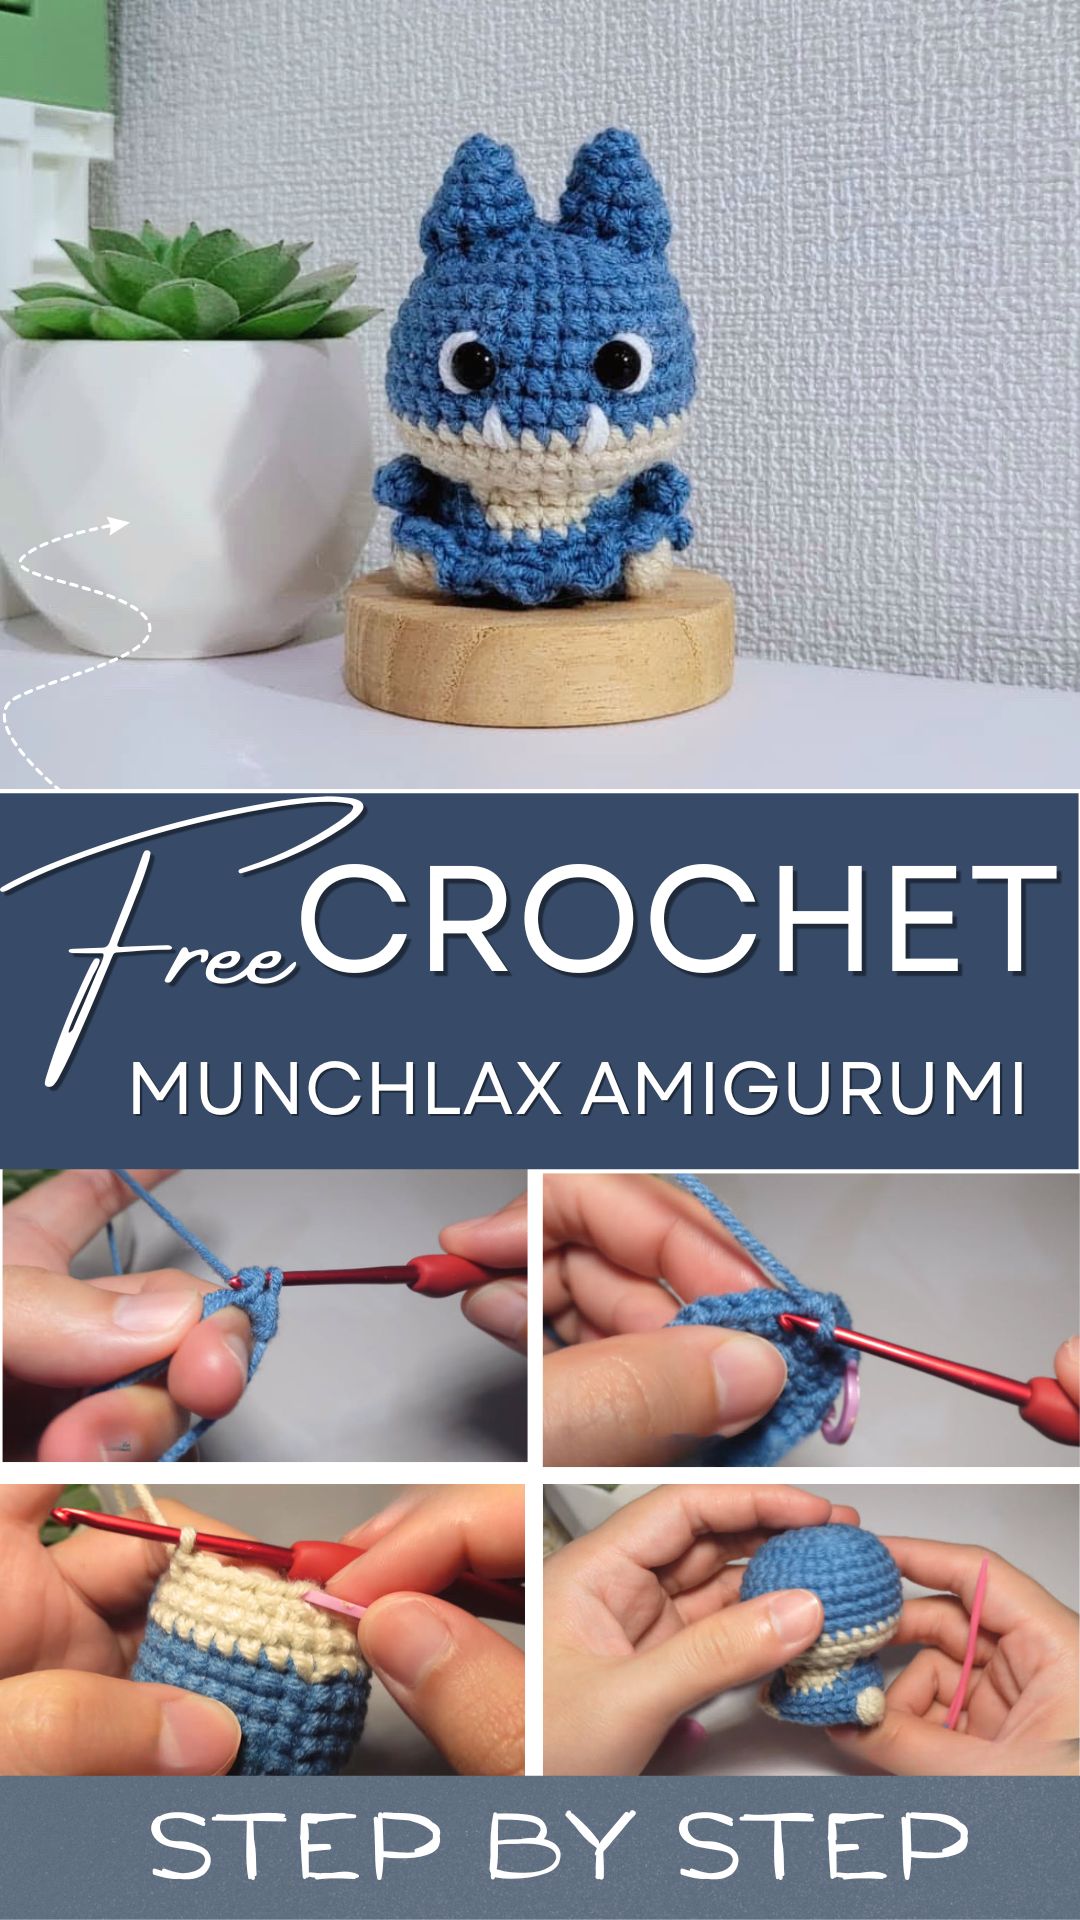
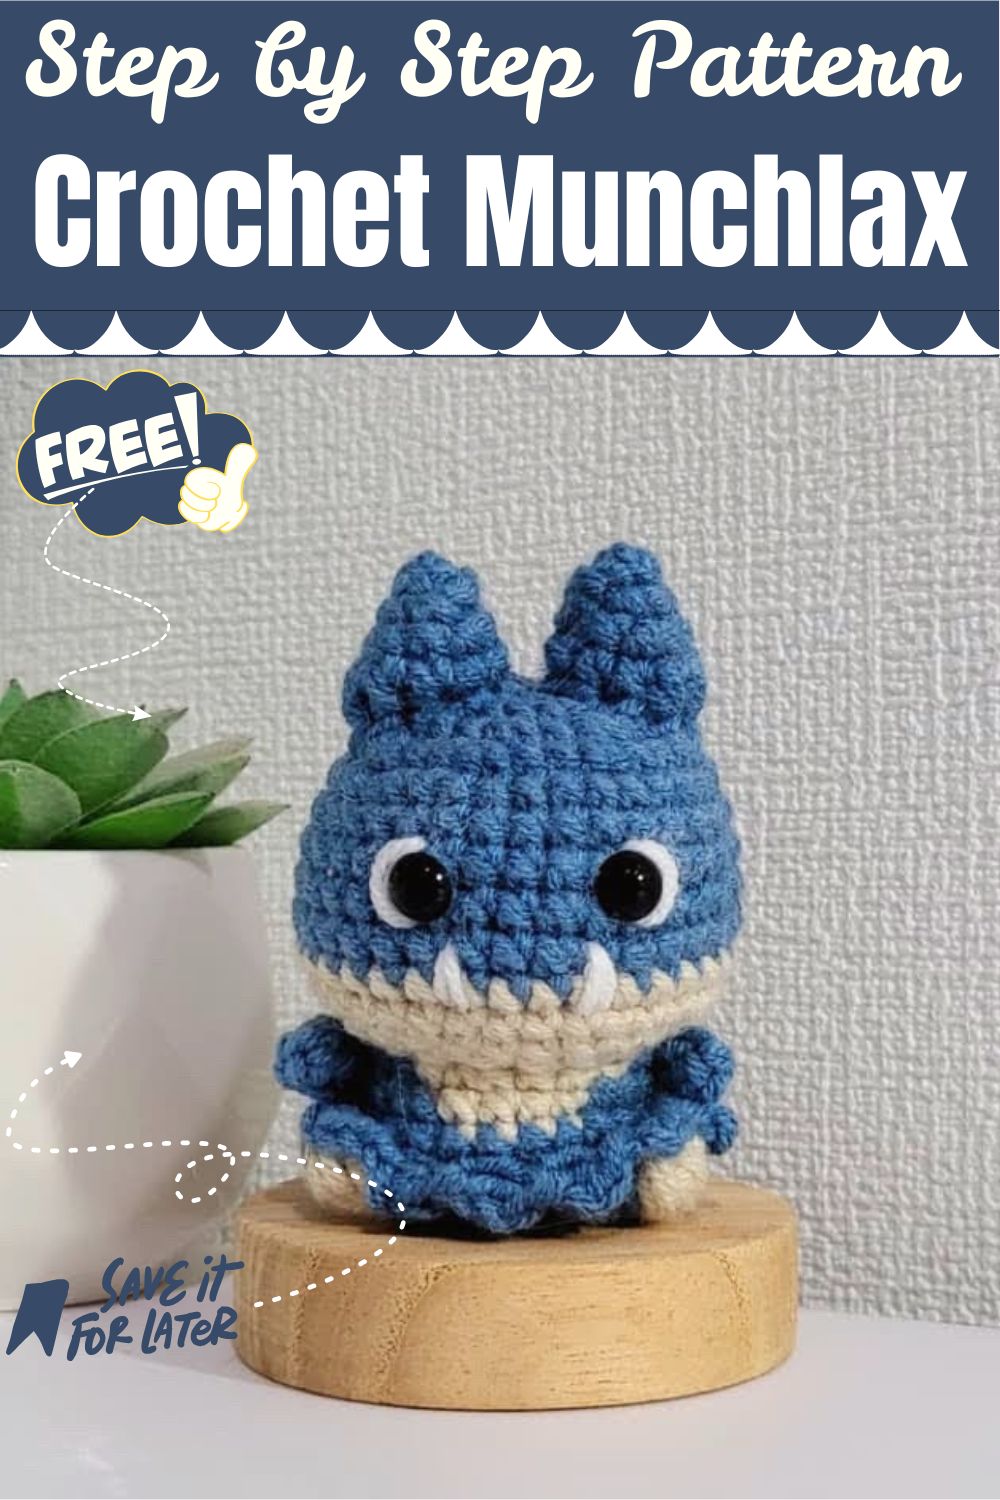
This pattern makes a small, round Munchlax with a dark blue-teal body, a cream belly patch, tiny limbs, and the tufted ears that give the character its look. First, you work the body in rounds from a magic ring. Then you stuff it as it grows, so the shape stays smooth and plump.
Key features include:
- A seamless head and body built with single crochet, increases, and decreases
- A separate cream belly patch sewn onto the front
- Small arms, legs, and ears made separately and attached
- Safety eyes and simple embroidered details for a sweet face
Because the pieces are small, this crochet Munchlax amigurumi works well as a gift, a bag charm, or a shelf buddy for Pokémon fans.
Skill Level for This Crochet Munchlax Amigurumi
This pattern suits confident beginners and up. Anyone who can make a magic ring, work single crochet in a spiral, and follow increases and decreases will manage this crochet Munchlax amigurumi. Color changes and sewing on parts add a little challenge. However, the photo steps below show each one.
Materials and Yarn for the Crochet Munchlax Amigurumi
Yarn
Milk cotton yarn in 4-ply weight works best. It feels soft, holds its shape, and gives a tidy, tight fabric.
- Dark blue or teal for the body
- Cream or beige for the belly, feet, and eye details
Tools and Extras
- 3.00 mm crochet hook
- Safety eyes
- Fiberfill stuffing
- Stitch markers
- Tapestry needle
- Scissors
A hook smaller than the yarn label suggests keeps the stitches dense, so the stuffing cannot peek through.
Finished Size and Sizing Options
The finished size depends on yarn thickness, hook size, and how firmly you pull the stitches. With the 3.00 mm hook and 4-ply milk cotton listed above, Munchlax comes out small and palm-friendly. In contrast, thicker yarn with a larger hook makes a bigger toy, while thinner yarn with a smaller hook makes a keychain-sized version. Whenever you change yarn, choose a hook that still gives a firm fabric.
Stitches and Abbreviations
The pattern uses only a few basics:
- MR: magic ring
- SC: single crochet
- INC: increase, two single crochets in one stitch
- DEC: decrease, two stitches worked together
- SL ST: slip stitch
- FO: fasten off
Working in the front loops only can help shape the belly line, and slip stitches come in handy for joining and finishing.
Gauge Information
Gauge is not critical for a toy, but consistency matters. Keep the stitches tight enough that the stuffing stays hidden when you gently stretch the fabric. A quick test swatch of single crochet rounds shows whether the fabric feels firm. If gaps appear, go down a hook size.
Tips Before Starting Your Crochet Munchlax Amigurumi
- First, work in a continuous spiral and mark the first stitch of every round with a stitch marker.
- Insert the hook under both loops unless told otherwise.
- Stuff in small pieces and shape as the work grows, since closing the opening makes stuffing difficult.
- Also, keep tension even, especially on the cream rows, where uneven stitches show more.
- Leave long tails on pieces you will sew on.
- Finally, fasten the safety eyes before closing the body, and check their placement first.
Step-by-Step Crochet Munchlax Amigurumi Instructions
Follow these photos in order, because each step matches one picture.
Step 1: Start the Base
First, make a magic ring with the blue yarn and work the first round of single crochet into it. Then pull the tail to close the ring tightly. In the first photo, fingers pinch the small round while the hook enters the next stitch. Pinching keeps the tiny circle from twisting.

Step 2: Grow the Circle
Next, continue with increases to widen the round. The second photo shows a growing flat circle with a pink stitch marker clipped into the first stitch of the round. Move the marker up after every round so you never lose count, and keep the work flat by spacing the increases evenly.

Step 3: Build the Body Walls
Once the circle is wide enough, stop increasing and work even rounds so the sides rise straight. The third photo shows the hook entering a stitch beside the marker as the fabric begins to curve upward. Check that the stitches stay snug, because loose rounds here make the body wobbly.

Step 4: Add the Cream Belly Section
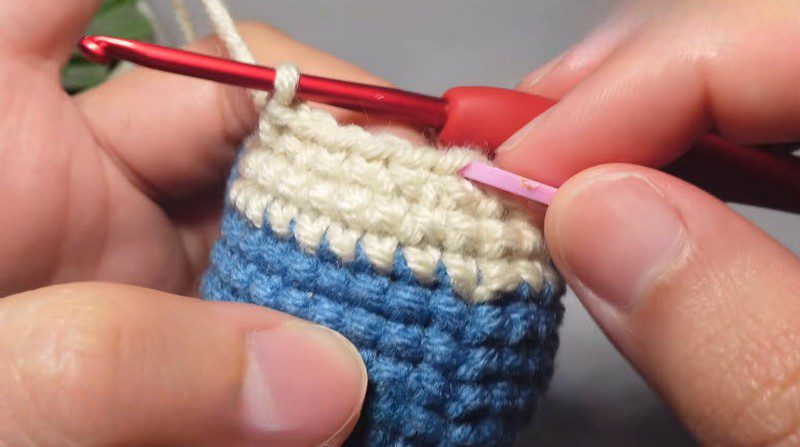
Then switch to cream yarn for the belly band. The fourth photo shows a neat cream strip sitting above the blue rows. To change color, pull the new yarn through on the last step of the final blue stitch, and then continue in the new shade. Keep both tails to weave in later, and work the cream rows with the same tension as the blue.
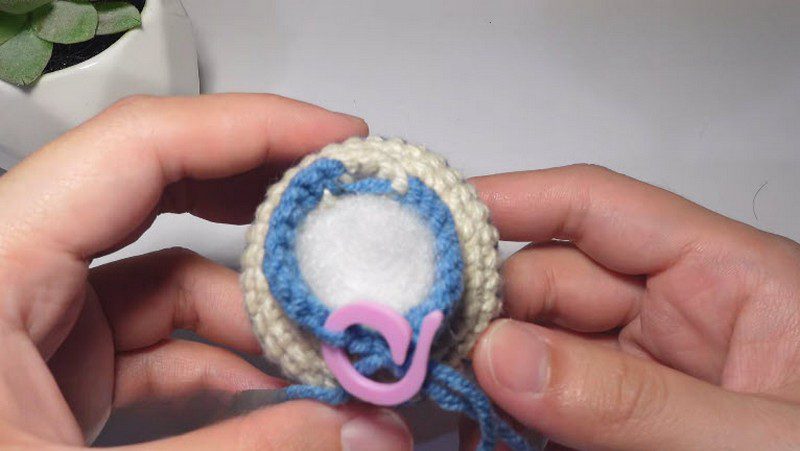
Step 5: Stuff and Shape
Before closing, fill the body with fiberfill. The fifth photo shows the base with a white stuffing disc visible inside the round opening and a marker holding the working loop. Add the filling in small pieces and press it toward the sides so it sits evenly, rather than packing one lump in the center.
Step 6: Join Head and Body Shape
With the shaping done, the piece begins to look like the character. The sixth photo shows the blue head above the cream belly band, with a blue lower body and a cream foot at the side, while a pink needle tidies and sews the pieces. Before you sew the foot down, check that the head sits straight and the foot sits symmetrically.

Step 7: Add Eyes and Face Details
Finally, insert the safety eyes and sew on the small cream eye patches. The last photo shows black safety eyes with white eye details, a cream belly patch, cream feet, and a ruffled blue lower edge, while a needle stitches white yarn near one eye. Place both eyes at the same height, and then use a short length of yarn to add the small facial lines.

Pattern Construction and Assembly
Four stages build the project:
- Head and body: Work them in one piece from the magic ring, and stuff as you go.
- Belly patch: Crochet it in cream yarn and sew it to the front of the body.
- Limbs and ears: Work the arms, legs, and tufted ears as separate small pieces in rounds.
- Final assembly: Sew each piece on with the long tails, add the safety eyes, and neaten the finish.
When you attach pieces, pin them in place with stitch markers first. Then check the front, side, and back views, and sew with small, firm stitches through both layers.
Customization Options for Your Crochet Munchlax Amigurumi
- Color swaps: Try a lighter blue for a different look, or use pastel shades for a baby-friendly version.
- Yarn weight: Thicker yarn makes a bigger plush, while thinner yarn makes a charm.
- Keychain version: Add a small loop of yarn or a ring at the top.
- Face style: Embroidered eyes make the toy safer for very young children.
- Seasonal touches: A tiny scarf or hat can turn Munchlax into a holiday gift.
Common Mistakes and Troubleshooting
Stuffing shows through the stitches. The fabric is too loose, so use a smaller hook, pull each stitch snug, and stuff gently rather than forcing the filling in.
The shape looks lumpy. This usually comes from uneven stuffing or uneven increases. Pull out the lumps, add filling in smaller pieces, and spread the increases evenly around the round.
The color change looks messy. Switch yarn on the last step of the final stitch of the old color, and keep tension steady on the first new row. A tiny jog is normal in spiral rounds, and the belly patch can hide it.
The eyes sit crooked. Use pins or markers to test the eye positions before you lock the backs on. Then step back and view the face from a distance.
The head tilts. You may have overstuffed one side. Open a few stitches, rebalance the filling, and sew the head down more firmly.
Finishing and Care for the Crochet Munchlax Amigurumi
First, weave in all loose tails with the tapestry needle, running them through the inside of the body before trimming. Then tug each attached part gently to check it. Finally, brush away any stray fluff.
To clean it, spot clean with a damp cloth and mild soap. Cotton yarn handles gentle hand washing well, but air-dry the toy completely to keep the stuffing fresh. Also, avoid hot dryers, since they can change the shape.
Bonus: Display and Gift Ideas
Munchlax looks great on a desk, a bookshelf, or beside a game console. For gifting, wrap the toy in tissue and add a small handwritten note. In addition, a small basket with a few matching Pokémon-style pieces makes a thoughtful present for a fan.
FAQs About the Crochet Munchlax Amigurumi
What yarn works best for this crochet Munchlax amigurumi?
Milk cotton yarn in 4-ply weight works best, since it feels soft and keeps stitches neat.
Which hook size should I use?
Use a 3.00 mm hook, because it keeps the fabric firm for stuffing.
Is this pattern suitable for beginners?
Confident beginners can manage it, especially with the photo steps. Basic stitches and a magic ring are the main skills you need.
Can I replace the safety eyes?
Yes. Embroidered eyes are a safer choice for small children, and they give a different, softer look.
How can the toy keep its shape over time?
Use tight stitches and firm, even stuffing. In addition, avoid squashing the toy while you store it.
Can I change the size?
Yes. Use thicker yarn with a larger hook for a bigger toy, or thinner yarn with a smaller hook for a smaller one.
Make Room on the Shelf for Munchlax
A finished crochet Munchlax amigurumi makes a charming gift and a lovely way to show Pokémon love in soft yarn. Each stage, from the first magic ring to the final face details, builds toward a cozy little character with plenty of personality. So save this guide for later, share it with a crochet friend, and leave a comment about the colors you chose.