Cute Crochet Red Mini Backpack Pattern for Beginners
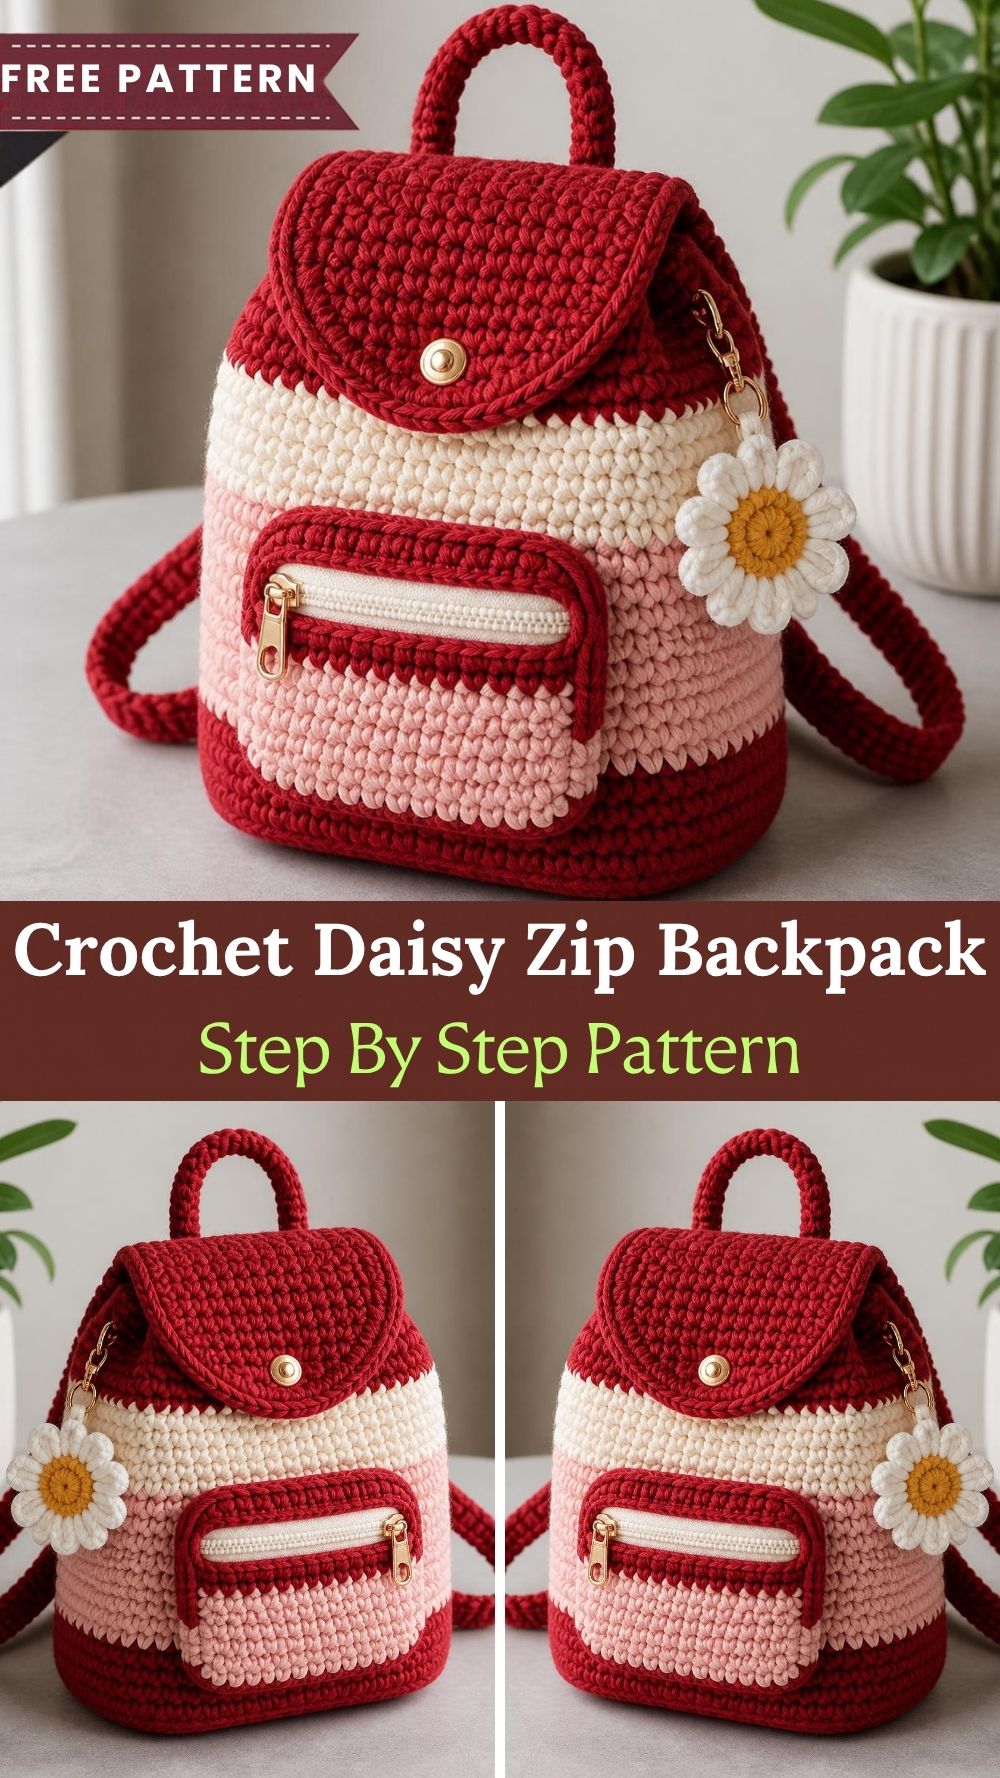
Cherry red stitches, soft cream stripes and a little white daisy dangling from the zipper turn this Cute Red Crochet Mini Backpack into something you’ll want to carry everywhere. It’s a handmade bag that fits sunny walks, busy school mornings and lazy weekend trips. Besides, every time you pick it up, it feels like a small hug you get to wear.
Chunky cotton gives the bag a soft but sturdy shape. Meanwhile, the blush and ivory stripes add a gentle touch. The zip pocket and button flap keep small items secure, and finally, a tiny daisy charm on the zipper finishes the look.
Crochet Mini Backpack Pattern Overview
The finished bag measures about 20 cm (8 in) tall, 18 cm (7 in) wide, and 10 cm (4 in) deep. First, you work the base flat in rows. After that, the body continues in spiral rounds, so there is no slip stitch or turning chain at the end of each round. Finally, the flap, pocket, straps, and charm are made separately and sewn on.
Materials and Supplies for a Crochet Mini Backpack
Before you start, check the Craft Yarn Council’s yarn weight system to confirm that your chunky cotton yarn or cord matches the weight called for here.
- Chunky cotton yarn or cord: about 200 g cherry red, 70 g blush pink, 70 g warm ivory, plus small scraps of white and mustard yellow
- 5 mm crochet hook
- One ivory zipper, 12 cm (5 in)
- One gold button, 20 mm
- One gold lobster clasp for the charm
- Stitch markers
- Tapestry needle and matching sewing thread
- Scissors
Abbreviations (US terms): sc = single crochet, hdc = half double crochet, dc = double crochet, dec = single crochet decrease, inc = two sc in one stitch, ch = chain, sl st = slip stitch, MR = magic ring
- Hook size: 5 mm
- Gauge: 14 sc and 14 rows = 10 cm (4 in), worked tightly
Special Techniques for This Crochet Mini Backpack
- Color changes in the round: Switch to the new yarn on the last yarn over of the final stitch of a stripe. After that, carry the old strand up inside the work.
- Working into row ends: Stitch evenly into each row edge when you start the body, so the walls stand straight.
- Invisible decrease: Work through the front loops only, because this gives a smooth flap edge.
Time Needed to Make the Backpack
- Prep: 15 minutes to sort the yarn and gather the notions
- Stitching: 6 to 7 hours across all pieces
- Finishing: 1 hour for sewing, the zipper, and the charm
Crochet Mini Backpack Pattern Instructions
Step 1: Base
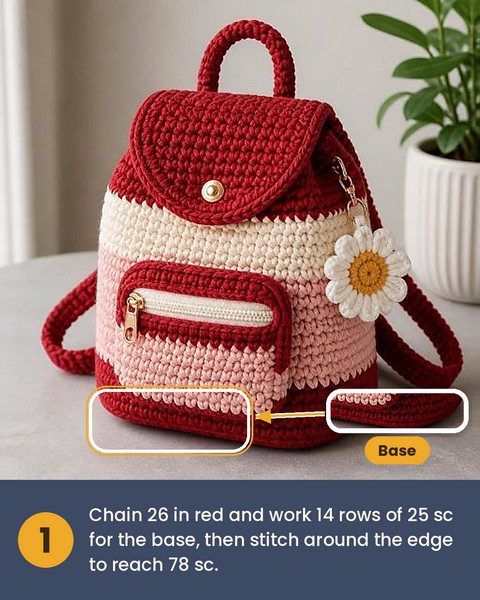
To begin, with red, ch 26.
- Row 1: sc in the 2nd ch from hook and in each ch across (25), ch 1, turn
- Rows 2 to 14: sc in each st (25), ch 1, turn
Do not fasten off. Next, rotate the work and crochet 1 sc in each st or row end around the whole edge, including one stitch in each corner, until you have 78 sc. If needed, add or skip a stitch or two to land on 78. Then place a marker and begin working in the round.
Pro tip: Keep tension firm on the base, because a loose base makes the bag slump when it’s full.
Step 2: Body Stripes

Now work in spiral rounds with 78 sc in every round.
- Rounds 1 to 4: red
- Rounds 5 to 12: blush pink
- Rounds 13 to 20: ivory
- Rounds 21 to 24: red
Even stripes only happen when each round has the same stitch count, so check it at every color change.
When the last round is done, fasten off. Afterward, sl st in the next stitch to even out the top edge.
Step 3: Flap
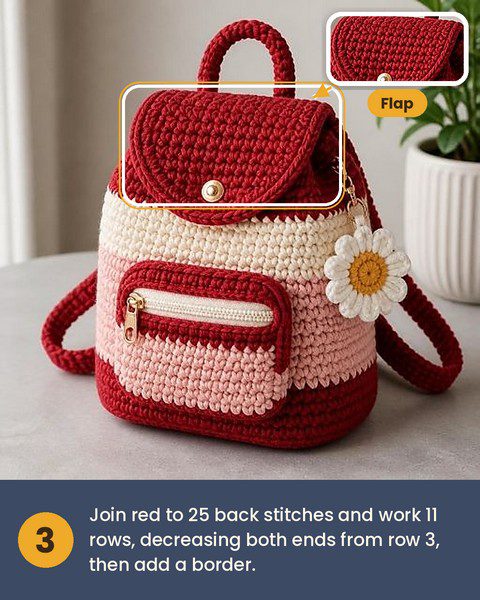
First, join red to the back of the bag at the 25 stitches centered along the top edge. Then work back and forth.
- Row 1: sc in each of the 25 sts, ch 1, turn
- Row 2: sc in each st (25), ch 1, turn
- Row 3: dec, 21 sc, dec (23), ch 1, turn
- Row 4: sc in each st (23), ch 1, turn
- Row 5: dec, 19 sc, dec (21), ch 1, turn
- Row 6: dec, 17 sc, dec (19), ch 1, turn
- Row 7: dec, 15 sc, dec (17), ch 1, turn
- Row 8: dec, 13 sc, dec (15), ch 1, turn
- Row 9: dec, 11 sc, dec (13), ch 1, turn
- Row 10: dec, 9 sc, dec (11), ch 1, turn
- Row 11: dec, 7 sc, dec (9)
Do not fasten off. Instead, work 1 round of sc around the flap edge. At the center of the curve, make ch 6 and sl st back into the same stitch to form the button loop. Finally, fasten off.
Step 4: Front Pocket

Start with red, ch 16.
- Row 1: sc in the 2nd ch from hook and across (15), ch 1, turn
- Rows 2 to 12: sc in each st (15), ch 1, turn
After the last row, work 1 round of sc around the panel. Then fasten off with a long tail.
Step 5: Handle and Straps
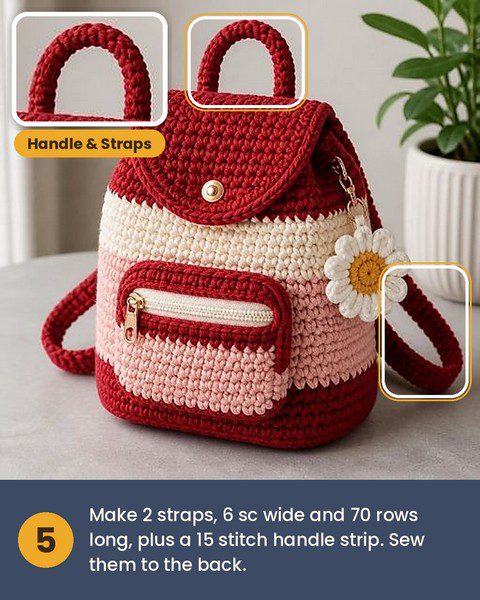
Handle: With red, ch 16 and work 15 sc across. After that, work 3 more rows of 15 sc, then fasten off.
Straps (make 2): With red, ch 7.
- Row 1: sc in the 2nd ch from hook and across (6), ch 1, turn
- Rows 2 to 70: sc in each st (6), ch 1, turn
At the end, fasten off both pieces with long tails.
Step 6: Daisy Charm

To make the flower, start with white and make a MR.
- Round 1: ch 1, 16 sc in the ring, join with a sl st (16)
- Round 2: In the next st, work (sc, hdc, 2 dc, hdc, sc), then sl st in the next st. Repeat 8 times to make 8 petals. Fasten off.
Next, with mustard, make a MR, ch 1, work 8 sc, and join. Then sew the yellow center to the middle of the white flower. Finally, make a ch 8 loop at the back and attach the gold clasp.
Assembly Steps for the Crochet Mini Backpack
- First, sew the button to the front of the bag, centered about 3 cm below the top edge, so the flap loop reaches it.
- Next, pin the pocket to the lower front. Then whip stitch it to the bag along the sides and bottom.
- After that, hand sew the zipper along the open top edge of the pocket, with one tape side on the panel and the other on the bag front.
- Then fold the handle strip in half and sew it behind the flap, centered on the back.
- Afterward, sew the top of each strap to the back, 6 cm apart. Then sew the bottoms to the lower back corners of the base.
- Finally, clip the daisy charm to the side seam.
Common Mistakes to Avoid
- Wavy stripes: Count stitches at each color change.
- Curling flap: Block it flat with damp towels for a few hours.
- Straps too short: Test the length on the person who will wear the bag before sewing.
- Loose pocket corners: Sew with a stitch at every other row end.
Uses and Benefits of a Crochet Mini Backpack
This bag fits a phone, a lip balm, and a small notebook. For example, wear it on the school run, to a picnic, on a market trip, or on a café date. Cotton cord keeps its shape and resists scuffs, and it also softens with use. Moreover, leftover skeins can become extra stripes, so the project helps stretch your yarn budget. In addition, a handmade backpack works well as a thoughtful gift for birthdays and holidays.
Beginner Tips for Your First Crochet Mini Backpack
- Place a stitch marker on the first stitch of every round.
- Keep each color tail inside the work, not on the surface.
- Test the zipper length against the pocket before you cut your yarn.
- If the fabric looks open, try a smaller 4 mm hook.
Personalization Ideas for Your Mini Backpack
Color Stories
Try lavender and cream for a spring look, or choose navy and white for a school-ready bag.
Charm Changes
Swap the daisy for a heart, a star, or a tiny initial worked in contrast yarn.
Pocket Styles
Instead of the zipper, use a button flap on the pocket.
Mini Version
For a purse-sized backpack, use DK cotton and a 3.5 mm hook.
Bonus Section: Washing and Care Guide
Spot clean the bag with a damp cloth and mild soap. After that, reshape it and let it air dry flat on a towel. Avoid hanging the bag wet, because heavy wet cotton stretches. Likewise, keep the zipper area out of direct soaking, and store the backpack lightly stuffed with tissue paper.
Frequently Asked Questions About the Crochet Mini Backpack
What yarn works best for a crochet mini backpack?
Chunky cotton gives firm stitches and holds its shape, although a tight acrylic cord also works.
Can beginners make the backpack?
Yes, because the pattern uses sc, hdc, dc, and simple decreases, plus basic sewing.
How do I stop the bottom from sagging?
Work the base tightly. Then add a piece of plastic canvas under a fabric lining.
How much yarn do I need?
You need about 340 g in total across all colors.
Can I skip the zipper?
Yes. Instead, leave the pocket open on top, or close it with a small button.
A Crochet Mini Backpack Worth Carrying Everywhere
A first backpack can feel like a big project, but each piece is small and simple. Start with the base, then add the stripes, and soon the flap and daisy bring the bag to life. Once you finish, choose fresh colors for your next one, and make a set for friends.