
Free Crochet No Sew Bat Amigurumi Pattern
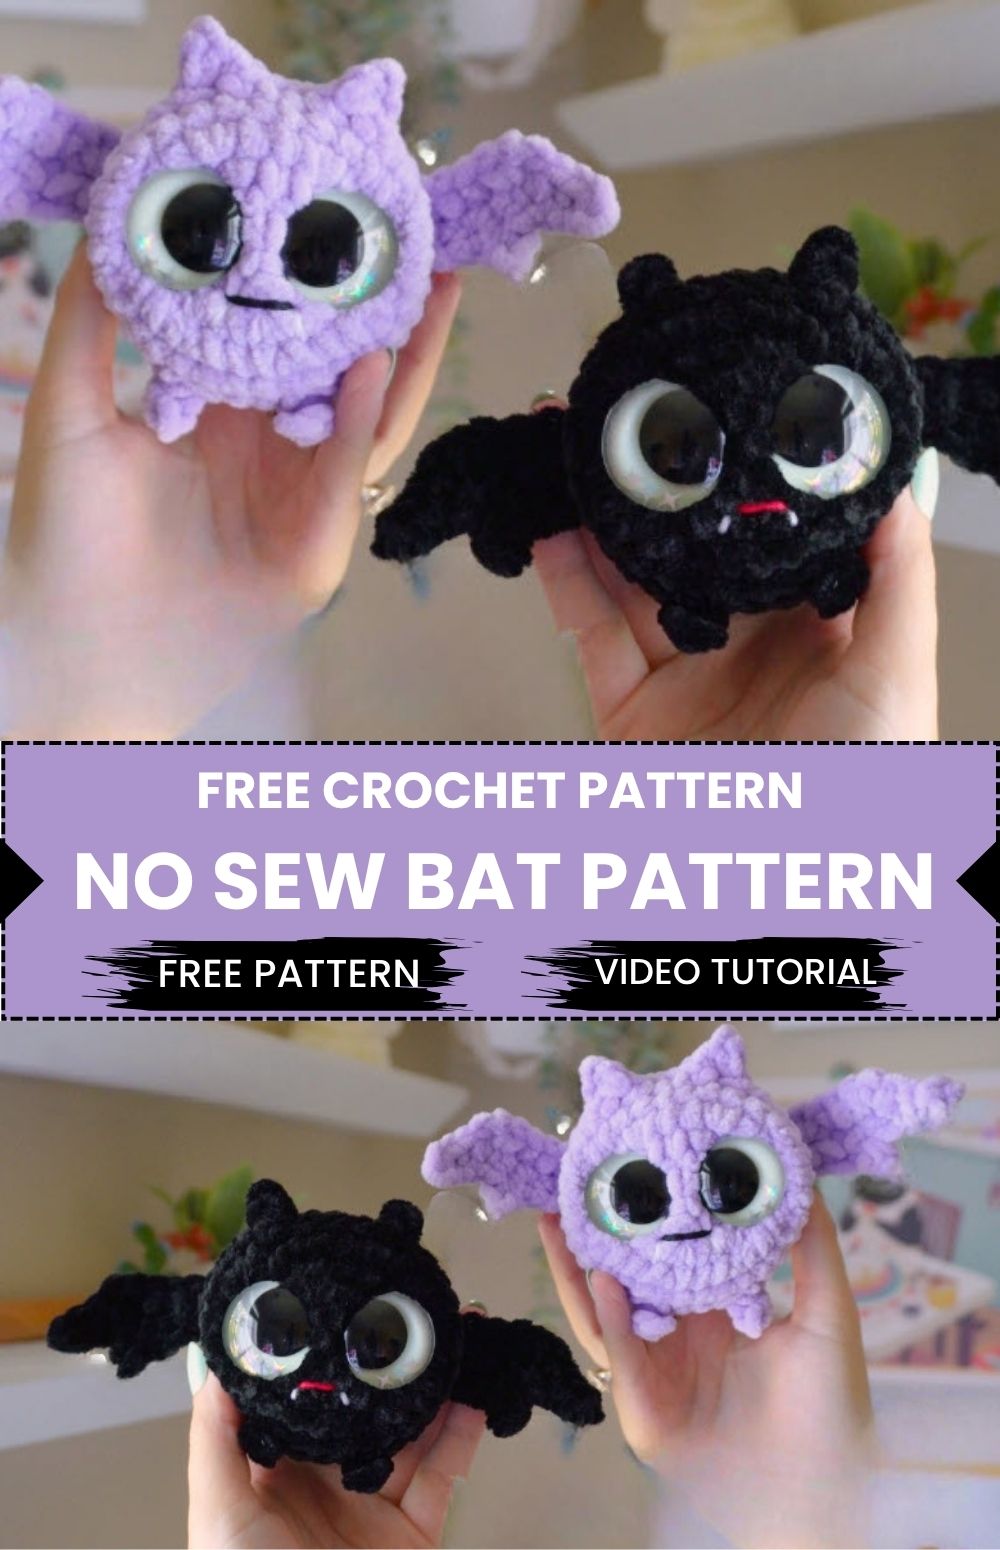
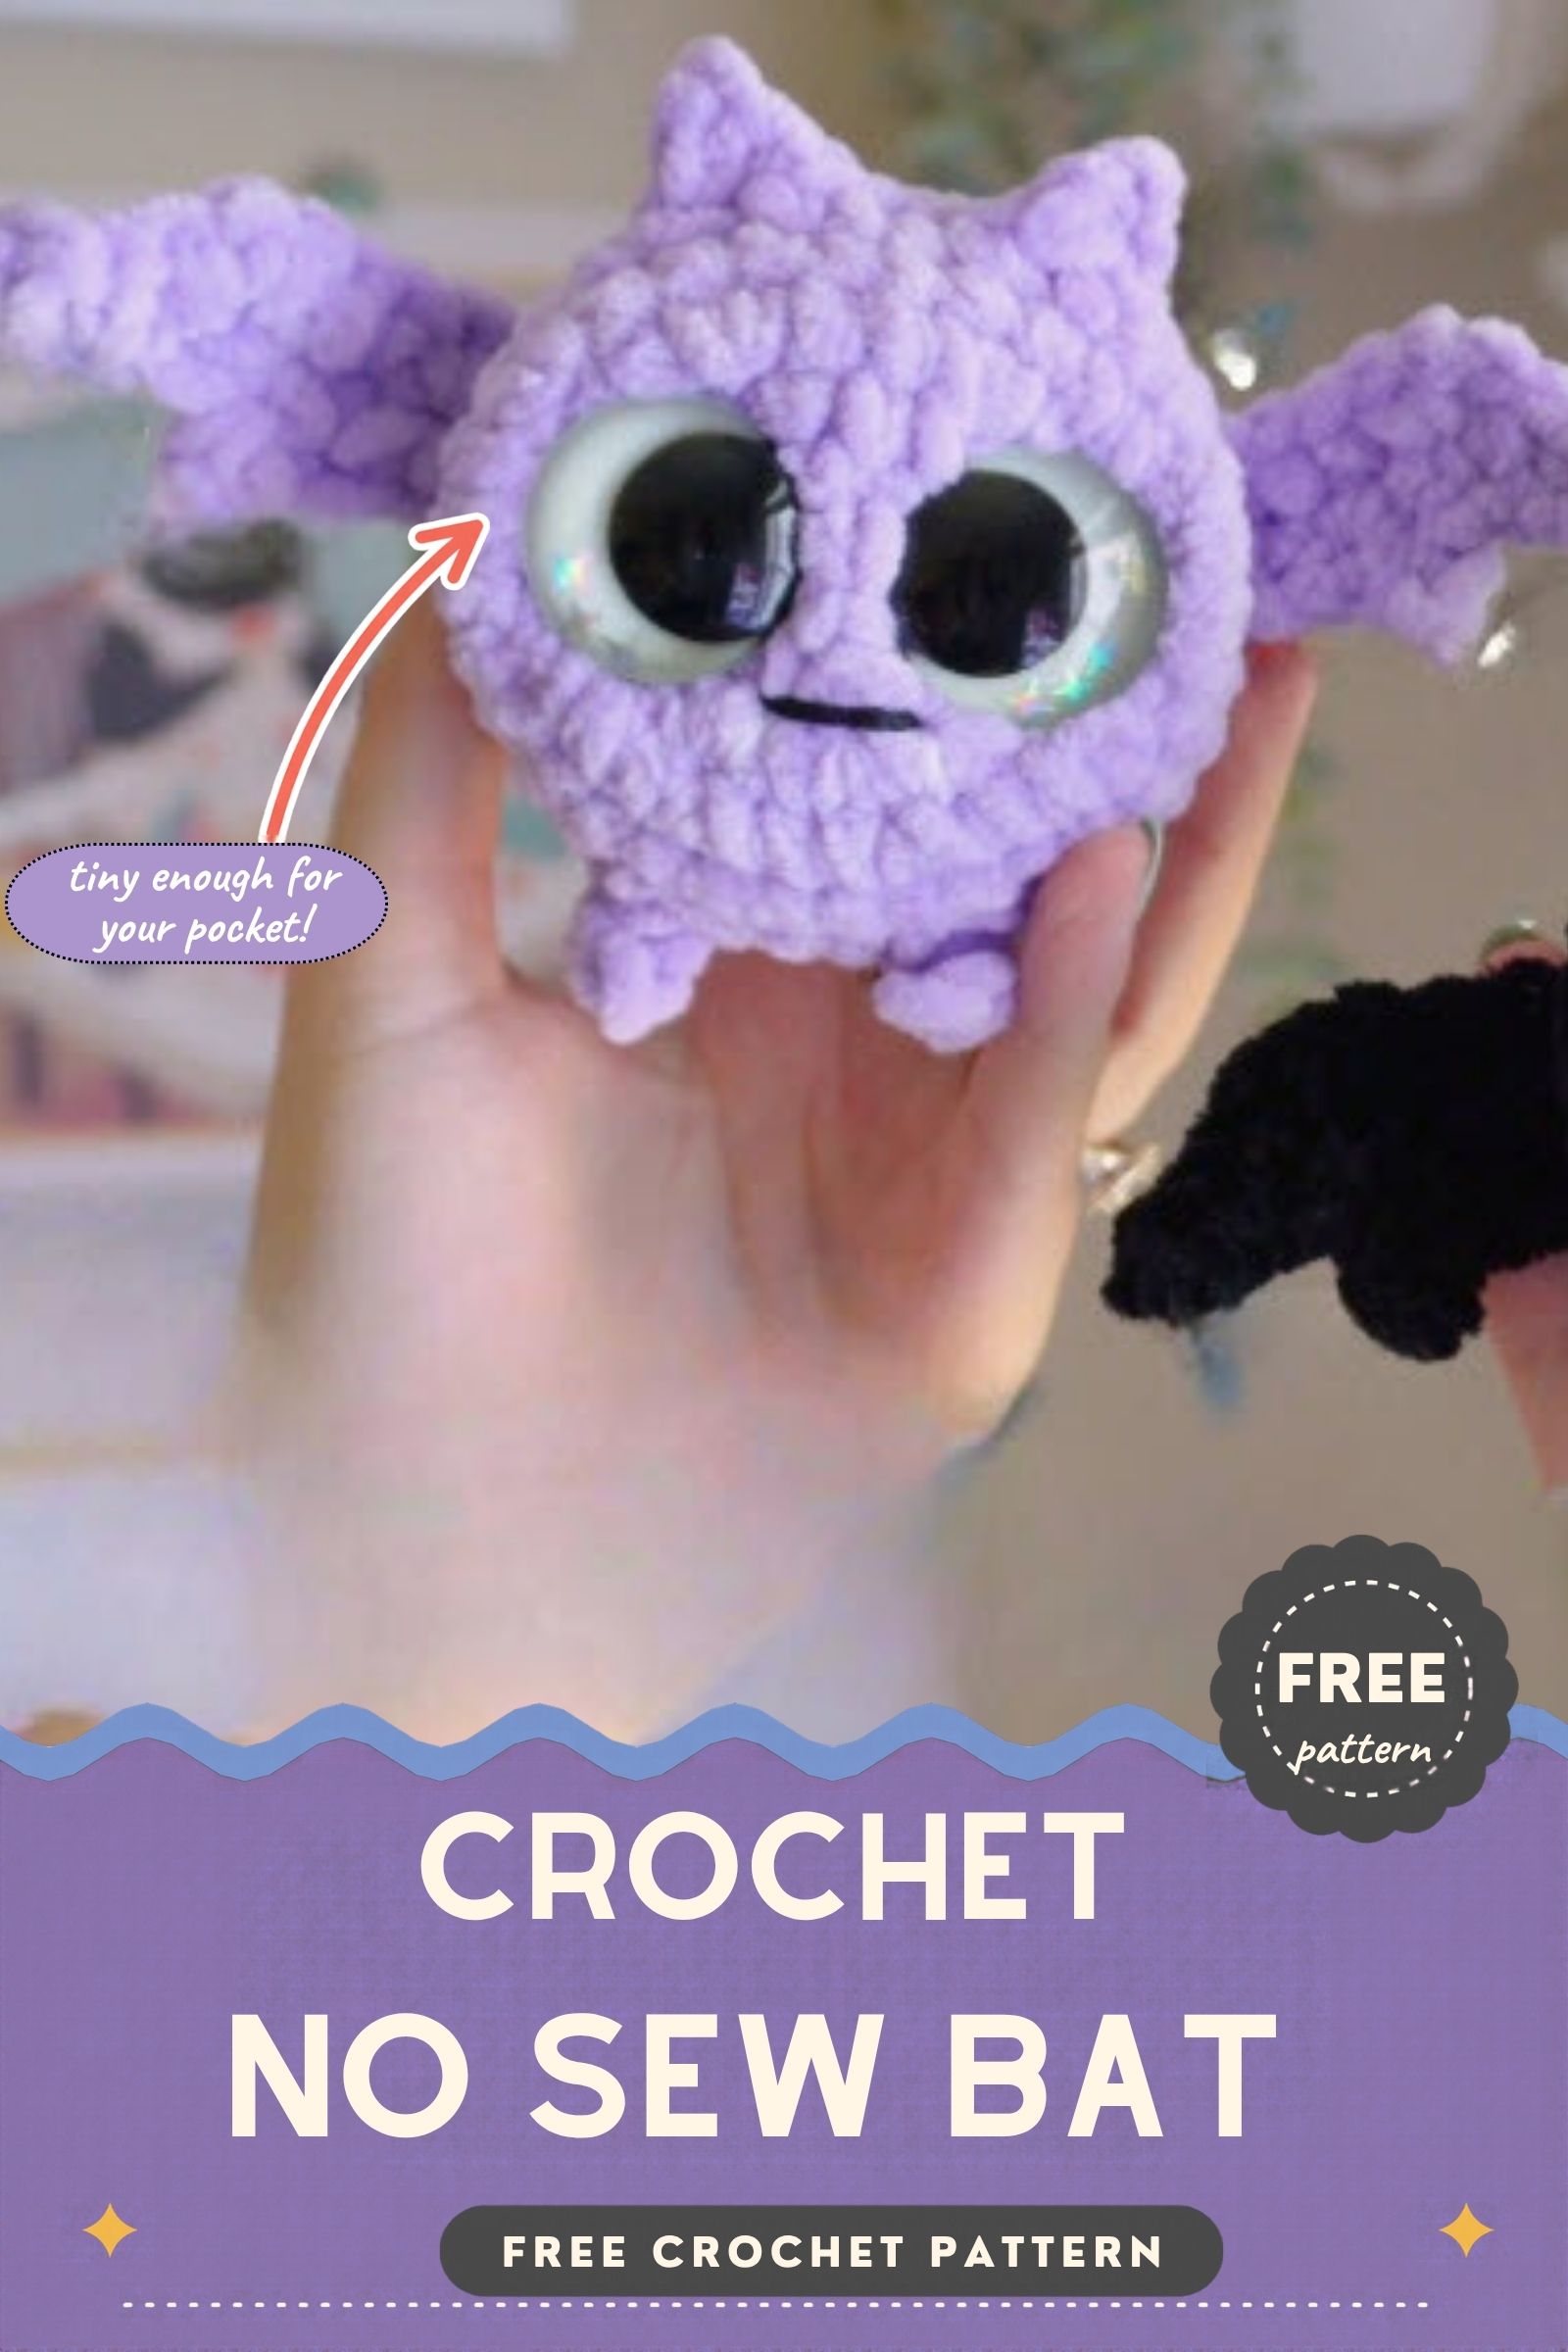
Plush lilac yarn, oversized glossy eyes, and a pair of tiny fangs turn a free crochet no sew bat pattern into a snuggly little night creature. Spooky season never looked so soft, and the finished toy sits easily in the palm of your hand.
Every part of the bat grows as you go. The ears and legs sprout straight from the body rounds, while you crochet the wings flat in rows and join them during the round. As a result, you need no sewing at the end. Simple black and white embroidery finishes the face.
Chunky plush yarn makes the bat work up quickly, and the pattern uses only basic stitches. In the end, you get a sweet gift, a bag charm, or a desk buddy for anyone who loves cute, cuddly Halloween decor.
Skill Level and Time Box for the Free Crochet No Sew Bat Pattern
Skill level: Beginner-friendly, with an easy intermediate feel in the wing rows and the ear round.
- Prep: about 10 minutes to gather supplies and set up your eyes and stitch marker
- Stitching: about 2 to 3 hours for both wings and the whole body
- Finishing: about 30 minutes for the face, stuffing, and weaving in ends
Materials and Supplies for the Free Crochet No Sew Bat Pattern
- Yarn: Premier Yarns Parfait Chunky plush yarn in a soft shade such as lilac
- Crochet hook: 5.0 mm
- Safety eyes: 30 mm, standard or glow-in-the-dark
- Facial details: small amounts of black yarn or embroidery thread for the mouth, and white for the fangs
- Stuffing: fiberfill
- Yarn needle: a tapestry needle with a large eye
- Scissors
- Stitch marker
- Optional: a keychain ring or small clasp if you want to turn the bat into a bag charm
Crochet Techniques Used in the Free Crochet No Sew Bat Pattern
- Magic ring (also called a magic loop)
- Single crochet (sc)
- Increase (inc), meaning two single crochets in one stitch
- Decrease (dec), meaning two stitches worked together
- Working in the front loops and back loops only
- Joining parts as you crochet, so nothing needs sewing on afterward
Step-by-Step Free Crochet No Sew Bat Pattern
Work the body in continuous rounds, and keep your stitch marker in the first stitch of each round. Start with the wings, because you attach them partway up the body.
Step 1: Make the Wings (Make 2) for the Free Crochet No Sew Bat Pattern
You work the wings in small rows instead of rounds.
- Make a slip knot and chain 3.
- Row 1: Starting in the second chain from the hook, work 2 sc down the chain. Chain 1 and turn.
- Row 2: Skip the chain and work 2 sc. Chain 2 and turn.
- Row 3: Work 1 sc in the second chain from the hook, then 2 sc down. Chain 1 and turn.
- Row 4: Work 2 sc. Chain 3 and turn.
- Row 5: Work 2 sc down the chain, 1 sc in the next stitch, 1 inc, then 4 sc across the top edge of the wing. Fasten off and leave a yarn tail for securing.
Pro Tip: Plush yarn hides stitches, so touch each one with your fingertip before you insert the hook. Rows this small are easy to miscount.
Afterward, make a second wing the same way and set both aside.

Step 2: Crochet the Body
- Round 1: Make a magic ring and work 8 sc into it. Pull the tail to close the circle.
- Round 2: Work 8 inc (16 stitches). Place your stitch marker in the first stitch.
- Round 3: (1 sc, 1 inc) repeat 8 times (24 stitches).
- Round 4: (2 sc, 1 inc) repeat 8 times (32 stitches).
- Round 5: Work 32 sc around.
Why it matters: a flat, even disc now means the head sits round and smooth once the sides rise.
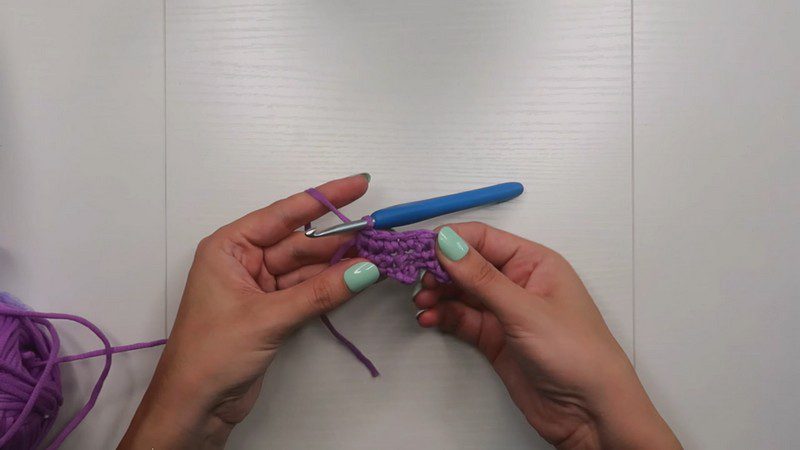
Step 3: Make the Ears and Legs
Round 6 sets up the ears and legs at the same time, so read through it once before you begin.
- Work 2 sc.
- First ear: Work only in the front loops. Make 1 sc in the front loop, chain 2, 1 sc in the second chain from the hook, then 1 sc in the next front loop. Leave the back loops of these stitches untouched, because Round 7 returns to them.
- Work 2 sc between the ears.
- Second ear: Make it exactly like the first, again in the front loops only.
- Work 11 sc.
- First leg: Chain 3, then work 2 sc down the chain.
- Work 4 sc.
- Second leg: Chain 3, then work 2 sc down the chain.
- Finish the round with 9 sc.
Pro Tip: Slide a spare stitch marker or scrap yarn into the unused back loops of the ears, since fuzzy yarn makes them easy to lose.

Step 4: Add the Eyes
Insert the 30 mm safety eyes between Rounds 2 and 3 of the head, and leave a gap of a few stitches between them. First, lay the eyes on the fabric and test the spacing before you snap on the backs. Wide-set eyes give a cuter, rounder look. Then press the washers on firmly until they click.

Step 5: Stitch the Face
Thread your yarn needle with black yarn and embroider a small, curved smile below the eyes. Next, use white yarn to add two little fangs under the smile. Keep the stitches short and pull gently, so the plush pile stays fluffy and does not pucker.

Step 6: Continue the Body
- Round 7: Work 2 sc. Next, work 1 sc into each marked back loop of the first ear. Work 2 sc between the ears, then 1 sc into each back loop of the second ear. Continue with sc around, skipping the leg stitches, until you have 32 stitches.
- Round 8: Work 32 sc around.
Why it matters: closing the ears with their back loops gives them a clean, folded shape without a single stitch of sewing.
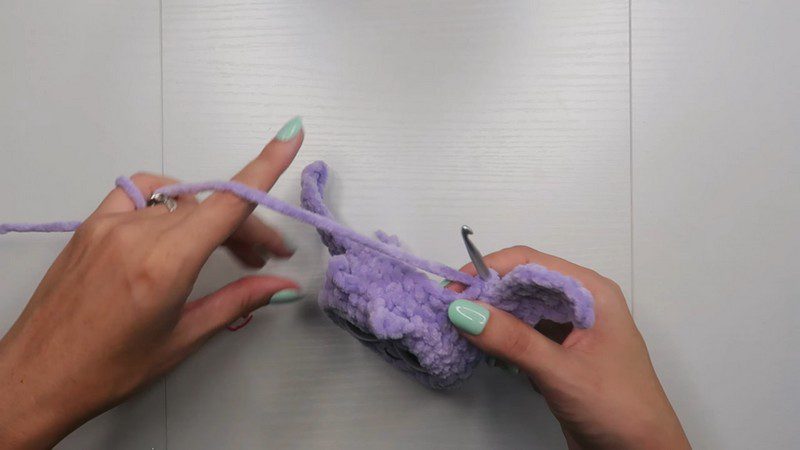
Step 7: Attach the Wings
- Round 9: Work 10 sc.
- Hold the first wing against the body. Work 3 sc through both the wing and the body at the same time.
- Work 15 sc.
- Attach the second wing with 3 sc through both layers.
- Finish the round with sc.
- Round 10: Work 32 sc around.
Pro Tip: Keep both wings level with each other before you join them. A quick glance from the front catches a crooked wing before it gets locked in.

Step 8: Decrease and Stuff
- Round 11: (2 sc, 1 dec) repeat 8 times (24 stitches).
- Stuff the body firmly with fiberfill, and push small pieces into the ears and legs first.
- Round 12: (1 sc, 1 dec) repeat 8 times (16 stitches).
- Add the final bit of stuffing.
- Round 13: Work 8 dec.
- Fasten off with a long tail. Thread the tail through the front loops of the remaining stitches, pull tight to close, and weave in all the ends.
Finishing Touches for the Free Crochet No Sew Bat Pattern
To finish, smooth the plush pile with your fingers, gently tug the wings open, and pinch the ears into shape. Then trim any stray strands of yarn. If you want a keychain, loop a small ring through a stitch at the top of the head and attach it securely.
Helpful Beginner Tips for the Free Crochet No Sew Bat Pattern
Keep Stitches Tight
Stuffing shows through loose stitches, so drop down one hook size if your fabric looks gappy. A snug tension also helps the plush yarn hold its shape.
Use a Stitch Marker
Chunky yarn hides the start of the round very well. However, if you move the marker up every round, you will never lose your place.
Stuff the Right Way
Add stuffing in small fluffy pieces instead of one big wad. Fill the ears and legs first, then the body. Finally, press the filling out toward the edges so the bat feels even and round.
Washing and Care Tips
Plush yarn likes gentle treatment. Spot clean with a damp cloth and a drop of mild soap. If a full wash is necessary, place the bat in a mesh bag, use a cool delicate cycle, and let it air dry. Afterward, fluff the pile with a soft brush.
Bonus: Halloween Display Ideas for Your Bat
A finished bat looks great beyond the toy shelf. For example, perch it on a mantel next to a few pumpkins, clip it to a backpack zipper, or tuck it into a trick-or-treat gift bag. A small group in different colors also makes a cheerful display on a windowsill.
Design Customization Ideas for the Free Crochet No Sew Bat Pattern
Try Different Colors
Black, gray, and deep plum make a classic Halloween bat. On the other hand, pastel pink, mint, or baby blue give a sweet, gentle look all year long.
Add Cute Accessories
Stitch on a tiny bow, a felt heart, or a little scarf. A small ribbon around the neck also dresses the bat up for gifts.
Make Mini Versions
Swap in a smaller hook and lighter yarn, and use 15 to 20 mm safety eyes for a pocket-sized bat. Smaller bats make excellent keychains and party favors.
Frequently Asked Questions
How long does the free crochet no-sew bat pattern take?
Most crocheters finish it in an afternoon, roughly 3 hours including the face and stuffing. Beginners may want an extra hour.
What is the best yarn for amigurumi?
Cotton and acrylic give crisp stitch definition and are easy to find. Plush chenille-style yarn, like the one used here, makes a softer, huggable toy, although the stitches are harder to see.
How do I make my crochet plush firm?
Use a hook slightly smaller than the yarn label suggests, keep your tension tight, and pack the fiberfill in firmly. Add it in small pieces so no lumps form.
Can I make the bat without safety eyes?
Yes. Embroider black circles with a tiny white highlight instead. Embroidered eyes are the safest choice for toys meant for babies and small children.
Let Your Free Crochet No Sew Bat Take Flight
Each small stitch brings your bat closer to life, and the no-sew build keeps the process relaxed and fun. So pick up your lilac yarn, take it one round at a time, and watch the ears, legs, and wings appear. Then share your finished bat with friends, and save the pattern for your next handmade gift.