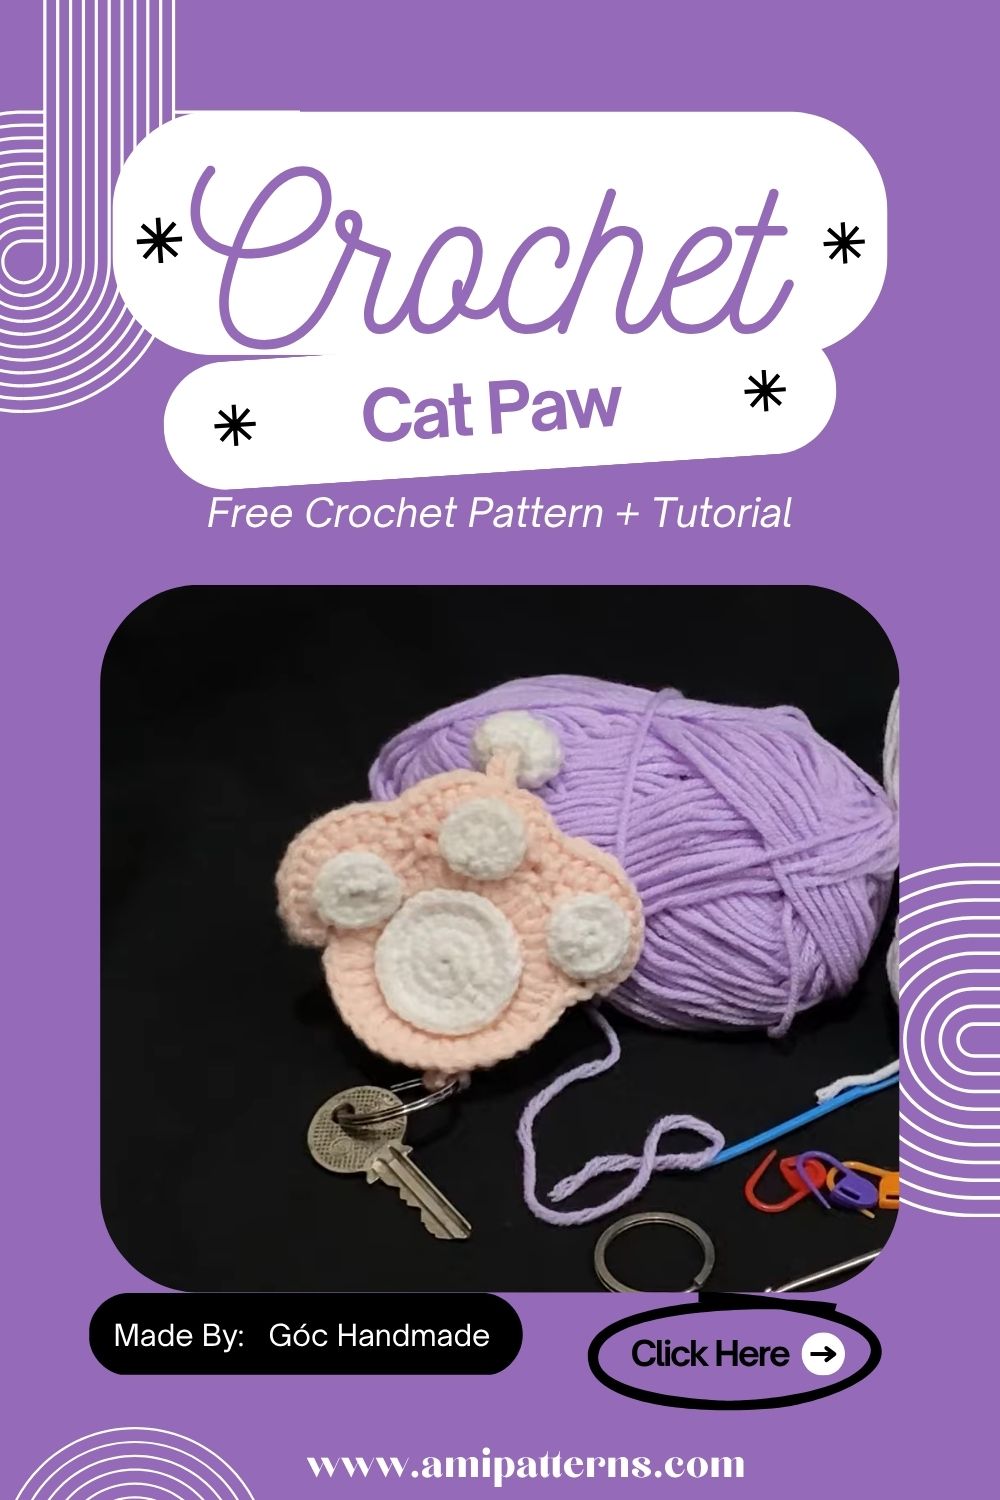
Free Crochet Cat Paw Keychain Amigurumi Pattern You Need to Try
Have you been scrolling through crochet ideas lately? You must have noticed one tiny accessory that’s appearing nearly everywhere: the adorable crochet cat paw keychain. It is small, simple and undeniably cute. Moreover, it somehow manages to steal the attention faster as compared to full-sized amigurumi animals.
But here is the real question, Why is everyone so obsessed with something so minimal? You must know the answer before even telling you, it is the kind of project that looks and feels impressive. Whether you are a beginner or an experienced crochet wanting some fun, this paw shaped charm is going to be your next favorite.
Why the Crochet Cat Paw Trend Is Everywhere
The cat-themed crochet items are not new, but nowadays miniature paw designs have taken things to another level. As compared to the full cat plushies, paw keychains are quick and portable. Moreover, they are quite easy to personalize.
Many makers feel that they can make it in an hour. Others may enjoy how easily it can fit in their bags, keys, and even everyday accessories. Honestly, the charm lies in its simplicity. When you look at the soft round base, tiny toe beans and pastel color choices, don’t worry at all. Everything is enough to turn basic yarn into something irresistible.
Materials You’ll Need
Before starting, gather your supplies:
- Soft acrylic or cotton yarn (main paw color)
- Contrasting yarn for toe beans
- Crochet hook (2.5mm–4mm recommended)
- Fiberfill stuffing
- Yarn needle
- Stitch marker
- Scissors
- Keyring or clasp
Even leftover yarn scraps work perfectly for this project, making it budget-friendly and beginner-friendly.
Basic Abbreviations
- MR – Magic Ring
SC – Single Crochet
inc – Increase
Dec – Decrease
sl st – Slip Stitch
FO – Fasten Off
st – Stitch
Step-by-Step Crochet Cat Paw Pattern
Step 1: Make the Main Paw Base
Make a magic ring and start a single crochet stitch into the magic ring. Gradually increase until a rounded oval is created. This is the primary pad on the paw. Stitches have to be stitched tight and even to maintain the shape neat and structured.
Step 2: Create the Toe Beans
Using the same increase method make 4 small circular pieces. These represent the cute paw pads. They should be both symmetrical and visually balanced, being similar in size.
Step 3: Assemble the Paw Layout
Place all the main and toe beans on a flat surface. Repeat until it looks like a natural cat paw shape. This is necessary to achieve the cutest final appearance.
Step 4: Attach the Toe Beans
Sew each toe bean onto the main paw base with a yarn needle. Make sure each stitch is tight and will hold up to everyday use. The quality of precision is important here for the appearance.
Step 5: Light Stuffing
Put a little bit of fiber filling in the outer paw. Don’t over stuff, it should be soft and squishy, not hard and shaped. If you stuff it, it will keep the finish round.
Step 6: Close the Shape
Carefully sew the other opening. Gently mold it into shape, making sure it is symmetrical and has smooth edges. Your paw has an adorable appearance at this stage.
Step 7: Add Keychain Attachment
Make a small loop at the top and put your key ring or clasp in it. Ensure additional stitching is provided as keychains use the same every day.
Pro Tip
Pin toe beans in place before sewing them on for good. You can do spacing and alignment adjustments without committing changes. This little detail makes a big difference in how the photograph looks and makes it easier to place.
Tutor’s Suggestion
If you plan to make multiple keychains, crochet in batches. First complete all paw bases, then all toe beans, and finally do assembly. For the selling or giving situation, this method would be consistent and time-saving to improve the consistency and save time.
Customization Ideas You’ll Love
Here are some customization ideas you’ll love. Your paw designs can easily be personalized with the following:
- Pastel rainbow tones
- Realistic cat colors
- Glitter yarn accents
- Heart-shaped paw pads
- Mini embroidery details
Seasonal themes and matching colors to create a diy crochet cat paw charm are also possible.
Why Beginners Love This Project
This project is popular among beginners because of the following reasons:
It is a great design for the beginners as it is fast, simple and forgiving. It is not difficult to shape or use advanced techniques. Though the stitches may not be flawless, the end result is still cute and put-together.
Perfect Gift Idea
A handmade cat paw keychain is a great gift idea for:
- Cat lovers
- Friends
- Family
- Teachers
- Coworkers
It’s compact, significant and custom-made for all events. This amusing and delightful book is ideal for small business sellers.
Great for Small Business Sellers
This project is also ideal for craft fairs and online shops because it is:
- Low cost
- Quick to produce
- Highly customizable
- Selling in bundles is easy.
This free amigurumi cat paw pattern is a great and easy-to-understand product for many sellers to sell as a regular best seller since it is so appealing and loved by all!
Why Does It Keep Going Viral?
It’s a design that’s both pleasing and ideal for social media. The final videos tend to be short and usually have assembly and reveal segments, which can be really interesting due to the cuteness and simplicity of the final product. Actually, even the non-crocheters want to have one when they see it online.
Learning Makes It Easier
If you are new to it, following a cat paw keychain tutorial will help you to understand what shaping and assembly are all about. After just one attempt, most crocheters can easily repeat the pattern without guidance.
Final Thoughts
In this case, the crochet cat paw key chain showcases how the most minimal designs can have the greatest impact. Easy to prepare, extremely versatile, and cat-hugger approved. This little accessory is super cute, yet easy to create, give or sell. Don’t be disappointed if you end up creating a lot more than one after creating this little paw, it can become incredibly addictive.