Crochet Black Teddy Bear with Red Star Kawaii Amigurumi
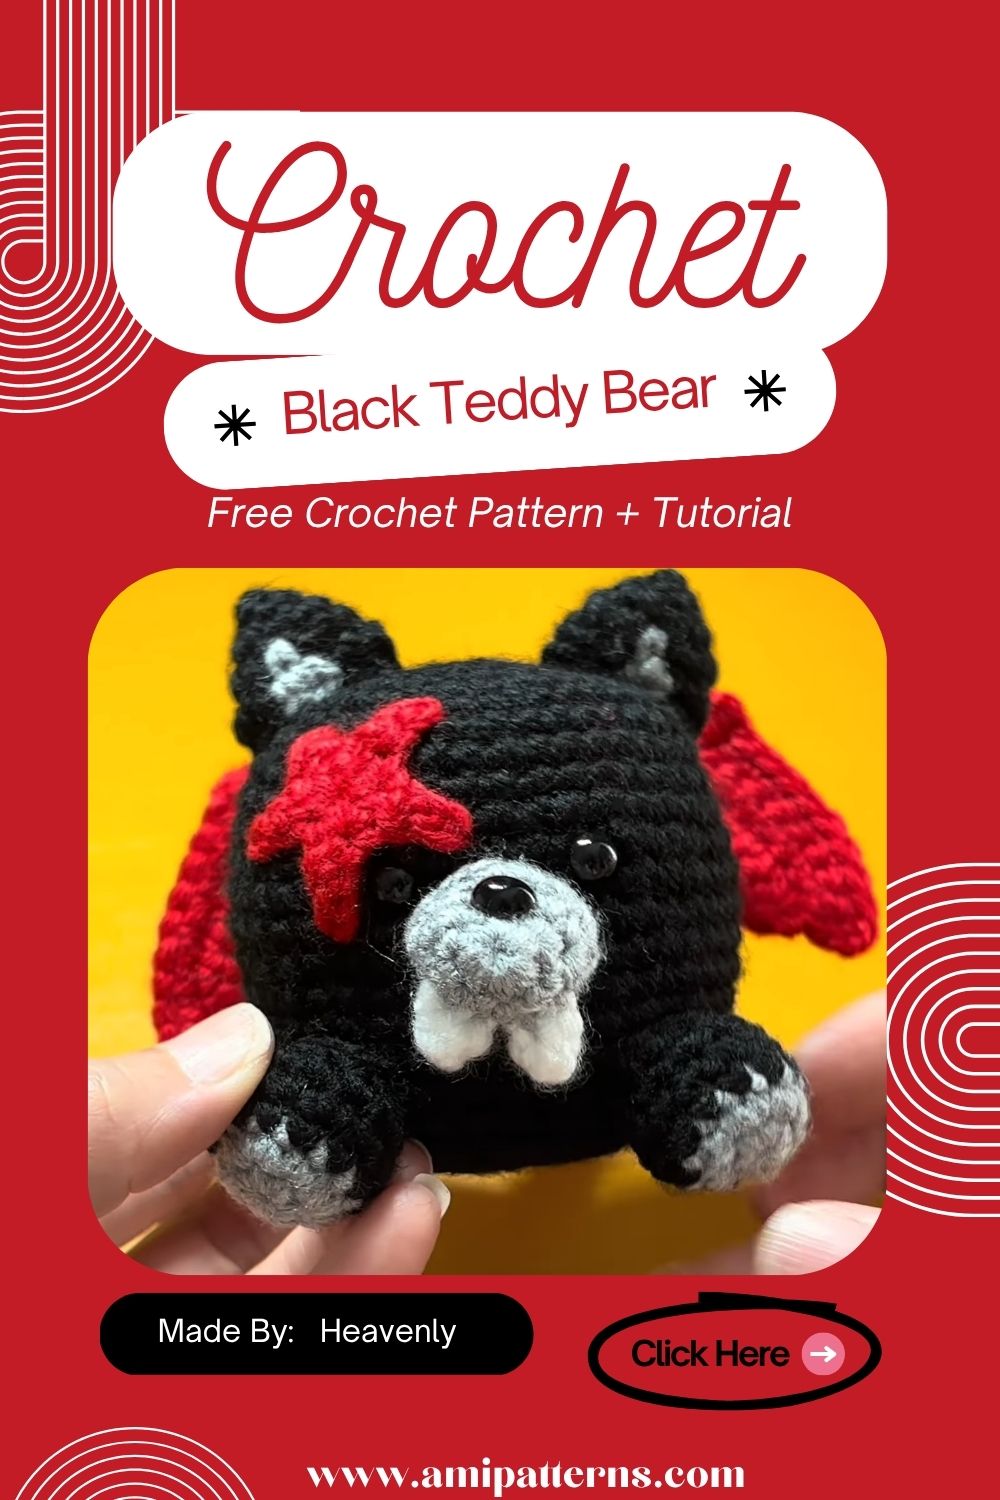
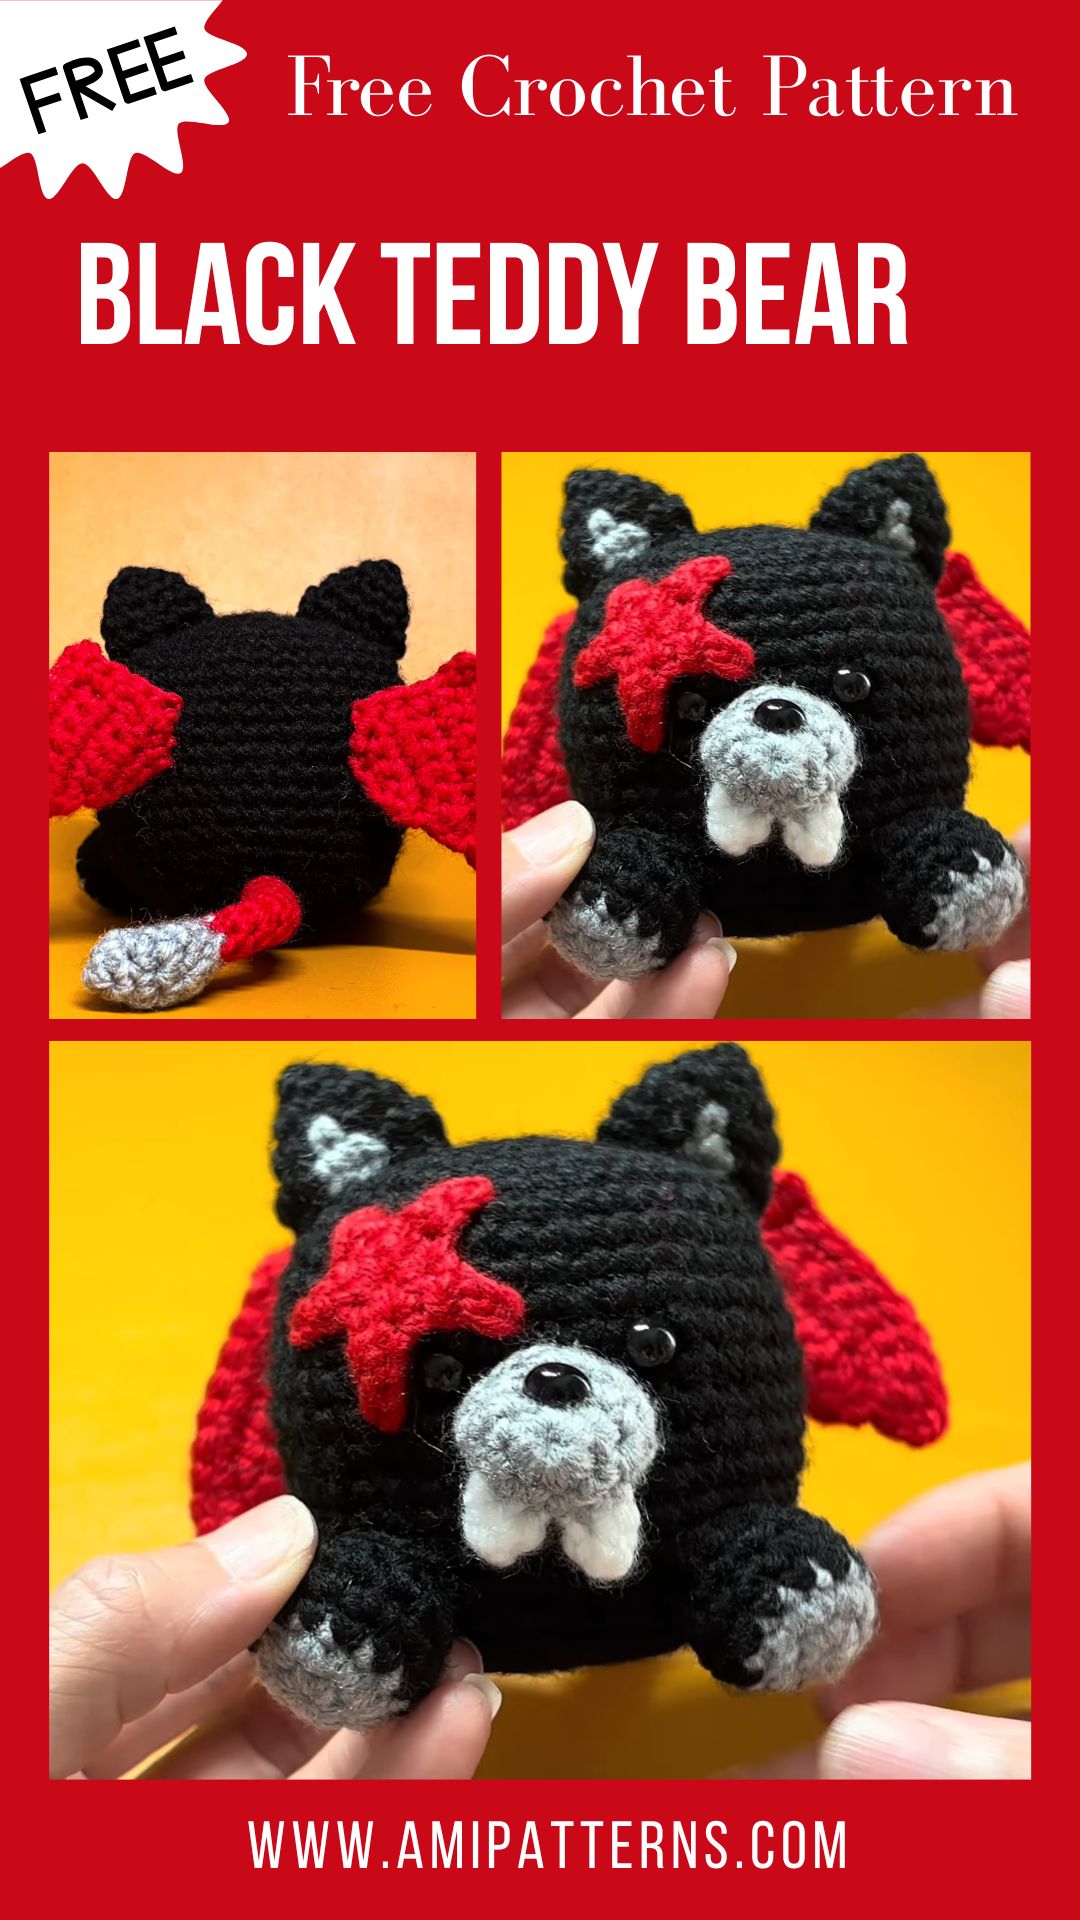
The little black teddy bear will never go out of style. You can crochet a bear that looks fantastic and soon become your best companion. The bright red star, tiny paws, and a sweet face that you embroider with your hands. There is no doubt a handmade product seems more real and even affordable as compared to a store bought item. If you are a fan of kawaii amigurumi, this project is going to melt your heart.
It can be placed on a shelf, adorn a desk, become a meaningful handmade present or just be there for someone. The great thing about this bear is that it doesn’t require a large inventory of materials. There is not much that you require to begin, apart from a small quantity of black yarn, a little red yarn for the star, stuffing, safety eyes, and an appropriate crochet hook.
Why This Little Teddy Bear Is So Special
This isn’t a typical giant teddy bear project. It’s the little details and compact size that make it so charming. The spherical head is the most distinctive feature of the bear, which makes it so cute. It has little ears on top and the short arms and body give it a very cuddly appearance. The black color is a clean base, so that the red star stands out immediately.
It is that star that gives the bear the personality. It can be sewn onto the belly, tucked between the paws or made into a little accessory. When creating the bear as a gift, you may even select a different color for the star to go with the recipient’s favorite color.
The face is as important as the body in a kawaii teddy bear crochet project. The eyes should be spaced evenly and the nose and mouth can be embroidered with a couple of basic stitches. A slight pink flush on the cheeks will make the smile even sweeter.
What You’ll Need
Before getting started, put all the items together. Amigurumi pieces are mini-sized, so not much yarn is required.
- Black worsted or DK weight yarn for bear top (or 2 top yarns of different weights
- A small quantity of cream, white or pink yarn for optional facial details.
- Suitable crochet hook for your yarn
- Polyester fiberfill stuffing
- Two small safety eyes
- Tapestry needle
- Stitch marker
- Scissors
- Stitching pins (if required)
Crochet Abbreviations
| Abbreviation | Meaning |
| MR | Magic Ring |
| ch | Chain |
| sc | Single Crochet |
| inc | Increase |
| inv dec | Invisible Decrease |
| sl st | Slip Stitch |
| dc | Double Crochet |
| FO | Fasten Off |
Work the bear in continuous rounds unless the instructions say otherwise. A stitch marker will help you keep track of the beginning of every round.
Before You Start
Most of this project should be familiar to you if you’re comfortable with basic amigurumi. The primary points to observe are stitch count, stuffing and shaping.
Stitches should be relatively tight. You don’t want them to be too large apart as there will be a chance for the stuffing to show through the black yarn.
Don’t stuff at the last minute. Apply to the body in small amounts as it grows. This provides you with a lot more control of the shape.
A fun idea to try is to stop after a few rounds, softly squeeze the piece. If the side is flatter than the other, you can make the necessary adjustments to the stuffing before it’s too late.
Head
Use black yarn and form a magic ring.
1: 6 sc in MR (6)
2: 6 inc (12)
3: (1 sc, inc) × 6 (18)
4: (2 sc, inc) × 6 (24)
5: (3 sc, inc) × 6 (30)
6: (4 sc, inc) × 6 (36)
7–11: sc around (36)
It should look like a little rounded dome at this stage.
Place the safety eyes between rounds 8 and 9. Make a few stitches in between and test the placement from the front before fastening the back.
Round 12: (4 sc, inv dec) × 6 (30)
Round 13: (3 sc, inv dec) × 6 (24)
Begin adding stuffing.
Round 14: (2 sc, inv dec) × 6 (18)
Stuff slightly and form your head with fingers.
Round 15: (1 sc, inv dec) × 6 (12)
Round 16: 6 inv dec (6)
Quickly remove and close the last opening with a tapestry needle.
Don’t overstuff the head. The bear should have a soft and rounded amigurumi shape, but not too soft.
Ears
Make two ears using black yarn.
Round 1: 6 sc in MR (6)
Round 2: 6 inc (12)
Rounds 3–4: sc around (12)
Sew off tight, with a long tail.
There’s no need to stuff the ears with too much filling. In fact, a small amount of stuffing (or not at all) will make them a nice shape.
Sew each ear slightly folded on the top sides of the head. Test the stitching position with the pins first before stitching permanently. The expression of a bear can change significantly from ear to ear if it is moved with just several stitches.
Body
The body has a similar rounded structure to the head.
With black yarn:
Round 1: 6 sc in MR (6)
2: 6 inc (12)
3: (1 sc, inc) × 6 (18)
4: (2 sc, inc) × 6 (24)
5: (3 sc, inc) × 6 (30)
Rounds 6–10: sc around (30)
Start stuffing gradually.
Round 11: (3 sc, inv dec) × 6 (24)
Round 12: (2 sc, inv dec) × 6 (18)
Stuff the rest and be sure to keep the body nice and round.
Round 13: (1 sc, inv dec) × 6 (12)
Round 14: 6 inv dec (6)
Unzip and zip up the zipper.
The body doesn’t have to be symmetrical. Handmade toys tend to look more attractive when they’re a bit more ‘charismatic’ instead of ‘machine made’.
Arms and Legs
To make the arms, create two small pieces in black yarn.
Round 1: 6 sc in MR (6)
Rounds 2–6: sc around (6)
Stuff just a little and collapse the opening, sew up the arms!
Two slightly larger pieces for the legs.
Round 1: 6 sc in MR (6)
Round 2: 6 inc (12)
Rounds 3–5: sc around (12)
Stuff lightly, flatten and fasten off.
Sew on legs to bottom half and attach arms slightly below the head. Pin first and then check the bear from a number of angles. This is an easy step that will make the assembly a lot easier.
The Red Star
The cherry on top is the detail, which makes this black teddy bear amigurumi extra special.
Crochet a small 5 point star with red yarn.
Start with a Magic Ring or a little circle in the center (based on your style of star formation). Ch and sc or dc evenly around centre.
An easy way to do this is to make one point and then back to centre, and repeat 5 times. Make sure the stitches are tight so that the star is crisp.
When done, cut off and pick up and knit in the ends.
Do not worry if the star is somewhat irregular. Gently block it with your fingers, and fine-tune the points before you put it on the bear.
Sew on the star tightly to the middle of the body. If you’d like a more playful appearance, position it a little to one side rather than dead-center.
Finishing the Face
Your bear’s face is the most important part.
When using safety eyes, insure them before presenting your finished toy to a young child. Embroidered eyes are safer options for baby gifts.
Choose a small piece of dark or contrasting yarn for the nose and embroider with a small amount of it. A small upside down triangle is perfect. Draw a short curve below for the mouth.
You can also add two little pink or red cheek marks.
Make the details concise. Just a few well executed stitches often make up for a complex look for the face with kawaii amigurumi.
Assembly
- Collect all the completed parts.
- Glue the ears onto the head.
- Stitch the head to the body.
- Attach arms equally on both sides.
- Stitch the legs to the lower parts of the body.
- Place and stitch the red star on the belly.
- Embroider nose, mouth and optionally cheeks.
- Weave in all loose ends.
- Using your fingers, gently mold the bear.
Spend some time on the last shaping. Turn the bear in your hand and make sure the ears, arms and legs are in a natural position.
Cute Ways to Personalize Your Bear
For winter gifts, a small scarf will do and a mini heart for Valentine’s Day instead of the star.
Another idea is to create multiple bears with differing facial expressions. Some may have eyes closed and some may have a smile on their faces, while others may look shocked.
These details add character to a little teddy bear’s gift and really make it special.
Final Thoughts
This cute and classy crochet teddy bear is able to combine two things that go together only imperfectly: simple and playful.
It’s a neat, timeless look thanks to the black body. It’s fun with the red star. Then those little eyes and embroidered bits make a few simple crochet pieces come to life as a little character with its own little personality.
It doesn’t have to be a complicated thing to make it special. It’s the careful shaping, neat assembly and a bit of patience that really makes the difference.
After you’ve done this, you’ll probably start thinking about the next bear before you even put your hook away.
FAQs
Is this teddy bear suitable for beginners?
Adventurous beginners can do it as long as they are familiar with making a magic ring, do single crochet stitches, increases and decreases, and basic sewing. Don’t rush through the small parts and assembly.
Which yarn is best for black teddy bear?
A good yarn to use is a smooth DK or worsted weight one as the stitches are visible. With Chenille, you will have a nice plush look, but it may be more difficult to see individual stitches.
What about making the bear without the safety eyes?
Yes. Embroidered eyes can be used and are a wonderful choice if for a baby or a small child. Secure embroidery all over the face.