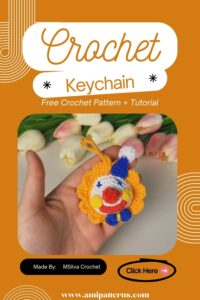
Crochet Corset Top With Ruffles
Ever seen a crochet corset top that looks sweet and a little bold at the same time? This lavender one has ruffled edges a lace-up front and a small bow at the bottom. Below I’ve shared the materials sizes and every row.
Looking for a crochet corset top that feels pretty without any boning or sewing? This lavender one has frilly edges, a criss-cross lace-up front and a tiny bow at the hem. Below, I’ve written out the materials and every row so you can follow along easily.
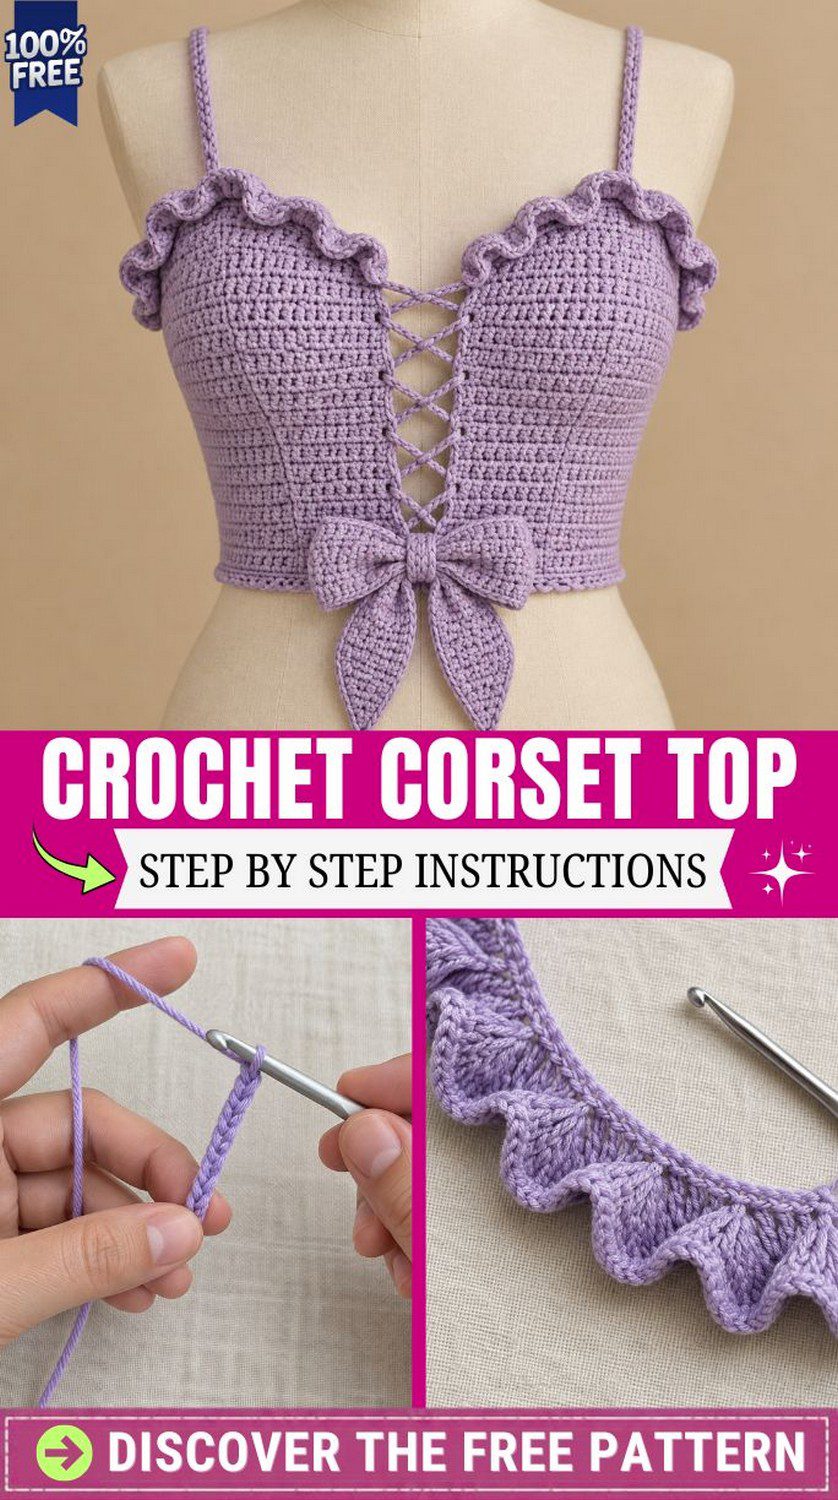
Crochet Corset Top With Ruffles: Pattern Overview
- Skill level: confident beginner (single crochet, half double crochet, increases and stepped decreases)
- Finished size: 33″ bust, 30″ waist (flat bust width 16.5″) x 12″ body length including double ruffle, braided straps 14″
- Yarn: DK cotton, about 400 yards (365 m)
- Hooks: 3.5 mm (US E/4) for the body, 3.0 mm (US D/3) for the bow
- Gauge: 20 sc x 22 rows = 4″ (10 cm), worked in back loops only
Materials for the Crochet Corset Top With Ruffles
- DK weight cotton yarn in lavender, about 400 yards (two 100 g skeins)
- 3.5 mm crochet hook
- 3.0 mm crochet hook (bow and tails)
- Tapestry needle
- 6 stitch markers
- Scissors
- Measuring tape
- Sewing pins (optional)
- Fabric stiffener spray (optional, for the bow)
Materials Substitution Ideas
A cotton-bamboo blend gives a softer drape, while mercerized cotton keeps the ruffle crisp. However, stretchy acrylic tends to sag around the bust, so choose a plant fibre whenever possible.
Abbreviations (US Terms)
- ch – chain
- sl st – slip stitch
- sc – single crochet
- hdc – half double crochet
- dc – double crochet
- sc2tog – single crochet two stitches together
- BLO – back loop only
- FLO – front loop only
- st(s) – stitch(es)
- RS – right side
- WS – wrong side
- rep – repeat
Sizing Notes for the Crochet Corset Top With Ruffles
For every extra inch of bust, add 3 stitches to the back foundation chain and 1 stitch to each front panel chain. Also, add the same stitches to the waist chains, so the shaping stays even. Because the front laces up, the fit stretches about an inch either way. Meanwhile, anyone who wants a longer top can add roughly 5 or 6 rows per inch before the shaping begins.
Special Techniques You Will Use
Back loop only single crochet: Because every row leaves a small ridge, the fabric turns firm and corset-like.
Bust increases: Adding one stitch at each side edge every fourth row widens the panel from waist to bust, so the top hugs the body instead of hanging straight.
Stepped decreases: Decreasing slowly at first and faster near the top bends the edge into a round sweetheart curve, so the neckline never turns into a straight slope.
Double ruffle layers: First, one ruffle grows from the next row, then a second one grows from the ridge of unused loops, so two frills sit one above the other.
Slip stitch cord: After chaining, slip stitching back along the chain makes a firm cord that does not stretch out.
Time Box
- Prep: 25 minutes (gauge swatch and winding yarn)
- Stitching: 13 to 15 hours
- Finishing: about 2.5 hours (seams, braiding, hem shells, lacing and bow)
Pattern Instructions for the Crochet Corset Top With Ruffles
Work every piece flat, and keep the gauge swatch nearby, because each step builds on the one before it.
Step 1: Back Panel
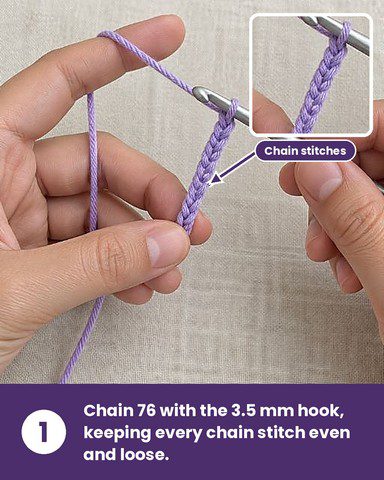
To begin, ch 76, then sc in the 2nd ch from the hook and in each ch across for row 1 (75 sc).
Next, work rows 2–19 by chaining 1, turning, and working sc BLO in each st across (75 sc).
After that, add the bust increases on rows 20, 24, 28 and 32: ch 1, turn, 2 sc BLO in the first st, sc BLO to the last st, then 2 sc BLO in the last st (77, 79, 81 and 83 sts in turn).
Then work rows 21–23, 25–27, 29–31 and 33–56 even, chaining 1, turning, and working sc BLO in each st across (83 sc). Finally, fasten off.
Working the ridges on every single row keeps the panel from curling at the edges.
Measure now: The panel should be about 15″ wide at the bottom and 16.5″ wide at the top.
Step 2: Front Panels (Make 2, Mirrored)
The outer edge is the side that gets sewn to the back panel, while the inner edge is the side that gets laced.
First, ch 39 and sc in the 2nd ch from the hook and in each ch across for row 1 (38 sc).
Next, work rows 2–19 by chaining 1, turning, and working sc BLO in each st across (38 sc). Because row 1 is a RS row, odd rows are RS and even rows are WS.
Then add the bust increases on rows 20, 24, 28 and 32 (WS rows): ch 1, turn, and increase at the outer edge.
- Panel A: Sc BLO to the last st, 2 sc BLO in the last st.
- Panel B: 2 sc BLO in the first st, sc BLO across.
After each of these rows, you have 39, 40, 41 and 42 sts in turn. In between the increase rows, work rows 21–23, 25–27, 29–31 and 33–40 even, chaining 1, turning, and working sc BLO in each st across (42 sc).
Shaping the Sweetheart Neckline (Step 2 Continued)
Next, shape the neckline on rows 41–56, and work every decrease at the inner edge.
- Panel A: Decrease at the end of RS rows and at the beginning of WS rows.
- Panel B: Decrease at the beginning of RS rows and at the end of WS rows.
Then follow three phases:
- Rows 41–48 (steep start): Decrease 1 st on every WS row only (rows 42, 44, 46, 48) and work the RS rows even, which leaves 38 sts.
- Rows 49–52 (medium curve): Decrease 1 st on every row, which leaves 34 sts.
- Rows 53–56 (flat curve): Decrease 2 sts on every row by working sc2tog twice at the inner edge, which leaves 26 sts.
Finally, fasten off.
Measure now: Each panel should be about 7.6″ wide at the bottom, 8.4″ wide at the widest point, and 10.2″ tall at the outer edge.
Pro-Tip: Place a marker at the inner edge before row 41. Because every decrease happens on that side, the marker stops you from shaping the wrong edge.
Fit check: Lay the panel flat. The inner edge should curve outward like a quarter moon. If it looks like a straight diagonal, the early rows had too many decreases.
Step 3: Eyelet Edging (Both Panels)
Hold the RS facing you and join yarn at the bottom corner of the straight inner edge (rows 1–40). Next, ch 1 and sc in each of the first 2 row-ends. Then *ch 2, skip the next 2 row-ends, sc in each of the next 2 row-ends.* Rep from * 9 times. Finally, sc in each of the last 2 row-ends and fasten off. Each panel now has 9 eyelets.
Step 4: Double Ruffles (Both Panels)
First, join yarn at the top of the eyelet edging, where the curve begins.
In row 1 (RS), ch 1, sc evenly along the curved edge (20 sc), then sc in each of the 26 top sts (46 sc).
After that, row 2 (WS) is ch 1, turn, sc FLO in each st across (46 sc), so the unused loops of row 1 form a ridge on the right side.
Back ruffle layer:
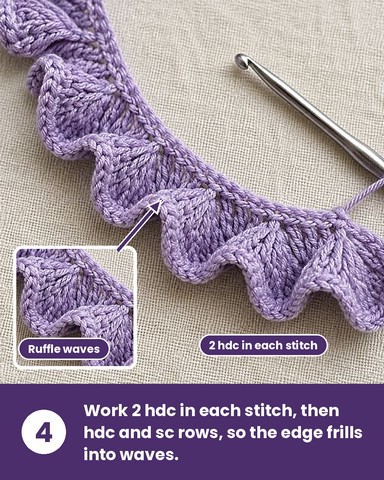
Next, in row 3, ch 2, turn, and work 2 hdc in each st across (92 hdc). Then work rows 4–5 by chaining 2, turning, and working hdc in each st across (92 hdc). Finally, finish row 6 with ch 1, turn, and sc in each st across (92 sc), and fasten off.
Front Ruffle Layer (Step 4 Continued)
Hold the RS facing you and join yarn in the first unused loop of the ridge from row 1.
Once the yarn is attached, ch 2 and work 2 hdc in each loop across (92 hdc) for row 1. Then, in row 2, ch 2, turn, and hdc in each st across (92 hdc). Finally, in row 3, ch 1, turn, and sc in each st across (92 sc), and fasten off.
Because the first ruffle row doubles the stitch count, the edge frills instead of lying flat.
Fit check: The front layer should sit slightly shorter than the back layer, so both waves stay visible. Together they should measure about 1.5″ deep.
Step 5: Braided Shoulder Straps (Make 2)
First, make 6 cords: for each one, ch 57, sl st in the 2nd ch from the hook and in each ch across (56 sl st), then fasten off and leave a 4″ tail. Next, hold 3 cords together and knot the tails at one end. After that, pin the knot to a cushion and braid loosely until the braid measures about 14″, then knot the other end. Finally, repeat with the remaining 3 cords.
Step 6: Lacing Cord
To make the lacing cord, ch 180, then sl st in the 2nd ch from the hook and in each ch across (179 sl st). Finally, fasten off, and the cord should measure around 52″.
Step 7: Bow and Tails (3.0 mm Hook)
First, switch to the smaller hook and pull every stitch snug, because tight stitches keep the bow firm.
Bow loop: ch 21, then sc in the 2nd ch from the hook and across for row 1 (20 sc). Next, work rows 2–18 by chaining 1, turning, and working sc across (20 sc). Finally, fasten off and leave a 12″ tail.
Center wrap: ch 7, then sc in the 2nd ch from the hook and across for row 1 (6 sc). Next, work rows 2–7 by chaining 1, turning, and working sc across (6 sc). After that, fasten off.
Tails (make 2): ch 13, then sc in the 2nd ch from the hook and across for row 1 (12 sc). Next, work rows 2–20 by chaining 1, turning, and working sc across (12 sc). Then, for rows 21–25, ch 1, turn, sc2tog, sc across to the last 2 sts, and sc2tog, which leaves 10, 8, 6, 4 and 2 sts after each row in turn. Finally, for row 26, ch 1, turn, sc2tog (1 st) and fasten off.
Next, bring the short edges of the bow loop together at the middle and pinch the center. Then wrap the center strip tightly around the pinch and sew its ends together at the back.
Pro-Tip: Lightly mist the finished bow with fabric stiffener and shape the loops while they dry. The bow then keeps its puff all day.
Step 8: Assembling the Crochet Corset Top With Ruffles
First, block every piece by pinning it out and misting it lightly with water. After it dries, line up the outer edge of each front panel with a side edge of the back panel and whipstitch both seams (56 rows each).
Next, sew one braided strap end to the outer top corner of each front panel, just under the ruffle. Then sew the other end to the back top edge, 15 stitches in from each corner.
Hem Edging and Shell Border (Step 8 Continued)
Switch back to the 3.5 mm hook for the hem. First, hold the RS facing you and join yarn at the bottom corner of one eyelet edge. Then ch 1 and sc evenly across the whole bottom edge, over the front panel, the back panel and the other front panel, until you have 153 sc, and fasten off without joining.
After that, join yarn again at the same starting corner with the RS facing you. Next, ch 1, sc in the first st, then *skip 1 st, 4 dc in the next st, skip 1 st, sc in the next st.* Rep from * across (38 shells), and finally fasten off.
Lacing and Bow Placement (Step 8 Continued)
Finally, lace the top. Center the cord on the top pair of eyelets, cross the ends, and feed each one through the next eyelet down on the opposite panel. Always feed from the same direction, because that keeps the crosses neat. Continue to the bottom, then hide both tails behind the bow. Also, sew the bow about 1″ above the hem so the pointed tails hang below the edge.
Fit check: Loosen the cord fully before pulling the top over your head, then tighten it gradually.
Common Mistakes to Avoid With a Crochet Corset Top With Ruffles
- Skipping the gauge swatch, because a looser tension adds inches fast, and the lacing cannot rescue a top that is two sizes too big.
- Placing the bust increases on the inner edge, since increases belong on the outer edge only, otherwise the lacing line goes crooked.
- Decreasing every row from row 41, which makes a straight V instead of a round sweetheart curve.
- Pulling the ruffle rows too tight, because tight stitches flatten the waves.
- Making the cord too short, since anything under 50″ runs out before the last eyelet.
Uses and Benefits of a Crochet Corset Top With Ruffles
Wear the crochet corset top with ruffles over a fitted tee when evenings turn cool, or style it alone with high-waisted denim on warm afternoons. Cotton keeps the fabric breathable, while the lacing lets the fit stretch about an inch. Because each panel is worked flat, mistakes stay easy to spot and fix. Also, the finished top makes a gift for birthdays, graduations or summer festivals. The sturdy stitch holds its shape wash after wash, so the effort pays off.
Beginner Tips
- Mark the first stitch of every row with a marker for the first few rows, because BLO ridges make the edge easy to lose.
- Count stitches after every increase and decrease row, so mistakes surface early.
- Braid the straps over a cushion with a pin, since a fixed end keeps the tension even.
- Weave in ends before blocking, since damp cotton hides loose tails.
Personalization Ideas for Your Crochet Corset Top With Ruffles
Pick a New Colour
Dusty rose, sage or butter yellow all suit the ruffle. Meanwhile, a deep navy gives a more dramatic evening feel.
Change the Cord
A satin ribbon threaded through the eyelets adds a soft shine. Alternatively, a two-colour cord gives the lacing a fun contrast.
Switch the Ruffle Style
Skip the front ruffle layer for a simpler single frill. However, adding one more hdc row to each layer gives a fuller look.
Add Beads
Slide tiny pearl beads onto the cord ends before knotting them behind the bow, so they swing gently with every movement.
Bonus: Colour Palette Ideas for Every Season
Spring suits pastel lavender, mint and soft peach. Summer works well in sky blue, coral and white. Autumn looks lovely in terracotta, mustard and olive, while winter pairs well with burgundy, charcoal and cream. Because the ruffle catches light so well, solid shades usually show off the texture better than variegated yarn.
Frequently Asked Questions About the Crochet Corset Top With Ruffles
How much yarn does the crochet corset top with ruffles need?
About 400 yards of DK cotton covers the size listed above. However, larger sizes need roughly 12 to 15 extra yards per added inch of bust.
Can beginners make a crochet corset top with ruffles?
Yes, as long as basic stitches, increases and decreases feel comfortable. Because each step is its own small piece, progress stays easy to track.
How should a crochet corset top with ruffles be washed?
Hand wash in cool water, then press out extra water in a towel and dry flat. Skipping the dryer keeps the ruffle, shells and eyelets in shape.
Can the straps be adjusted?
Absolutely. Make the cords longer or shorter before braiding, or sew the straps at a different spot on the back edge.
Your Turn to Make the Crochet Corset Top With Ruffles
So that’s the whole crochet corset top with ruffles, start to finish. Yes, it takes a few evenings, and yes, the ruffle rows will test your patience for a bit. If the first ruffle comes out uneven, just pull it back and redo it, because it’s only a few rows. Keep your swatch and your notes handy, since they save a lot of guessing later. Make it in lavender like the sample, or pick whatever colour makes you smile. Either way, you end up with a fitted, soft and slightly fancy top that you made with your own hands, and that feels really good.