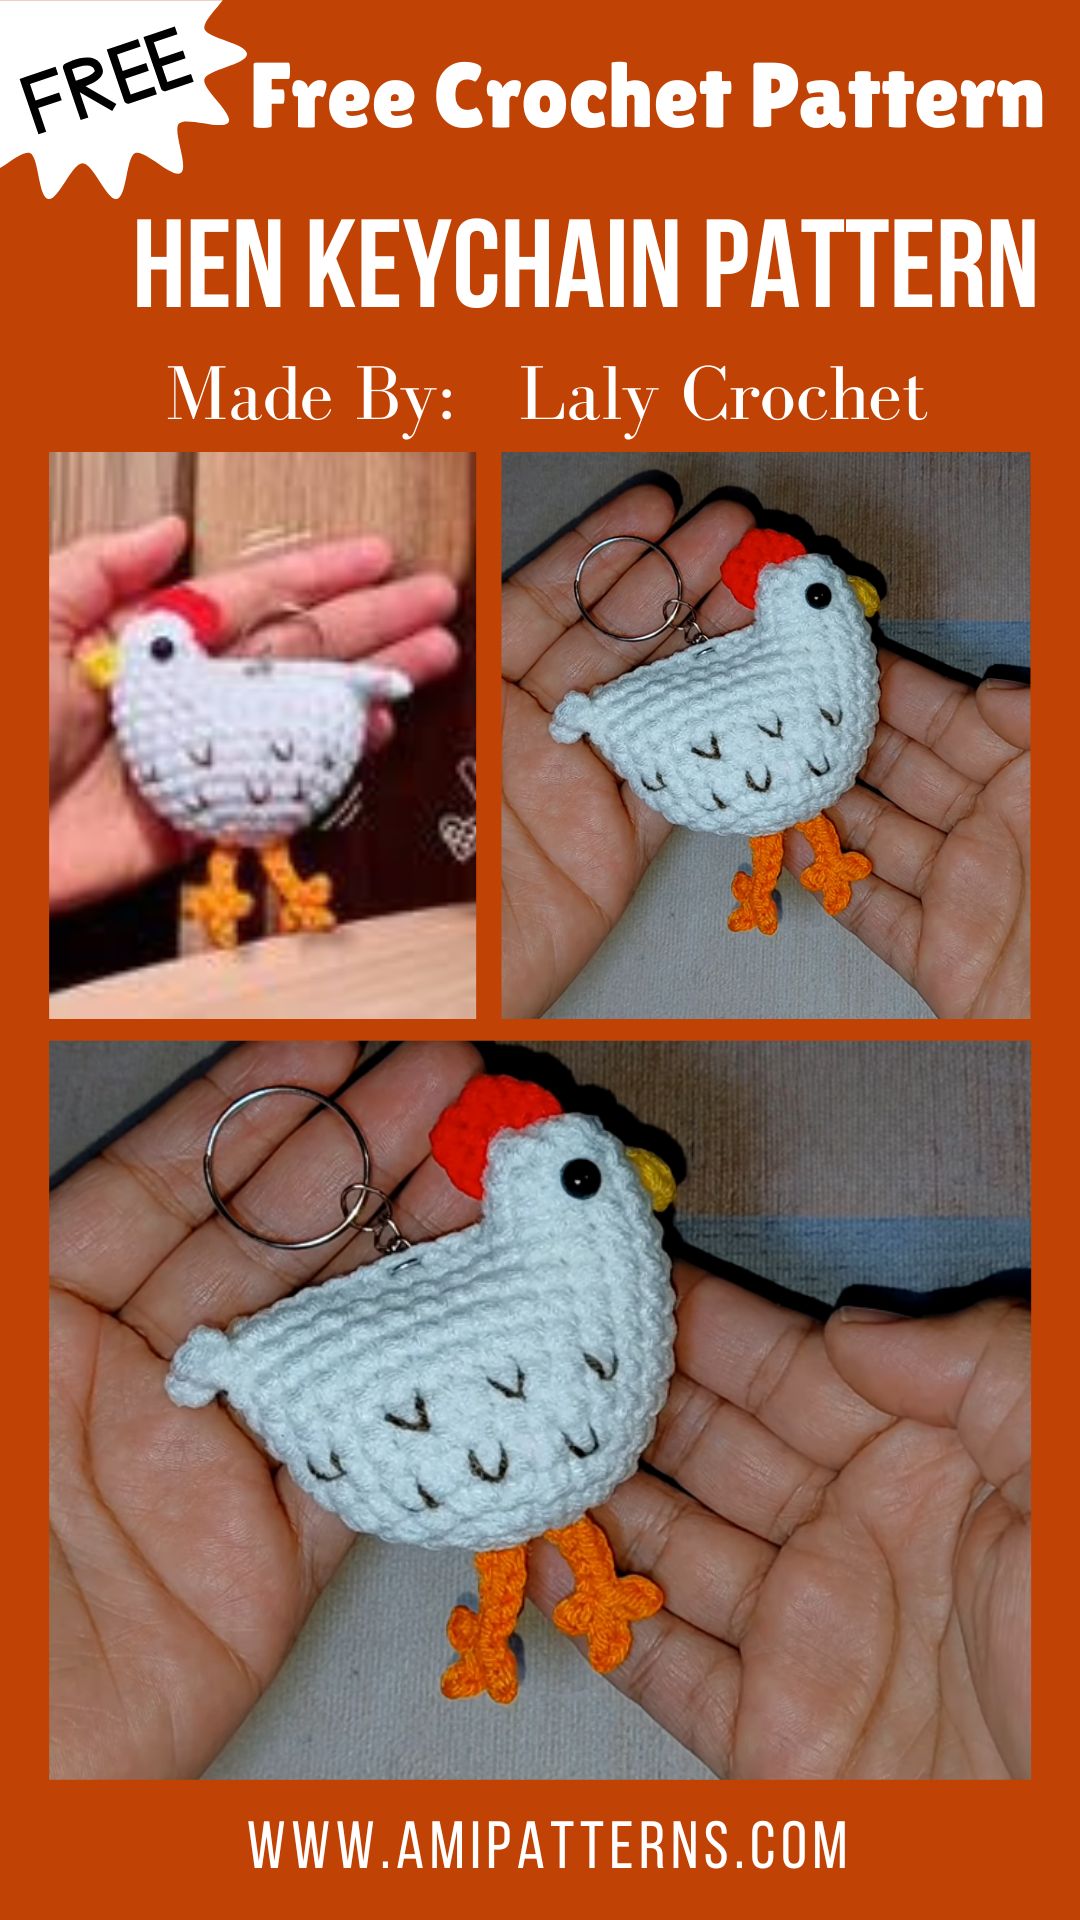
Comforting Crochet Hen Keychain Pattern to Wow Everyone
If you notice, there is something oddly comforting about the small handmade designs. It is not the flashy kind that demands a lot of attention. Moreover, it is like you can hold it in your palm and feel attracted to it. A tiny crochet hen keychain can fit right into your space. It looks simple and feels soft and nostalgic. When you hold it in your hands, you will realize how much you needed it.
Then it will be the time to notice all the details. The round body, tiny beak and everything else just feels alive. Even though it’s made of simple yarn, it will be more than just a keychain now. The best part is that it is a small piece of care that you have shaped up with your hands. This is why the Crochet Hen Keychain Pattern is so special. It will not only be easy to make but it carries a warmth that goes behind the stitches.
Materials You’ll Need
The good thing is that not much is needed to get started. It’s a project that you can undertake without thinking a lot, on a tranquil afternoon.
Yarn
White or cream (body color), red (comb color), yellow or orange (beak color)
Crochet Hook:
2.5mm–3.5mm
Tapestry Needle:
Used for joining parts of a piece together
Stitch Marker:
This is great for working in rounds.
Polyfill Stuffing:
Cut out a little bit of stuffing for a soft shape.
Safety Eyes or Black Yarn:
It is suitable for facial features.
Keychain Ring:
To convert it into a ring to carry
Scissors
These are must for cutting our various materials evenly.
Creating the Impressive Crochet Hen Keychain Pattern
Don’t worry, you can always change the colors, soft pastels for a soft and gentle appearance, or brighter hues for a more playful vibe. It is here where the crochet hen keychain pattern becomes yours.
Starting the Body
Start at the body, since all comes from there.
Work in round and single crochet with magic ring. May be a bit tight and awkward in the first few stitches, particularly if you are new to this. That’s completely normal. Stick with it.
As you go, the circle gradually turns into a small rounded base. Then, after a few more rounds, you’ll begin to be shaping it up. It’s a slow change; it’s not a radical change, but then all of a sudden it looks like something special.
There’s a pace here that’s simple to get into. Round and round and stitch, stitch, stitch. There’s no hurry, no pressure. This is where your mini crochet hen key ring begins to really start coming together.
Forming the Hen’s Body
As you get up to height, you’ll start to close the shape.
Slow reductions culminate in that rounded body, which makes the hen feel so gentle and approachable. Fill it before completely closing it with your stuffing.
Don’t overdo it. Just a little bit will do. It needs to be soft to the touch and not hard.
Here’s a little hint: take a little time and form it into your hands. Gently roll it between your hands. It is used to blend out the stuffing and to make a smoother finish.
Adding the Comb
Crochet a small, simple shape, typically a few connected loops or a small scalloped shape, using red yarn. It doesn’t have to be flawless. In reality, it’s actually more natural if there is a minor irregularity.
Attach it right on top of the head, slightly forward. Here perfection is not the goal, it’s the place. If it’s too far back, it’s plain. A bit too far forward, it looks a little bit off. Make sure to adjust for a moment before completing the fit.
Creating the Beak
The small beak but “lifts the whole boat”. You may either crochet a small triangle or simply sew a triangle with yarn. Both work beautifully. As with all other items on the list, it should be simple but not flashy; this isn’t a piece for which strong design elements are necessary.
Place it just under the eye and level and tidy. After it’s established, you’ll see the change right away. It transforms from a round shape to one that has character.
Eyes and Expression
In Amigurumi, the eyes are all-important. For a polished appearance use safety eyes. Or stitch them in black yarn for a more handmade feel and something softer. You can arrange the eyes with a little difference, not too far or close. Raise the head slightly for it to appear happier. This is where your easy crochet hen for beginners comes to life. The stitches remain straightforward, and the emotion comes through in the expression.
Wings and Small Details
Wings can be added on, but not mandatory. Make two little teardrop or oval pieces to attach on either side gently. Tie them loosely to avoid them becoming flattened. Adding a little dimension makes the piece more subdued.
Also, you can add some small lines that are stitched or light shaping to give the impression of feathers, but again, it’s best to stick to the simple approach. Sometimes less detail makes for a more real experience.
Adding the Keychain Ring:
This is where the fun begins: making this portable. Securely attach the keychain ring at the top. A small loop of yarn or metal accessory will do – just be sure it’s snug enough to use regularly.
This is a rapid change but it allows the piece to be used for a new function. No longer simply for show. Becomes a habit. A little secret that will make you smile despite yourself.
Assembly
If you have already completed all the parts, now is the time to assemble! First attach the comb, then the beak, then the wings. Look at the location in other directions. Sometimes it looks good on one eye and slightly crooked on the other.
Take as much time as you need here. Making small changes has a large impact. When everything feels equal, finish all your stitches and carefully weave in all loose ends! Your hen is now complete!
Special Features
- With a friendly look and soft design, it’s comforting.
- Compact and portable, ideal for daily wear and tear applications.
- The pattern is easy to use and is beginner friendly.
- Fast and easy to prepare, even in one sitting
- Color and detail information can be easily customized for it
Tutor’s Suggestions
Don’t rush through the shaping. A few additional seconds of tweaking can make a huge difference in the finished product. Maintain even stitches. This is what makes for the clean look.
When they feel a little bit wrong, go with your gut, and make adjustments. Handmade work doesn’t mean that everything is done right the first time. Last, but not least, have fun doing it. The small projects are intended to be relaxing and not stressful.
Uses
- A keychain with a cuteness to use during the day
- Carefully crafted handmade present
- A small ornament to attach to a bag.
- A comforting desk companion
- A crafted animal, especially one made of crochet.
Level of Difficulty
There is no doubt, this ideal is perfect for the beginners. The stitches are very simple to sew. It’s not much of a technical skill but about getting comfortable with the flow of crocheting.
Step-by-Step Flow
You begin with the body, shaping it through steady rounds. Then you add stuffing and close the form. After that, you create and attach the comb, beak, and wings. Next thing, it’s about time you attach the keychain ring to combine everything. Each part will be natural and don’t have to make it too complicated.
Conclusion
Everything is quietly charming and special when it comes to making a tiny hen with your hands. It is not at all complicated, and it doesn’t try hard to be impressive. However, it still stands out.
Crochet Hen Keychain Pattern will just Wow Everyone. It is not about creating something cute, but about creating something that feels more than personal. Something small that takes a bit of your time, you focus and care.
Pro Tip
When you have created the perfect hen, now gently press and shape it between your hands. Next, you can attach it to the keychain. It will smooth out the form and give it a soft and rounded finish. In the end, everything will feel just right!