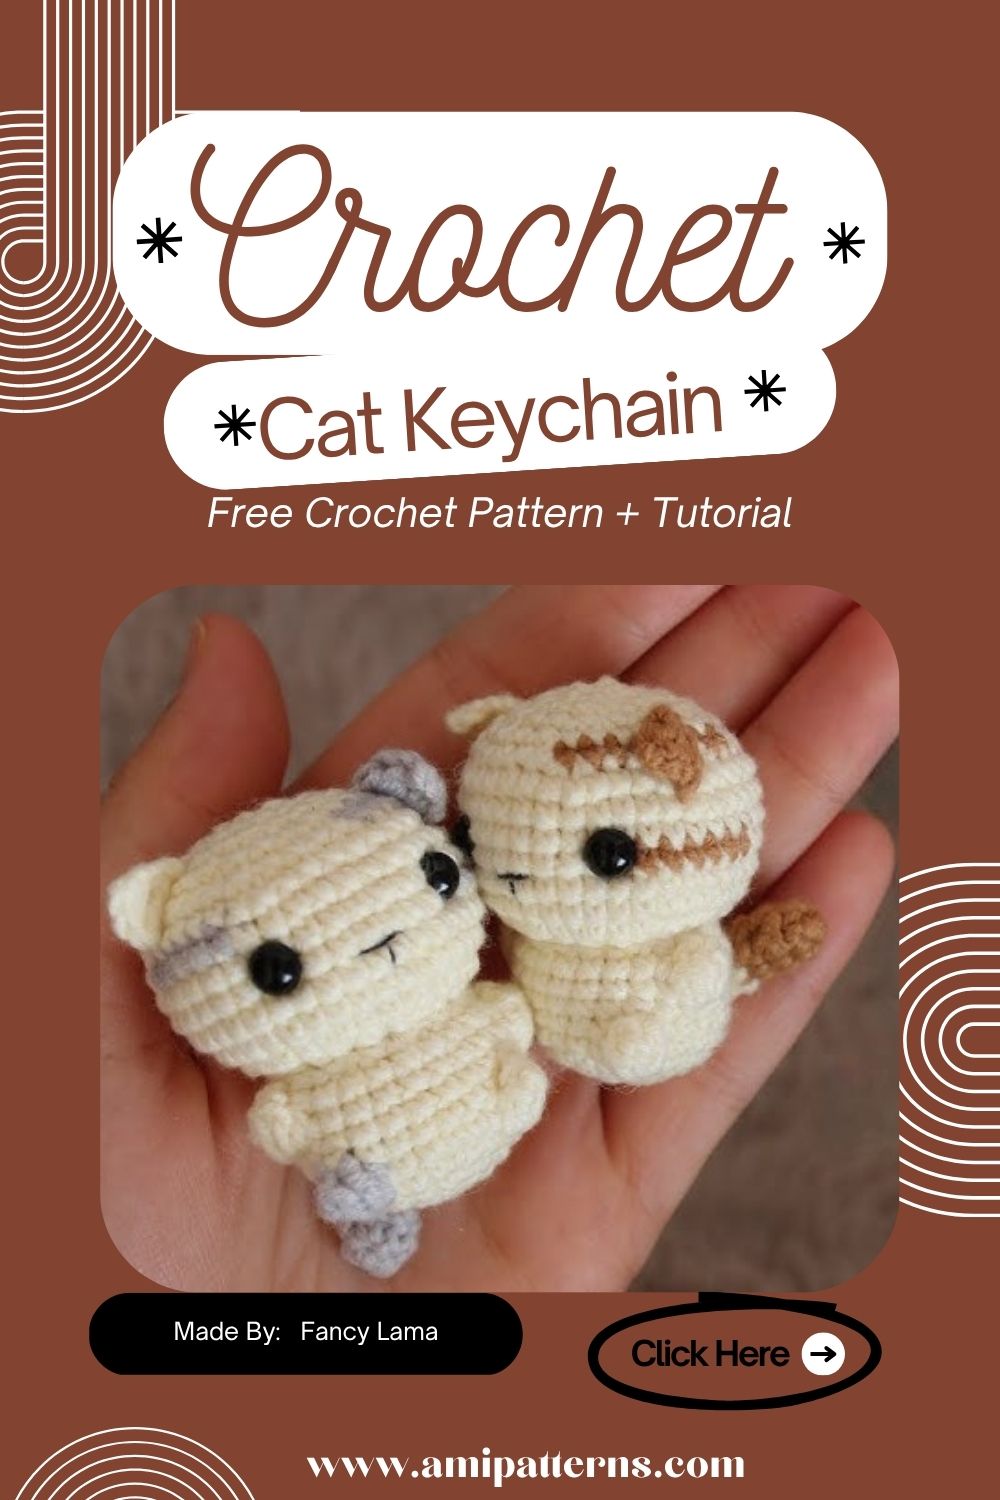
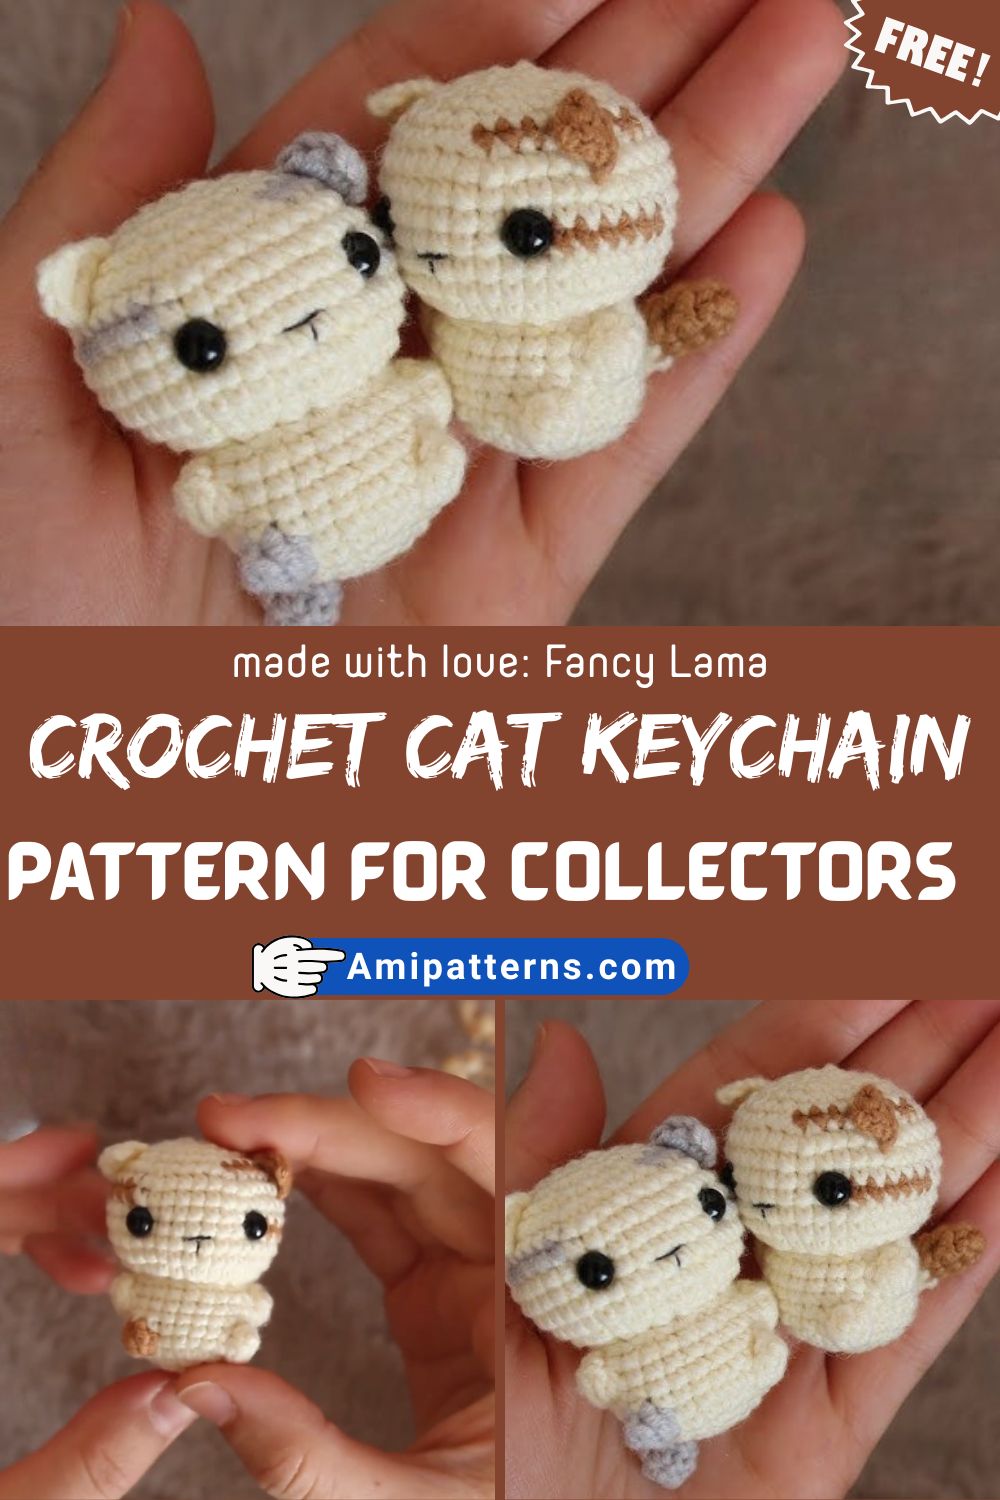
Precious Crochet Cat Keychain Amigurumi Pattern for Collectors
It’s sort of a rewarding thing to make very small crochet collectibles. They are not a weeks-long project, aren’t complicated to do with minimal yarn, and somehow feel special. It can be a favorite keychain, a gift or even the beginning of an entire collection.
This is the reason why this Precious Crochet Cat Keychain Amigurumi Pattern for Collectors is a fun project for cat lovers.
It’s cute like amigurumi, and functional like a keychain. After it’s finished, the cat is small enough to fit on a key, in a bag, or on a zipper, but detailed enough to be seen as a cute little collectible. Its round head, small paws and sweet embroidered face makes it easy to ask, “Did you make that?”
And, in all seriousness, you will likely want to make more once you’ve created one. A variety of colors and expressions, perhaps even a series of cat-themed images.
Why This Cat Keychain Is So Collectible
There are no rules for size and complexity when it comes to crocheting. It is the little bits that make it into daily life that make the best memories.
The cat keychain amigurumi pattern is particularly attractive because it can be made in a relatively short period of time but is still finished with a nice look. Its small size is ideal for collectors who like to display handmade miniatures and it’s an excellent craft fair or gift project.
Each keychain can be made in different yarn colors and facial features making no two keychains look exactly the same. This is part of what’s fun.
Skill Level & Finished Size
Average time to complete: 1 Hour
Finished Size: This is about 3–4 inches tall when the keychain hardware is attached.
The project involves only simple amigurumi stitches and increases, decreases, and simple sewing. If you are just beginning to crochet, this pattern should be easy to work with.
Abbreviations
- MR – Magic Ring
- sc – Single Crochet
- inc – Increase
- dec – Invisible Decrease
- sl st – Slip Stitch
- st(s) – Stitch(es)
- FO – Fasten Off
Materials You’ll Need
- A cotton yarn in your favorite cat colors!
- Small piece of pink yarn for nose
- Black embroidery thread
- 2.5mm–3.5mm crochet hook
- Polyester fiberfill
- 6–8mm safety eyes
- Yarn needle
- Scissors
- Split key ring or lobster clasp
Cotton yarn is perfect as it will maintain the stitches crisp and keep the keychain in form.
Step 1: Crochet the Head
Start with a magic ring and make the starting stitches into the center. Tighten the ring and make sure the hole is not visible.
Gradually increase the stitches as you crochet, forming a smooth, rounded ball. The head should be just slightly larger than the body as this will make the finished cat look cute and collectible.
Check the shape every so often as you work. Symmetrical heads are easier to figure out later on.
Step 2: Crochet the Body
The body is started in the same manner but a little smaller than the head.
Work up gradually to the desired width, and then work down evenly for a small length and decrease to the width down to the bottom.
Stuff a little at a time as you close the opening. This will help make the shape smooth, rounded and free of lumps.
The body should feel soft and firm enough to support the head.
Step 3: Make the Ears
This is a good way to add character to a cat, and it is easy to recognize by its pointed ears.
Use the same color yarn as the head and make 2 small triangle shaped ears. Some rounded points are not as sharp or harsh as the more pointed ones, and therefore may appear more cuddle-worthy.
Stitch on the ears prior to sewing them in place. The final appearance is greatly enhanced if the spacing is even.
Step 4: Create the Tail
Create a narrow tube for the tail long enough to gently wrap behind the body by crochet.
It can be kept as a straight line, bent slightly, or coiled around one side for a fun pose. The flexibility itself is part of the fun loving style of mini crochet cat collectibles – each individual cat can be unique.
Step 5: Add the Face
Stick the safety eyes close together on the middle of the head, leaving room for the nose.
Embroider a small pink triangle nose, then a short line down and the small pink smile below.
Finish with fine whiskers with black embroidery thread.
These simple details are enough to bring the cat to life, and make it a cute cat key chain crochet project.
Step 6: Attach the Head to the Body
Position head above the body and bring it into a straight position.
Stitch pieces together correctly using short and secure stitches and checking the piece as you go. If the head is just a little too large, the amigurumi is going to look sweet and collectible!
Step 7: Add Tiny Paws
Crochet 4 small oval paws.
Secure front feet to lower portion of body and rear feet underneath. Make sure they are evenly spaced, allowing the cat to appear balanced from the front.
Step 8: Attach the Keychain Hardware
Go through the top of the head and secure with a few stitches before putting on the split ring or lobster clasp.
Pull the hardware to ensure it’s in place. This is a nice feature for the keychain, as it will be used a lot.
Step 9: Add Collector Details
This is where you can customize each cat and make it feel special to them.
Include a little bow, mini scarf, mini collar or other eye colors. You might even develop theme collections – tabby cats, black cats, calico cats or cats based on actual cats.
It’s these touches that make handmade collectibles unique. You are going to be able to finish off all the details.
Step 10: Final Finishing Touches
Cut off the loose ends of the yarn threads and shape the body and head into their correct form with your hands.
To smooth the stitches, if required, lightly steam the completed product. Then hang it on your keys, purse or display stand and enjoy your little handmade cat.
Video Pattern Here:
Special Features of This Pattern
- Beginner-friendly construction
- Wraps very little yarn around the plants
- Quick to finish
- Easy to customize
- Perfect for collectors
- Lightweight and practical
- Perfect for giving or selling!
Tutor Tips (From experience)
- Always use a stitch marker at the start (easy to go wrong on the smaller projects).
- Fasten all the pieces together before sewing them in place.
- Fill slowly, don’t fill quickly.
- Install safety eyes and not completely close the head.
Common Mistakes to Avoid
- Excessive stuffing: This may stretch the stitches and cause the stuffing to show through.
- Sewing symmetrical parts: Always check for symmetry before sewing.
- Strong keychain attachment: Tighten the loop several times.
- Running face features: The eyes, nose and whiskers are the most important features of the cat’s face and are the ones that give the cat its personality.
Creative Uses for Your Crochet Cat Keychain
- A keychain to carry house or car keys.
- Attach to a bag or a bracelet.
- Zipper pull
- Stocking stuffer
- Handmade gift
- Craft fair product
- Collector’s display piece
- Personalized pet-inspired keepsake
Final Thoughts
It’s so rewarding to complete a small crochet creation which seems to be completed. It’s little, but this small amigurumi cat charm is chock full of character.
Easy enough for a lazy afternoon, simple enough for beginners, and customizable enough for advanced crocheters. First and foremost, it is personal. Each color, each whisker, each little detail makes it distinctly yours. And so are collectible crochet projects, I suppose. Small, charming, and each has its own mini-story.