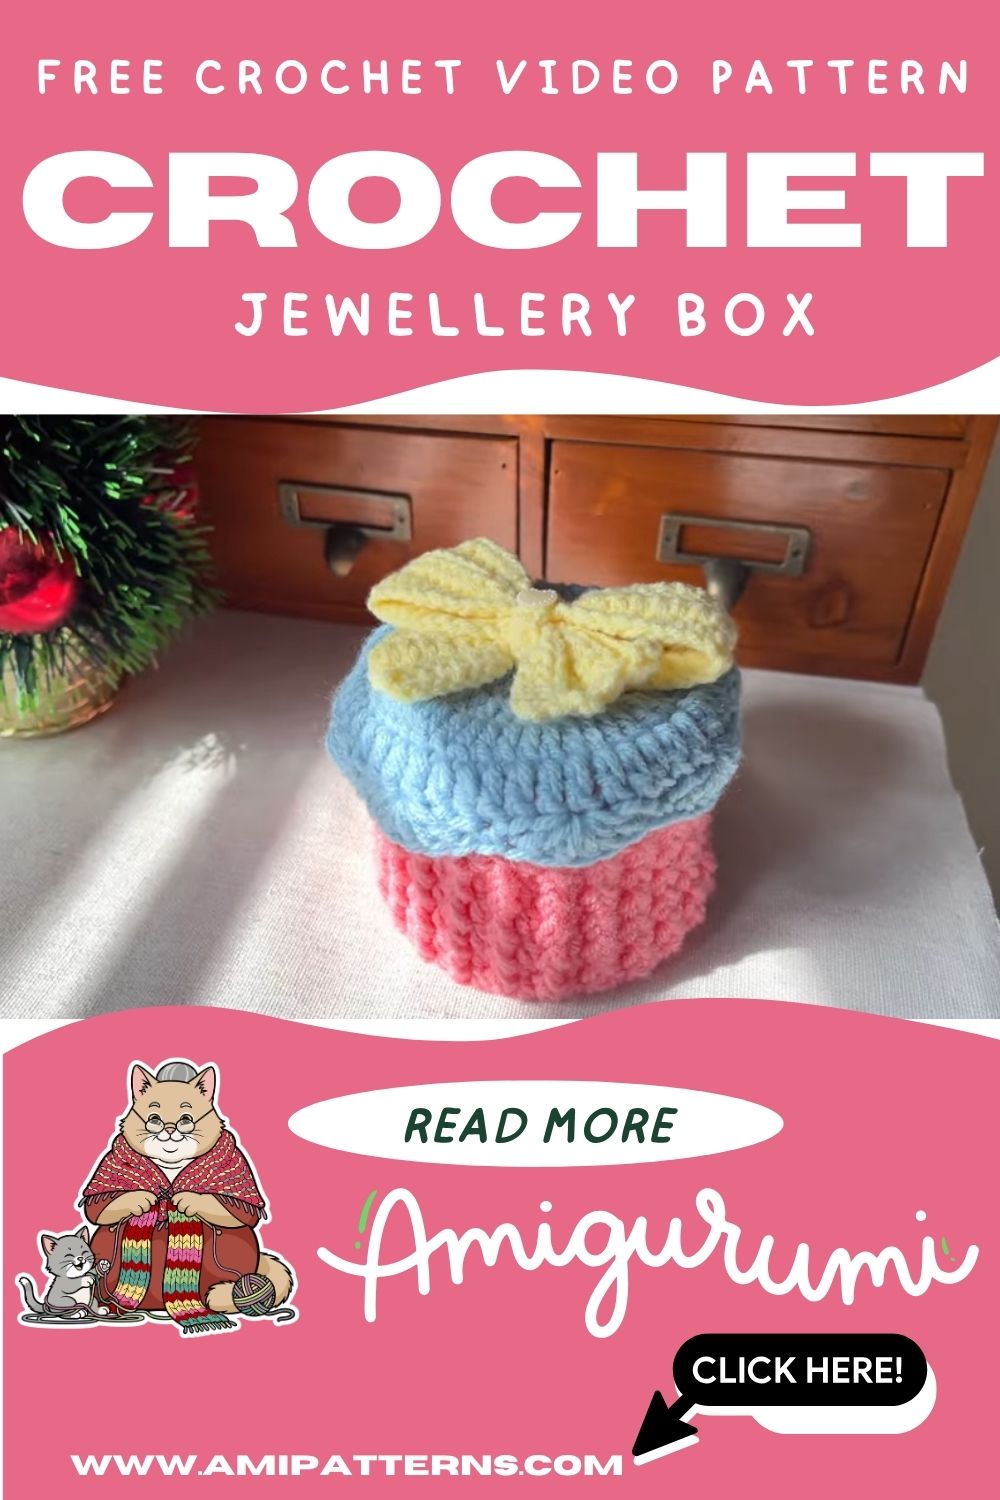
Crochet Jewellery Gift Box with Bow Pattern for Beginners
It will feel really special when you open a small handmade box, especially when you know it’s made by you. It is not just a simple container; it feels more like a gift. Now imagine, that box is crocheted. Very soft to touch and shaped like a keepsake chest. You can finish it off with a little bow sitting right on the top, as if it belongs there.
That is the charm behind Crochet Jewellery Gift Box with Bow Pattern. It is a simple structure but has the wow factor. You are not even trying hard here, because this gift box has it all. It is addictive to make and you can keep it with you for a long time to come.

Materials You’ll Need
To begin with, collect all the important materials. Because it is not an overly complicated project, this is why it is so popular with beginners.
- Medium weight cotton yarn (soft pastel or neutral colors are great)
- Please note that the thicker the yarn, the larger the size of the 3.0mm–4.0mm crochet hook to use.
- Needles used for sewing and finishing yarns.
- Stitch markers (helpful but not essential)
- Optional but recommended: a small piece of cardboard or plastic insert (for structure)
- Light stuffing (lid forming, if required)
- Small decorative button or pearl (optional for the center of the bow).
- Scissors
White or beige is classic, or try soft pinks, dusty blues or soft lavender. The box is quite different in appearance with each color.
Awesome Crochet Jewelry Gift Box with Bow Pattern
The beginner crochet jewelry box pattern idea really shines. Not only are you creating something practical, you are also creating something personal from the crochet stitches you use from the beginning.
Starting with the Base of the Box
A good box begins with a solid bottom. You start with a magic ring or chain circle, which ever you feel comfortable with. Here the objective is to create a level, solid base. This part may be a bit slow to start but please take your time. A clean base is an easy one to build on later.
You will be able to see that as the stitches are added on, the shape spreads out evenly. It begins as a small circle, slowly develops into a solid platform.
I suppose it’s this stage that’s calming. It doesn’t require perfection; it only requires consistency. One by one, the base gradually grows under your fingers.
The pattern ideas for a DIY crochet gift box with lid pattern begin naturally in this manner: you’re not simply crocheting a shape; you are making a structure that will hold something significant.
Constructing the Box Walls
After the base is complete, the transformation starts. Rather than adding stitches, you work up. This is how the box is tall and shaped. It is not the same as flat crochet – at this point your work is starting to go up!
Here, the stitches are tighter and more controlled. That’s intentional. You want the walls to be solid, not sagging.
But slowly something interesting happens. It no longer resembles a circle and it begins to resemble a container. A real one. This is the time when new players have that “Oh, this is starting to work…” moment.
It’s the most rewarding part if you’re in an easy crochet jewellery storage box tutorial. It’s where flat yarn becomes a purposeful yarn.
Creating the Lid
Personal touch begins to emerge with the lid. It is easy to crochet separately and is generally a bit wider and taller to fit over the base. The same technique, circle base with build-out, just a bit looser.
Some people prefer a snug lid; others like a soft overlap. It depends on you and both work. The balance is the key here. You don’t want it too loose or too tight. Gently placed just enough to be on top without forcing.
As the lid begins to form, it will look different than the bottom. It is somehow lighter, almost as if it is expecting its finishing touch,
To add Texture and Detail
This makes this box less “simple” and more handmade luxury.
Add texture on the edges around the front-post stitches, tiny ridges or delicate shell patterns. A simple surface broken up here and there.
It’s here that personal creativity truly shines. A few makers even embellish with the smallest lace around the edges. Some people stick to a simple design to give it a contemporary feel.
This is not a rule that has to be followed. Just a feeling.
This is where your box becomes a bit more personal than the pattern and beautifully ties in with the crochet decorative jewellery box ideas.
Crafting the Bow
The next important point that makes all the difference is the bow. It may be a small element, but it can have a lot of visual weight.
It can be crocheted by folding and cinching a basic rectangle or it can be a more rounded ribbon bow. After it is formed it is stitched tightly to the lid. Then, the box doesn’t look handmade anymore: it looks done.
There’s something soft and nostalgic about a crochet bow. It’s like something you’d find in a vintage memory box or a wise gift wrapped up by a thoughtful person. Ensure that assembly and structure are properly checked.
Assembly and Structure Check
When all components are assembled, it’s time to pull it all together. Cover cup with lid and test fit. Adjust if needed. This is the place where small adjustments count, as in tightening stitches on one side, and loosening them on the other.
If using an insert for structure, ensure it fits easily in place without altering the shape of the insert.
Then securely tie the bow to the lid. Be sure it is centered, or it can be a little offset to create an artistic appearance.
Carefully weave in any loose ends to prevent anything from detracting from the clean finish. It seems like it’s now finally what it’s supposed to be: a little personality jewelry box.
Special Features
- Handmade soft structure with firm feel
- Beginner-friendly shaping techniques
- Adjustable size and color
- Completely designed and functional
Tutor’s Suggestions
Don’t worry about getting stitches all right. This project is really good with some handmade variations. Maintain a steady tension throughout, particularly in making the walls of the box.
If lid is a little out of place, if it is, adjust it early and before its done, it will be easier to fix. But most importantly, don’t rush the bow. It’s small, but it makes all the difference in the final look.
Uses and Applications
- Jewelry storage for rings, bracelets and earrings.
- Packaging for special occasions made by hand.
- Bedside/bedroom/wardrobe decoration
- Small box for keeping items close by for notes or small items
- Rainbow yarns and ribbon
Level of Difficulty
This project is in the beginner to intermediate level. Simple stitches, however, some attention needs to be paid to the structure and balancing of the lid. It’s not so much about skill as patience and consistency.
Step-by-Step Flow
You put the base on, and then add the walls. Then you crochet the lid, add texture if desired and the last detail – the bow. After the assembly the shape is adjusted and refined.
Conclusion
It’s kind of neat creating yarn into something that truly could hold little treasures. This crochet jewelry box is not only a crafty box, it is a bit of handmade care. The kind of thing that you have around on a table and you start smiling for without any reason.
As simple as it is, the Crochet Jewelry Gift Box with Bow Pattern for Beginners is beautiful. It does not boast, loud and clear. It simply lives gently, lovingly, and purposefully. At times, that’s all that’s needed.
Pro Tip
For a more formal look, lightly starch in the box or add a thin plastic lining between the stitches. It has a stabilizing effect on the shape, which helps it to resist changes over time, but still maintains the quality of the soft handmade appearance.