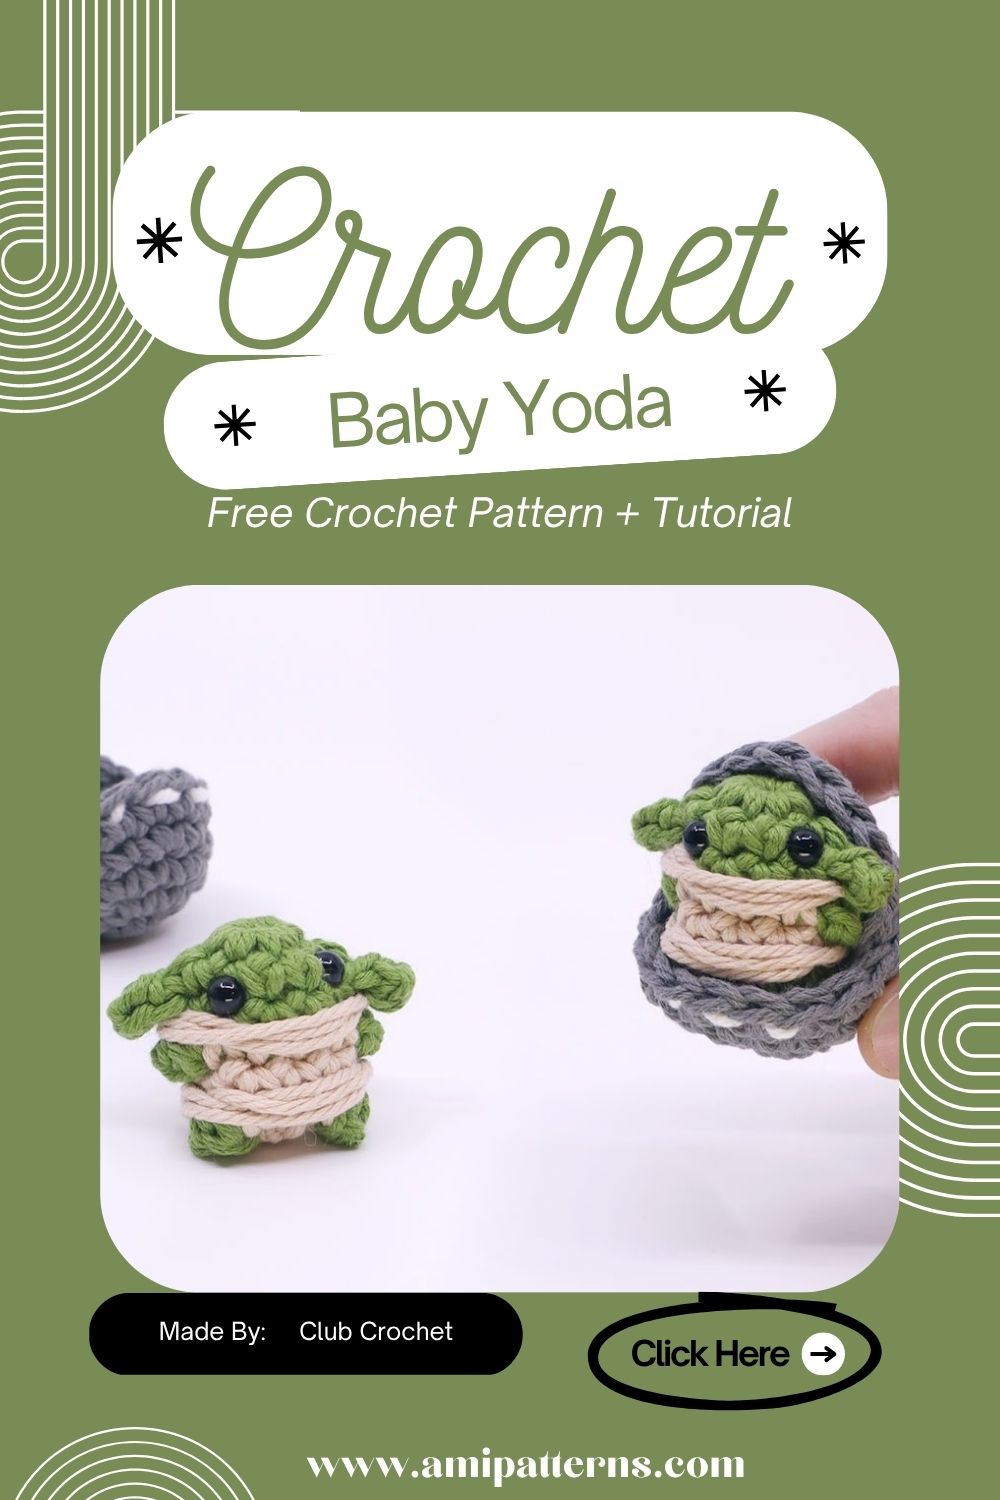
Crochet Baby Yoda Amigurumi Pattern You Can Make Today
When it comes to crochet baby amigurumis that are both adorable and satisfying, this Baby Yoda Amigurumi Pattern is a must-have! Baby Yoda, or Grog, the baby super hero has won the hearts of millions with its tiny eyes, oversized ears and cute expressions. Creating a crochet version of such a famous character would be a great spot to enhance your house or give a friend who loves the character a unique gift.
This project has one of the best features being its versatility. The best part is that it can fit in most of the places and add charm whether it is a nursery or any other room. The Crochet Baby Yoda Pattern is a must-have for anyone who appreciates cute and cuddly DIY projects. Are you curious to try it yourself? Start now and create a master piece!

Why You’ll Love This Crochet Baby Yoda Pattern
The adorable baby Yoda crochet pattern will be adored forever. This pattern works up pretty quickly, so it may be a suitable project for weekend crafting. It also uses minimal yarn, so it is ideal to use old yarn skeins from other projects. You can make one to keep for yourself or give to a person who loves Star Wars, and it will certainly make their day one that is much brighter.
Special Features of This Pattern
- Your finished Baby Yoda will be a stand out because of some clever details in this pattern.
- Signature ears in oversized sizes for a true authentic style.
- Educational, large expressive safety eyes for making a cute face.
- Softly made robe with realistic sleeves.
- Chubby, erect body with rounded shoulders.
- Small hands and feet for balance.
- Easier to make for beginners, little to no sewing.
Materials You’ll Need
Prepare supplies before you start.
- Cotton or acrylic colored yarn.
- Brown or beige yarn to make the robe
- If you want to use black yarn, use sparingly.
- Pink embroidery thread (available in various thicknesses, optional)
- 3.5 mm crochet hook
- Fiberfill stuffing
- 10–12 mm safety eyes
- Yarn needle
- Stitch markers
- Sharp scissors
- Black embroidery thread
- Keychain ring (optional)
The crocheting process will be smoother if everything is prepared ahead of time.
Making the Marvelous Baby Yoda Pattern: Step By Step
Now, let’s discuss how you can make this incredible pattern. Follow the mini Grog amigurumi tutorial for even better results!
Crochet the Head
Pay a little more attention to the head of baby Yoda. You can get started with a green yarn and create a magic circle with it. Make sure you increase the stitches gradually. Keep crocheting till you reach a desirable height and then start decreasing.
Place the safety eyes in the opening before it is closed, leaving the correct distance between the eyes for Baby Yoda to form his sweet face. Stuff the head tight with fiberfill without having it become hard/packed.
Continue to reduce evenly until the opening is closed. Leave a long tail of the yarn to attach the head to the body later.
Make the Signature Ears
The large ears are the first thing to distinguish this character. Using green yarn, crochet two matching ears. Start with a pointy end and slowly widen the outline in the middle and back down to the opposite end. May stuff lightly for additional structure or leave them flat for a softer look.
Attach the Eyes, Nose and Facial Details
Now, let’s add to Baby Yoda the very cute personality.
If you have not yet inserted your safety eyes, make sure to do so prior to closing the head entirely.
Stitch a small pointy nose with black embroidery thread between the eyes. Embroider a small curved smile in the bottom. For an even more cute look, embroider blush to cheeks or use fabric-safe blush.
Take your time with this step. The slightest change in expression can make all the difference.
Crochet the Body
Use a brown or beige colored yarn for the robe. Use a circle base and expand upwards until you have the desired width. Keep crocheting up, no increase. Continue working up without increase to make body.
Stuff it firmly as you work, it will help it sit up. Very close to the top, gradually taper down to form the neckline where the head will fit. Leave a long yarn tail to sew on.
Create the Arms
Green yarn is used for the hands followed by brown yarn for the robe sleeves on each arm. Fill only lightly the upper part of each arm to keep them flexible.
Hold both arms on both sides of the body at the same level, below the neckline. Place them in a natural position, allowing them to appear relaxed.
Crochet the Hands
Embroider very small lines of green yarn on each hand for more detail.
This is not required but just adds a little “realism” to the doll.
Create some Legs and Feet
With green yarn, crochet two small oval feet; then switch to brown for the legs covered with the robe.
Pack them lightly – they should not be heavy.
Place both legs balanced under the body so that Baby Yoda can comfortably sit on a shelf or tabletop.
Putting a whole doll together
Once all the pieces are finished, it’s time to put it together and create your Baby Yoda.
Secure head to body with yarn tails.
If the ears, arms and legs are not already in place, sew them on.
Tie all of the loose ends nicely and gently mold the stuffing to form a balanced and symmetrical doll.
Video Pattern Here:
Add the Finishing Touches
These tiny characteristics can help to make your Baby Yoda special. The handmade Star Wars crochet gift is easy to make and your friends and family are going to love it. Consider adding:
- Pink cheeks with a soft pink look on them.
- Decorative robe collar
- Tiny scarf
- Mini frog accessory
- Small coffee cup
- Star charm
- Embroidered eyebrows
- Sparkly yarn accents
A personal touch is always a nice thing for handmade projects.
Creative Ways to Display Your Crochet Baby Yoda
When complete, your Baby Yoda will illuminate just about any room. Display it on:
- Bookshelves
- Office desks
- Nursery shelves
- Craft room displays
- Coffee tables
- Backpack zippers
- Handbags
- Car mirrors
- Christmas trees
- Keychains
Pro Tip
Use sewing pins to pin each piece in place prior to the final sewing of the ears and safety eyes. Look at the doll from different perspectives from the same level. Just a few millimeters of the ears or eyes moving can make all the difference for Baby Yoda’s expression. One of the simplest ways to get a beautiful and professional finish is to invest a bit more time in the placement.
Caring for Your Finished Amigurumi
Baby Yoda should be dusted every so often with a soft brush and cool water and mild soap should be used for spot cleaning as necessary to make it look its best.
Do not machine wash unless using machine safe yarn and securely fastening all parts.
Over time, if the stuffing has moved, simply mold the doll back into shape with your hands. It will also help retain shiny colors in the yarns when kept out of direct sunlight.
Why This Pattern Is Perfect for Beginners
Baby Yoda appears to be quite detailed, but is built with basic crochet stitches that are well known to many beginners. You’ll practice:
- Magic circles
- Single crochet stitches
- Increasing
- Decreasing
- Stuffing evenly
- Applying braided or sewn on joints
- Simple embroidery
At the conclusion of the project, you will be able to use a variety of useful amigurumi techniques to make a cute keepsake and have learned a few new things! Make this easy fantasy crochet project now!
Final Thoughts
One of those projects that’s fun to make, but also fun to hang up and be proud of is Crocheting Baby Yoda. Whether it’s the large ears, the eyes, the floppy rosette, the cute hands, or the adorable grin, each stitch adds just a touch more to this cuddle-worthy doll. It is a relaxing project, and will offer you a chance to practice your crochet skills while producing something which you can be proud of.
This adorable Baby Yoda amigurumi handmade pattern is bound to be a favorite, whether you are making it for your own enjoyment, for your home, or just for a fellow Star Wars enthusiast to enjoy. Pick up your hook, select your lightest yarn and have fun animating this adorable little friend, stitch by stitch.